Queue Counter
The Queue Counter feature gives registrants real-time visibility into the approval queue by showing their current queue position right in the registration confirmation message.
Setting it up
- Open the settings. Go to New User Approve → Settings in your WordPress admin.
- Open the Registration Notification sub-tab. Within Settings, switch to the Registration Notification sub-tab.
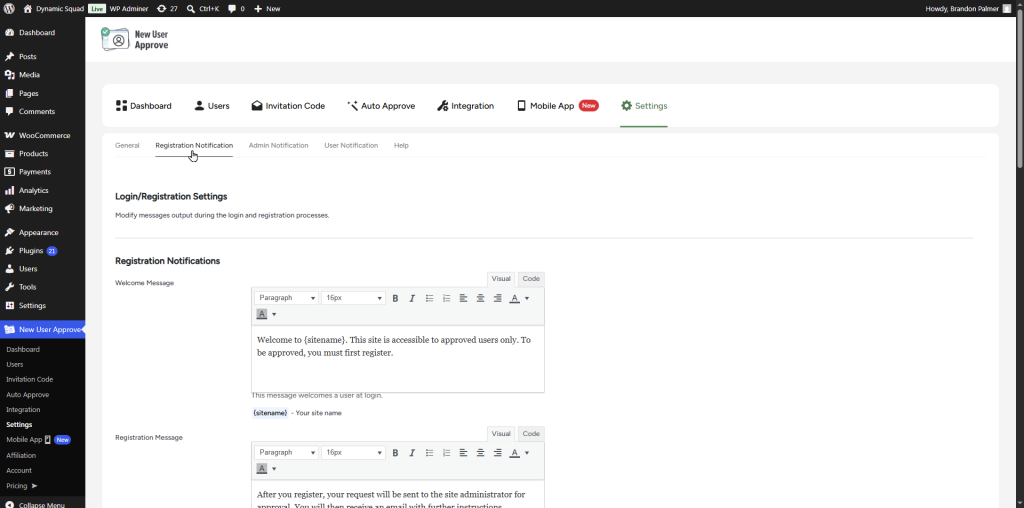
- Use the available tags. Under the Registration Notification tab, find the list of dynamic tags shown beneath each message field.
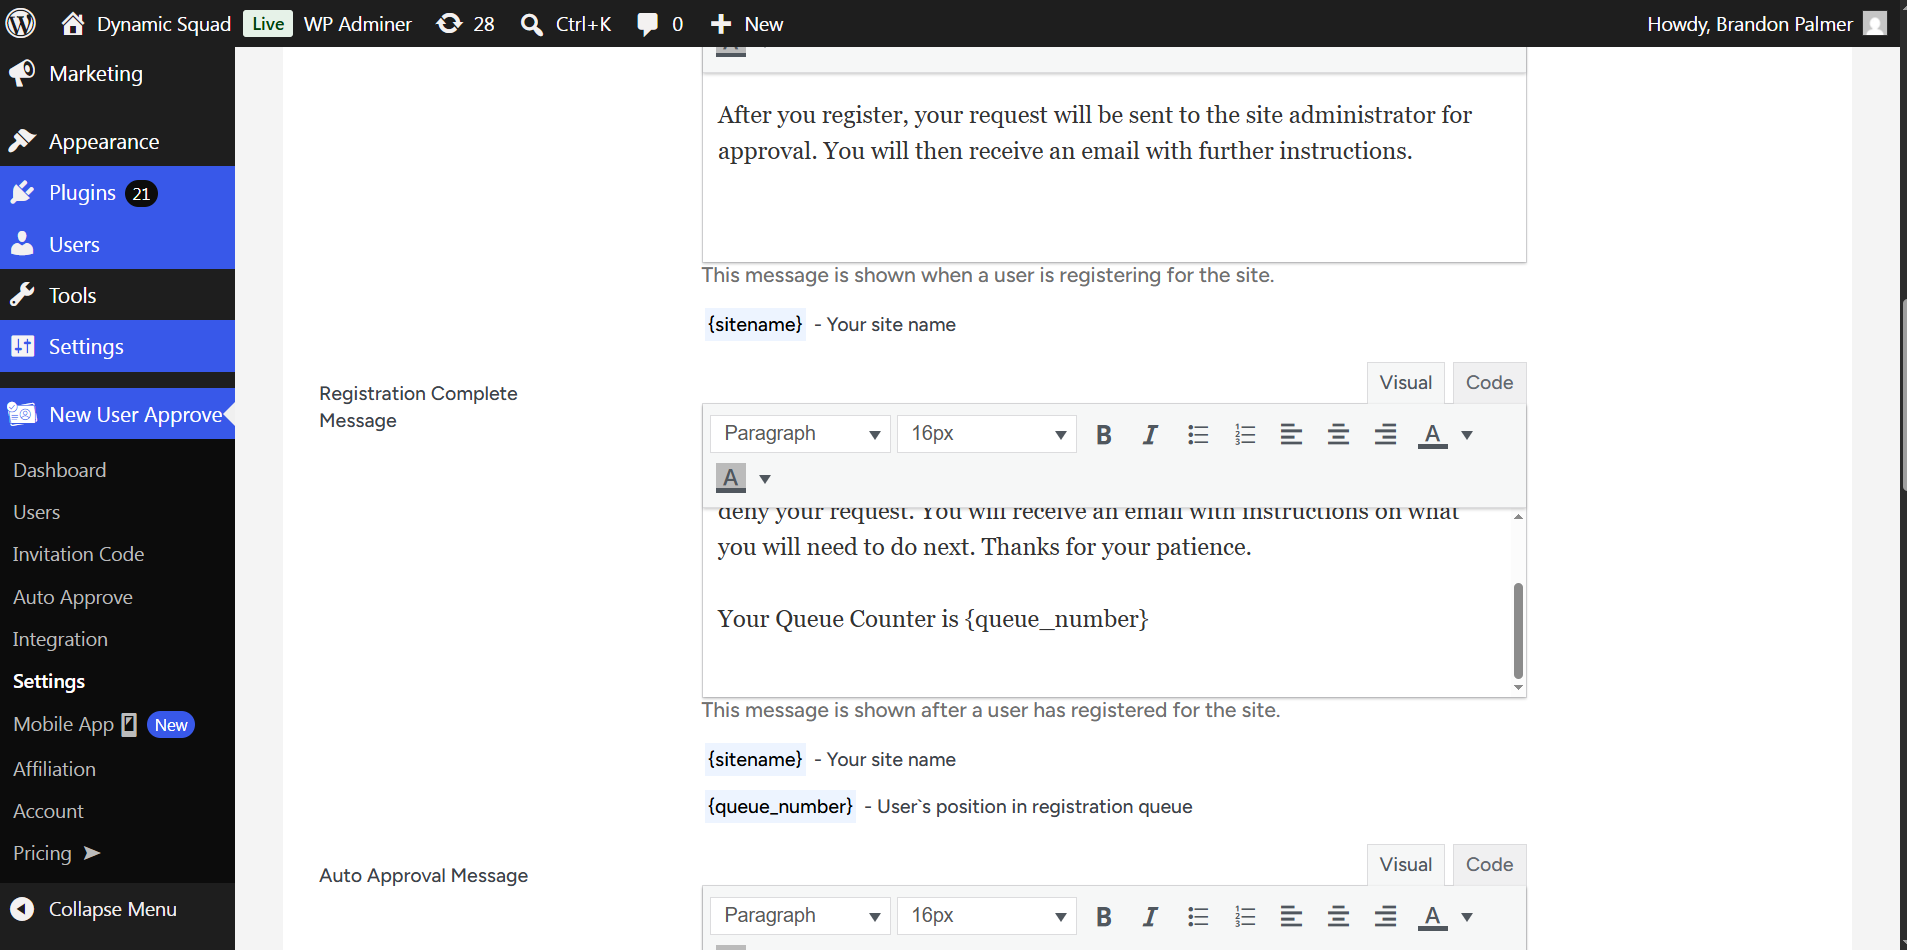
- Insert the queue tag. Copy the {queue_number} tag, paste it into the message field where you want the position to appear, then click Save Changes.
Front-end impact
- After the visitor clicks Register, the confirmation screen is shown and {queue_number} is replaced with the user’s actual queue position.
