
Automatic Denial of Pending Registrations
Automatic Denial lets you put a time limit on how long a new registration can sit in the Pending state. If you do not approve a request within the time window you choose, New User Approve denies it automatically — no manual action required.
This keeps your pending queue clean and ensures that stale or abandoned sign-ups do not stay open indefinitely. You stay in full control: you can still approve any request manually before the time limit is reached, and denied users can be reviewed at any time from the Users list.
How the status changes
Every new registration moves through a simple lifecycle:
- Pending — the moment the visitor submits the registration form, their account is created with a Pending status and waits for review.
- Denied — if the request is still Pending once your time limit elapses, the status automatically changes to Denied.
In the example used throughout this section, the limit is set to 10 minutes, so a request that is not approved within 10 minutes of registering is denied automatically.
Note Automatic Denial only acts on requests that are still Pending. Requests you have already approved are never affected.
Enabling Automatic Denial (Admin)
All configuration is done from the plugin’s Settings screen. Follow the steps below.
- From your WordPress dashboard, open New User Approve, click the Settings tab, and make sure the General sub-tab is selected.

- On the General tab, scroll down until you reach the Denial Settings section.

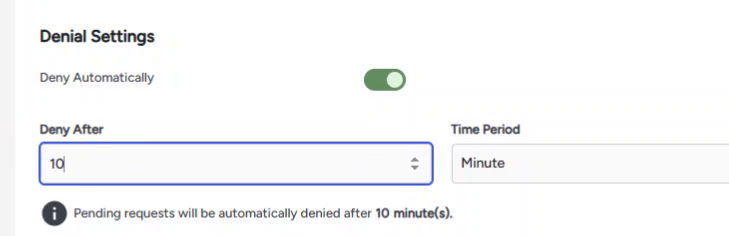
- Switch the Deny Automatically toggle on (green). This reveals the time-limit fields below it.
- Set the time limit. Enter a number in Deny After and choose the unit in Time Period. In this example the value is 10 and the unit is Minute. The helper line beneath the fields confirms your rule in plain language: “Pending requests will be automatically denied after 10 minute(s).”
- Click Save Changes at the bottom of the page. A “Settings saved successfully” message confirms the rule is now active.

Frontend Impact
This section shows the experience from the visitor’s side so you know exactly what your users go through when Automatic Denial is in effect.
Registering
The visitor fills in the registration form on your site and clicks Register. The notice above the form already tells them that their request will be reviewed for approval.

Confirmation
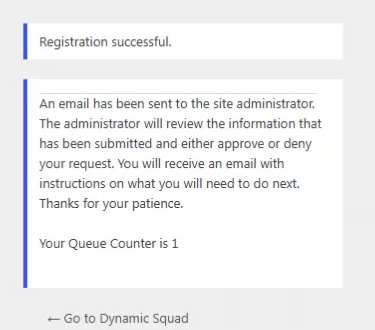
After submitting, the visitor sees a confirmation that registration was successful and that their request has been sent to the administrator for review. At this point their account is Pending.
Verifying automatic denial (Admin)
You can watch the status change directly in the Users list. Open New User Approve and select the Users tab; the All Users view lists every account with its current Status.
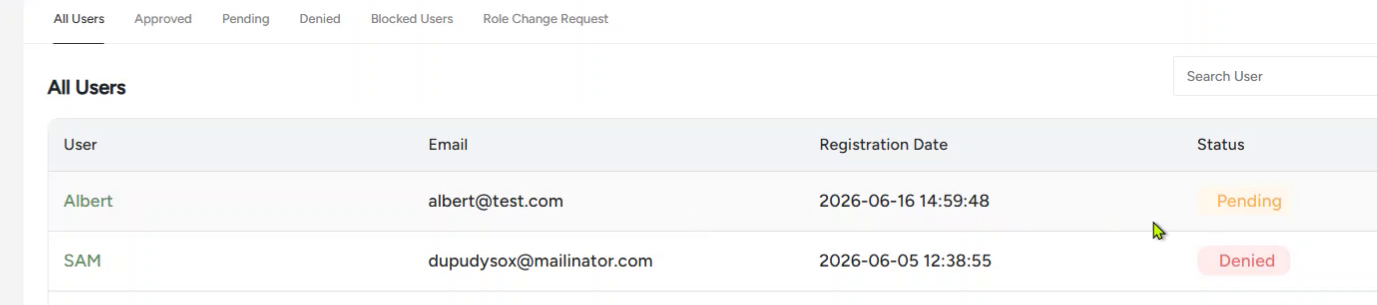
Immediately after registration — Pending
As soon as the visitor registers, their account appears with a Pending status (shown in orange).
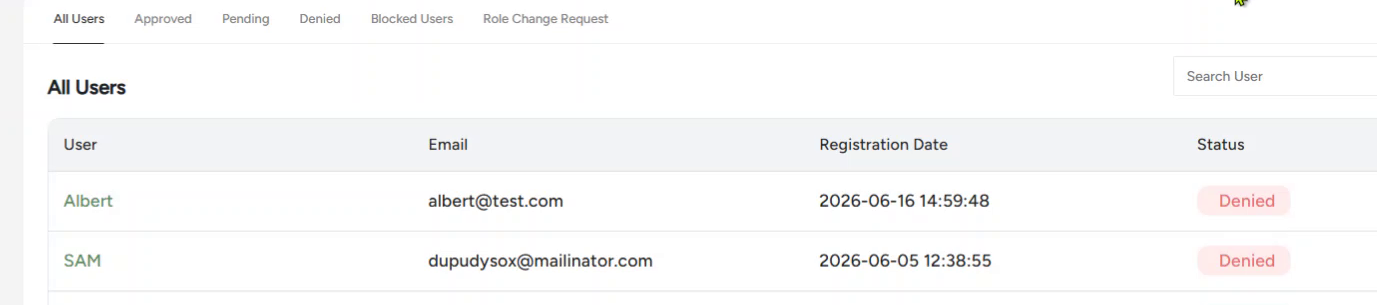
After the time limit — Denied
Because the request was not approved within the 10-minute window, the status changes on its own from Pending to Denied (shown in red). The user and registration date stay the same — only the status updates.
Tip You can review denied accounts at any time using the Denied filter at the top of the Users list, and approve any of them manually if you change your mind.