Roles
The Role Editor is a powerful feature in New User Approve that allows the admin to create, edit, and manage user roles along with their associated capabilities. The admin can add new custom roles, modify existing roles, and assign or remove specific capabilities to control what each role can do on the website.Under the Role Editor header, there are two sub-tabs: Roles and Capabilities. The Roles tab displays all available user roles, while the Capabilities tab allows the admin to manage the capabilities assigned to each role.
- Go to the Admin Dashboard > New User Approve > Role Editor.
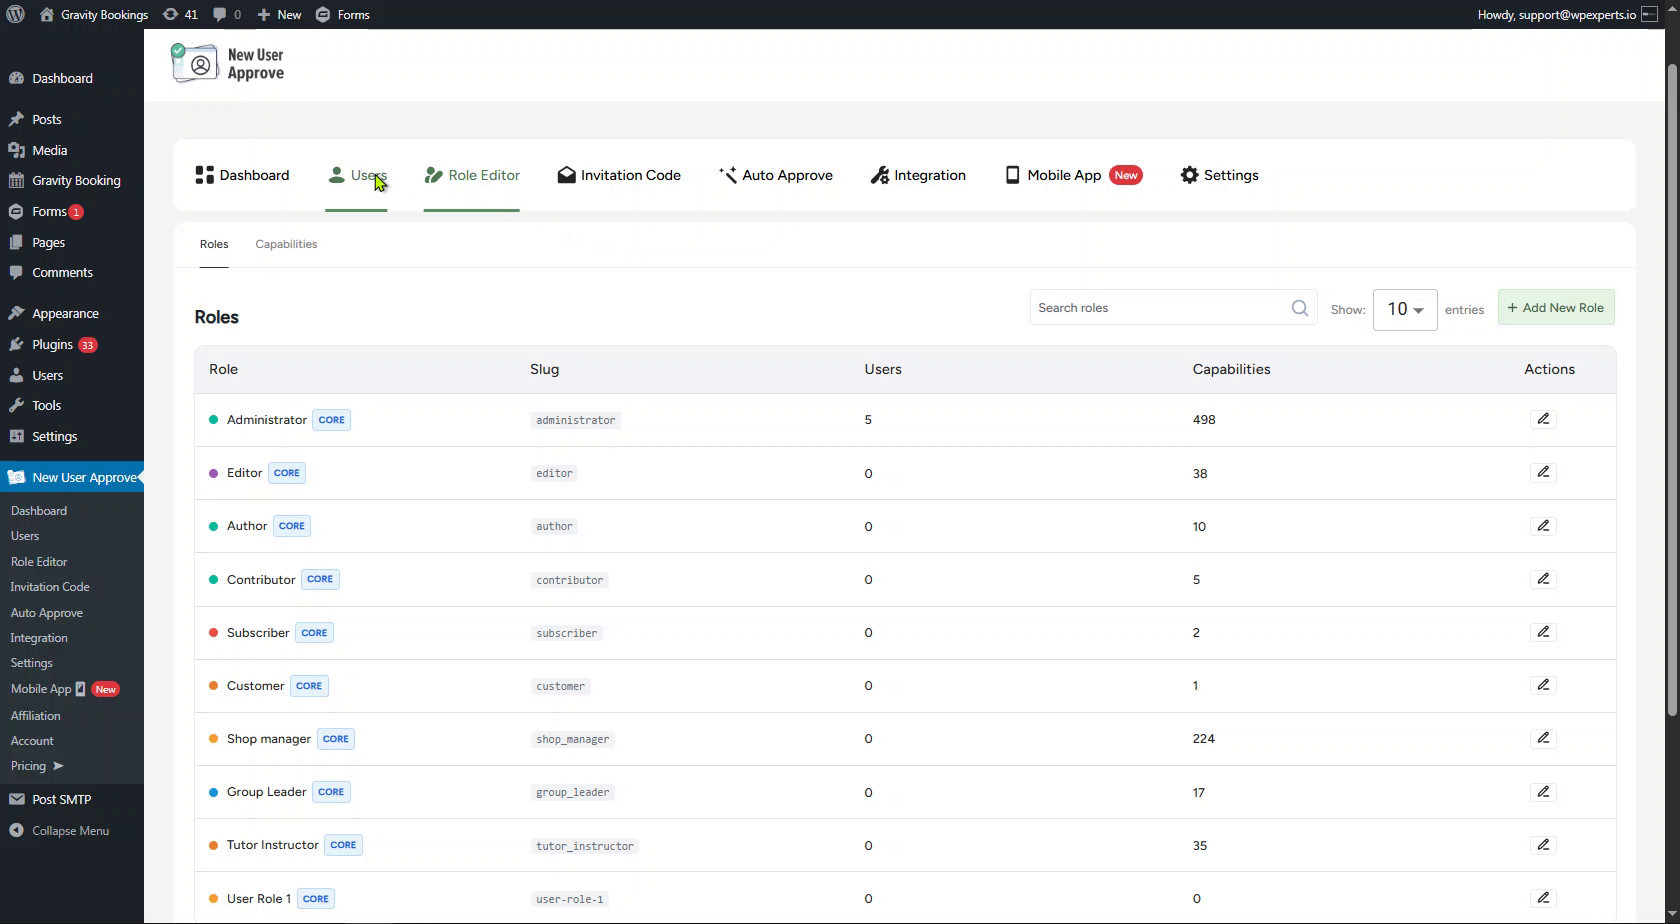
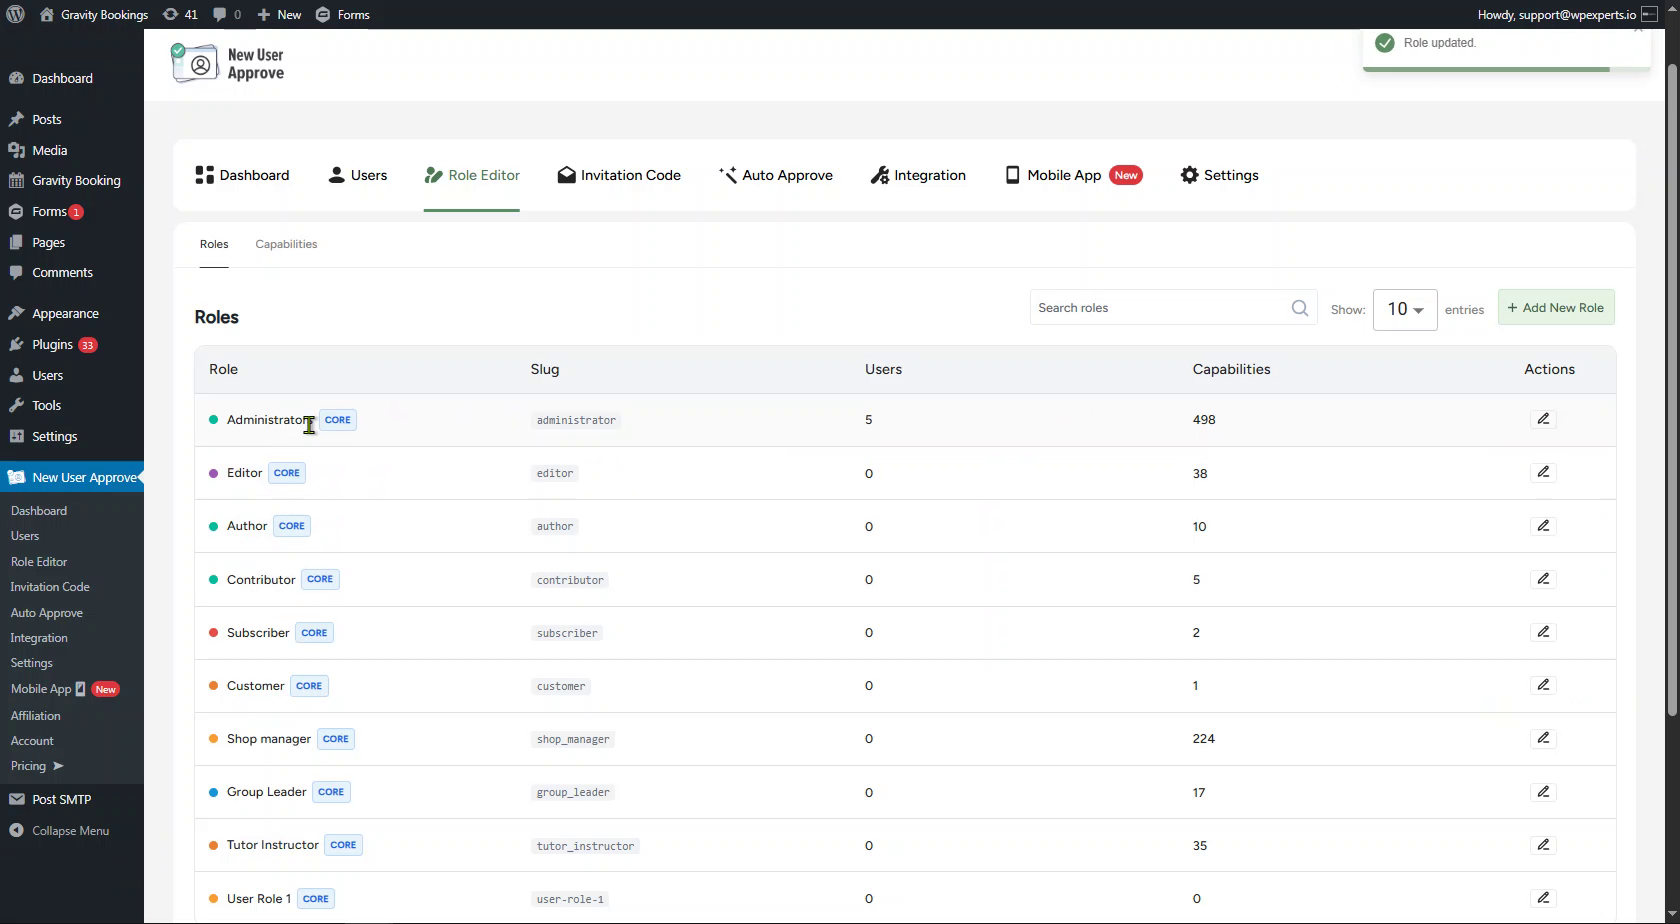
- When the admin opens the Role Editor section, the Roles sub-tab page is displayed by default.
- The Roles tab shows a list of all available user roles with the following columns:
- Role – The display name of the role with its type indicator (e.g., CORE).
- Slug – The unique system identifier for the role.
- Users – The total number of users currently assigned to that role.
- Capabilities – The total number of capabilities assigned to the role.
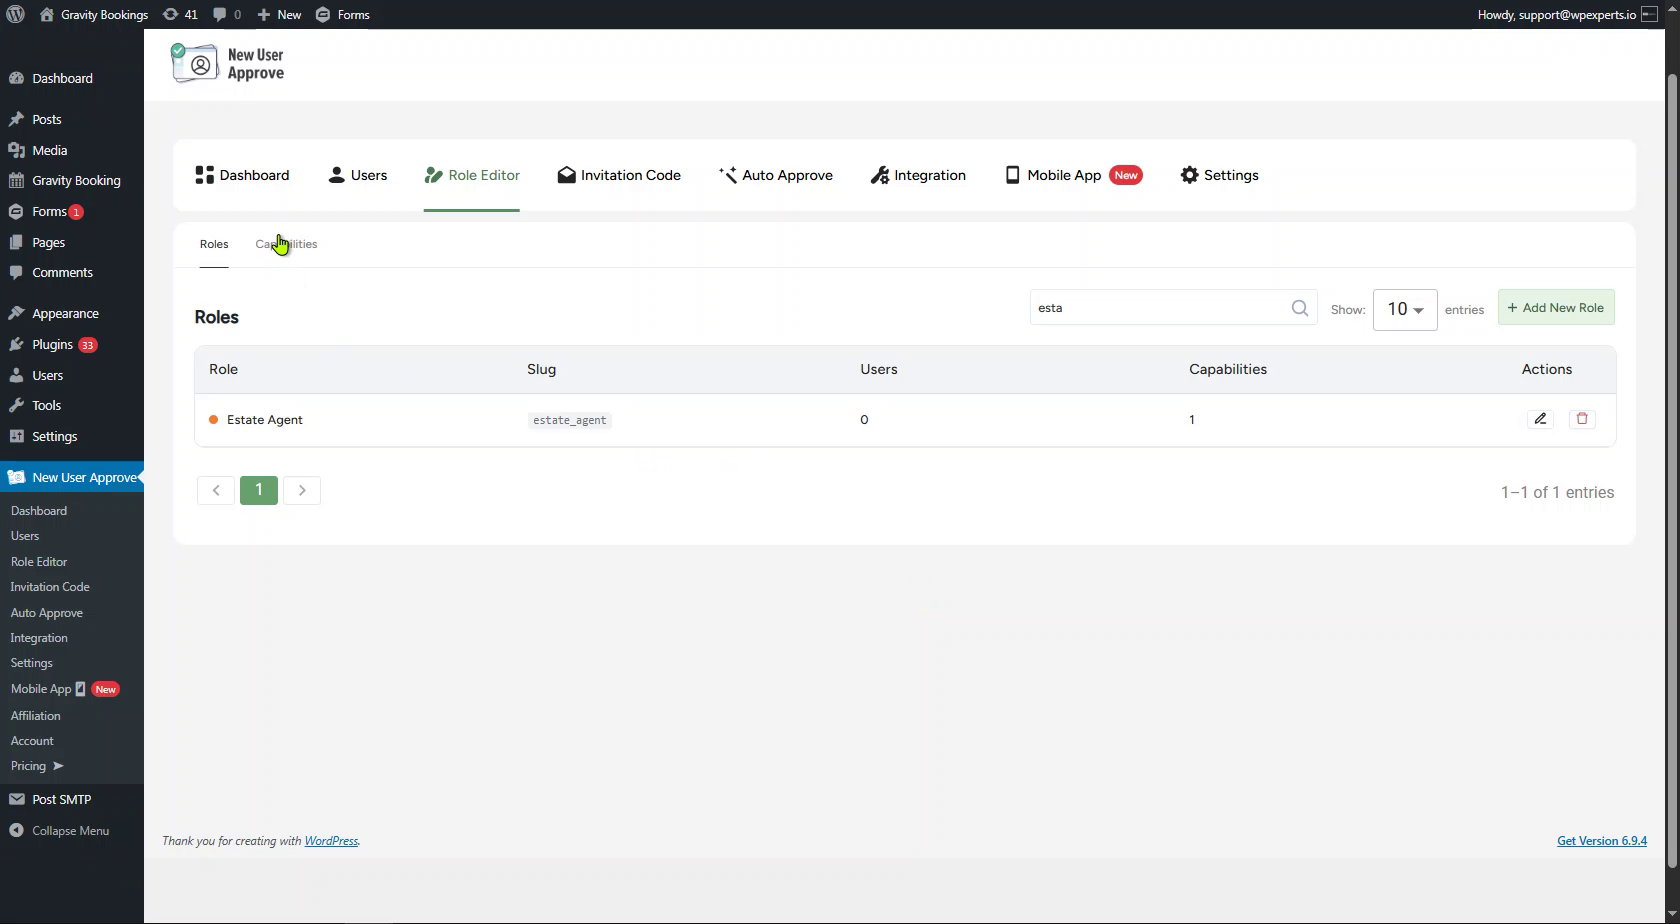
- Actions – Contains the Edit and Delete (for custom roles) icons.
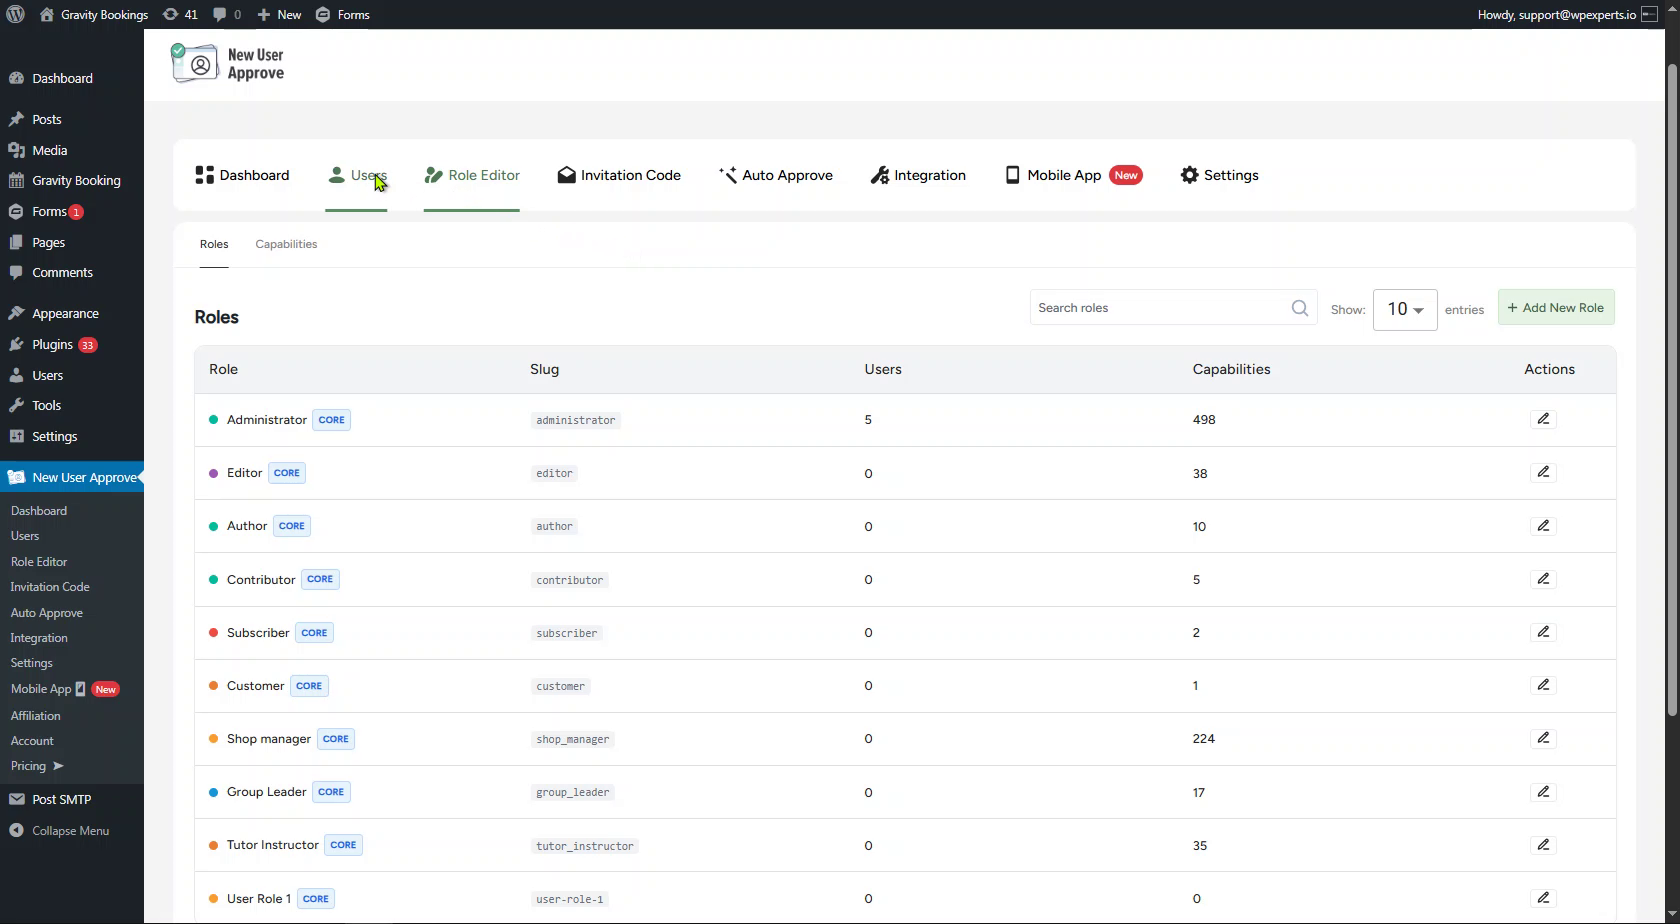
Note: Core Roles cannot be deleted; only the name can be updated, but the slug remains unchanged.
- The admin can scroll through the list to view all the roles available on the website, including both core WordPress roles and roles added by third-party plugins.
Search Roles
- A role can be directly searched for by using the Search Roles search bar.
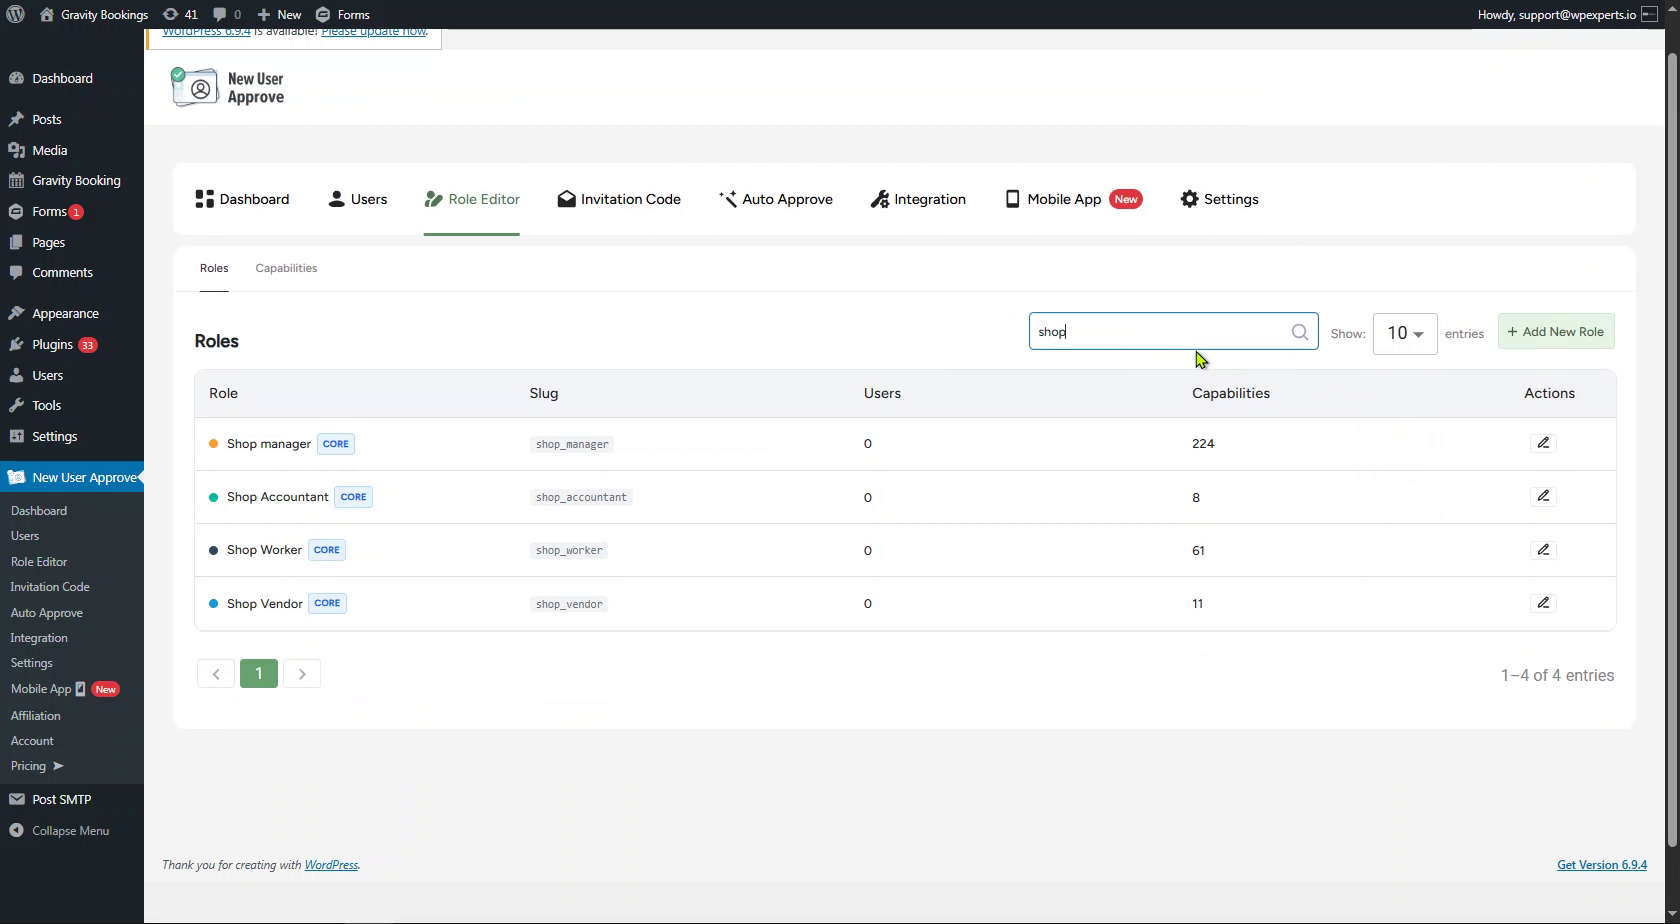
- The filter allows the admin to control how many role entries are displayed per page (e.g., 10, 20, 50, 100) using the Show entries option.
Add New Role
- To create a new custom role, the admin can click the + Add New Role button located at the top-right of the page.
- A pop-up window will appear, allowing the admin to enter the following details:
- Display Name – The name of the role as it will appear in the system (e.g., Estate Agent).
- Role Slug – The unique slug for the role, which is auto-generated based on the display name (e.g., estate_agent). The admin can modify this as needed.
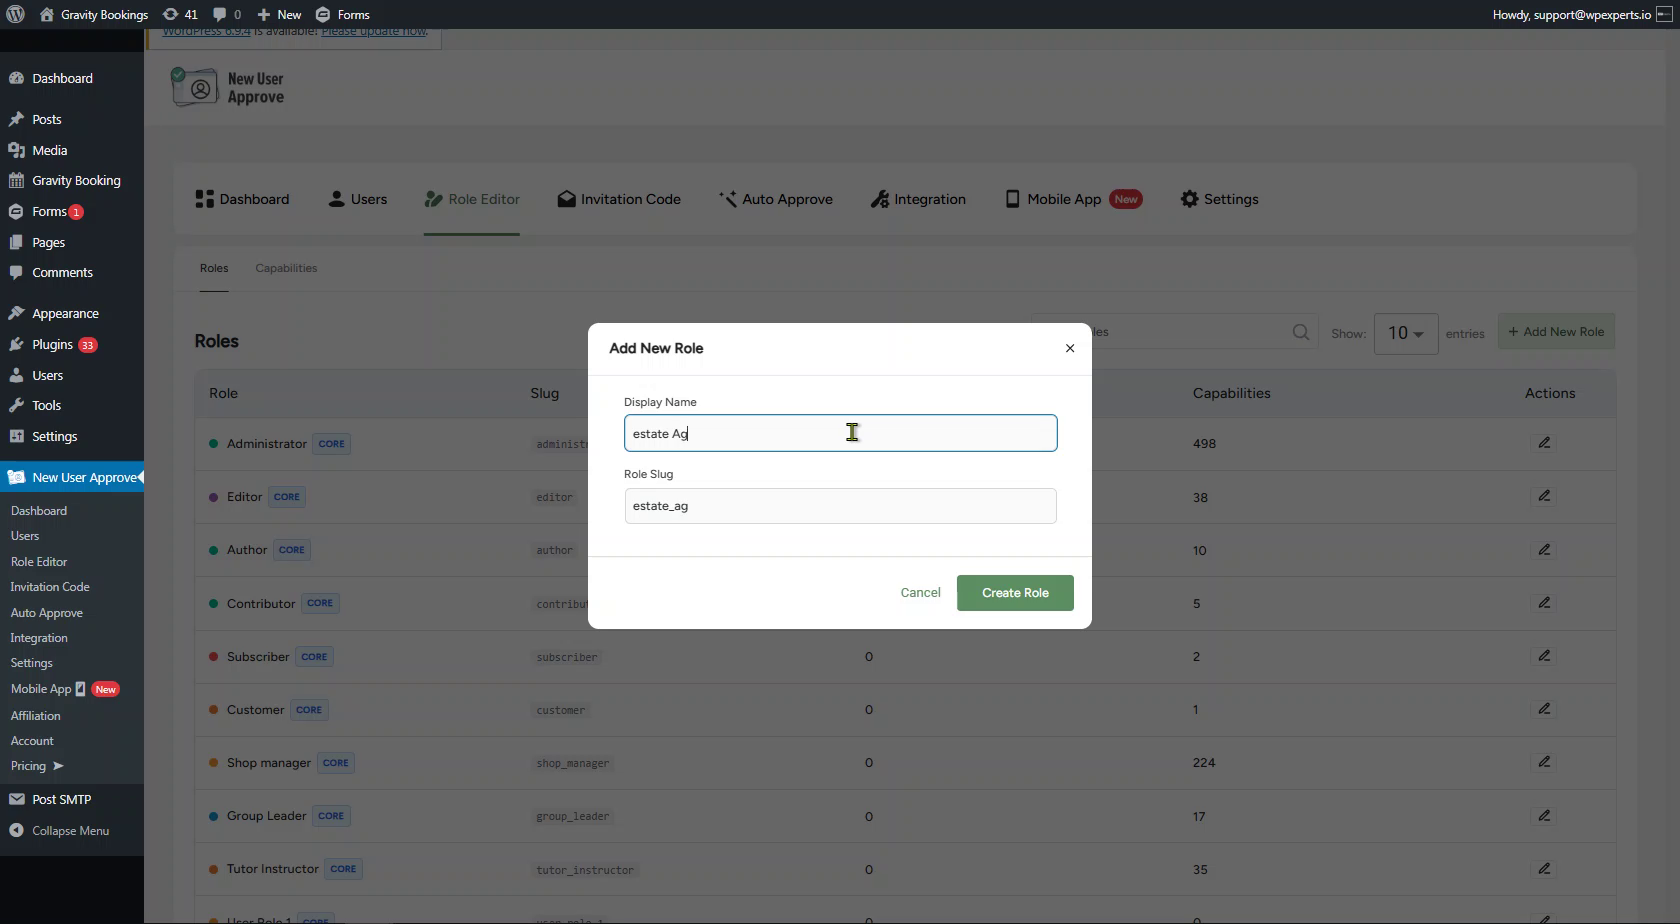
- Once the details are entered, click the Create Role button to add the new role. A Role created confirmation notification will be displayed at the top-right corner of the screen.
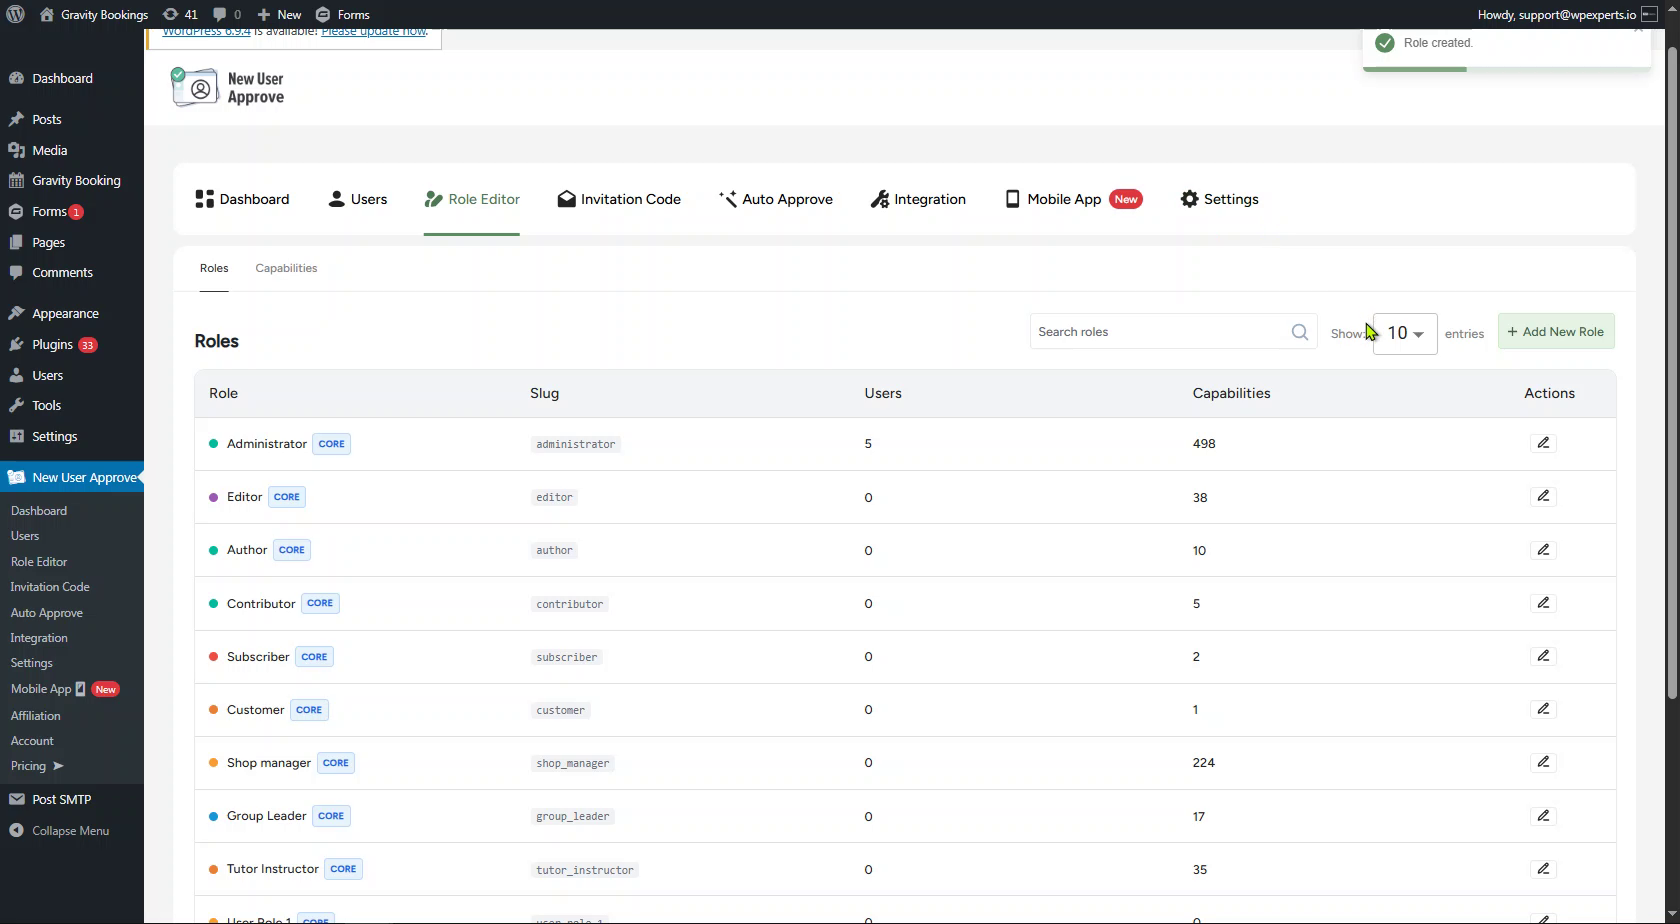
- The newly created role will now appear in the Roles list.
Edit Role
- To edit an existing role, the admin can click the Edit (pencil) icon in the Actions column for that role.
- A pop-up window titled Edit Role will appear with the following fields:
- Display Name – The admin can modify the display name of the role.
- Role Slug – For core roles, the slug is marked as (built-in, cannot change) and remains read-only. For custom roles, the slug can be modified.

- Once the changes are made, click the Update Role button. A Role updated confirmation notification will appear at the top-right corner of the screen.
Delete Role
- Custom roles (those added by the admin) can be deleted by clicking the Delete (trash) icon in the Actions column.