
Invitation Code
- The invitation code feature enables administrators to invite users to register on the website using a unique code. It creates an invitation-only registration process, adding a layer of exclusivity to the user sign-up process.
Back-End
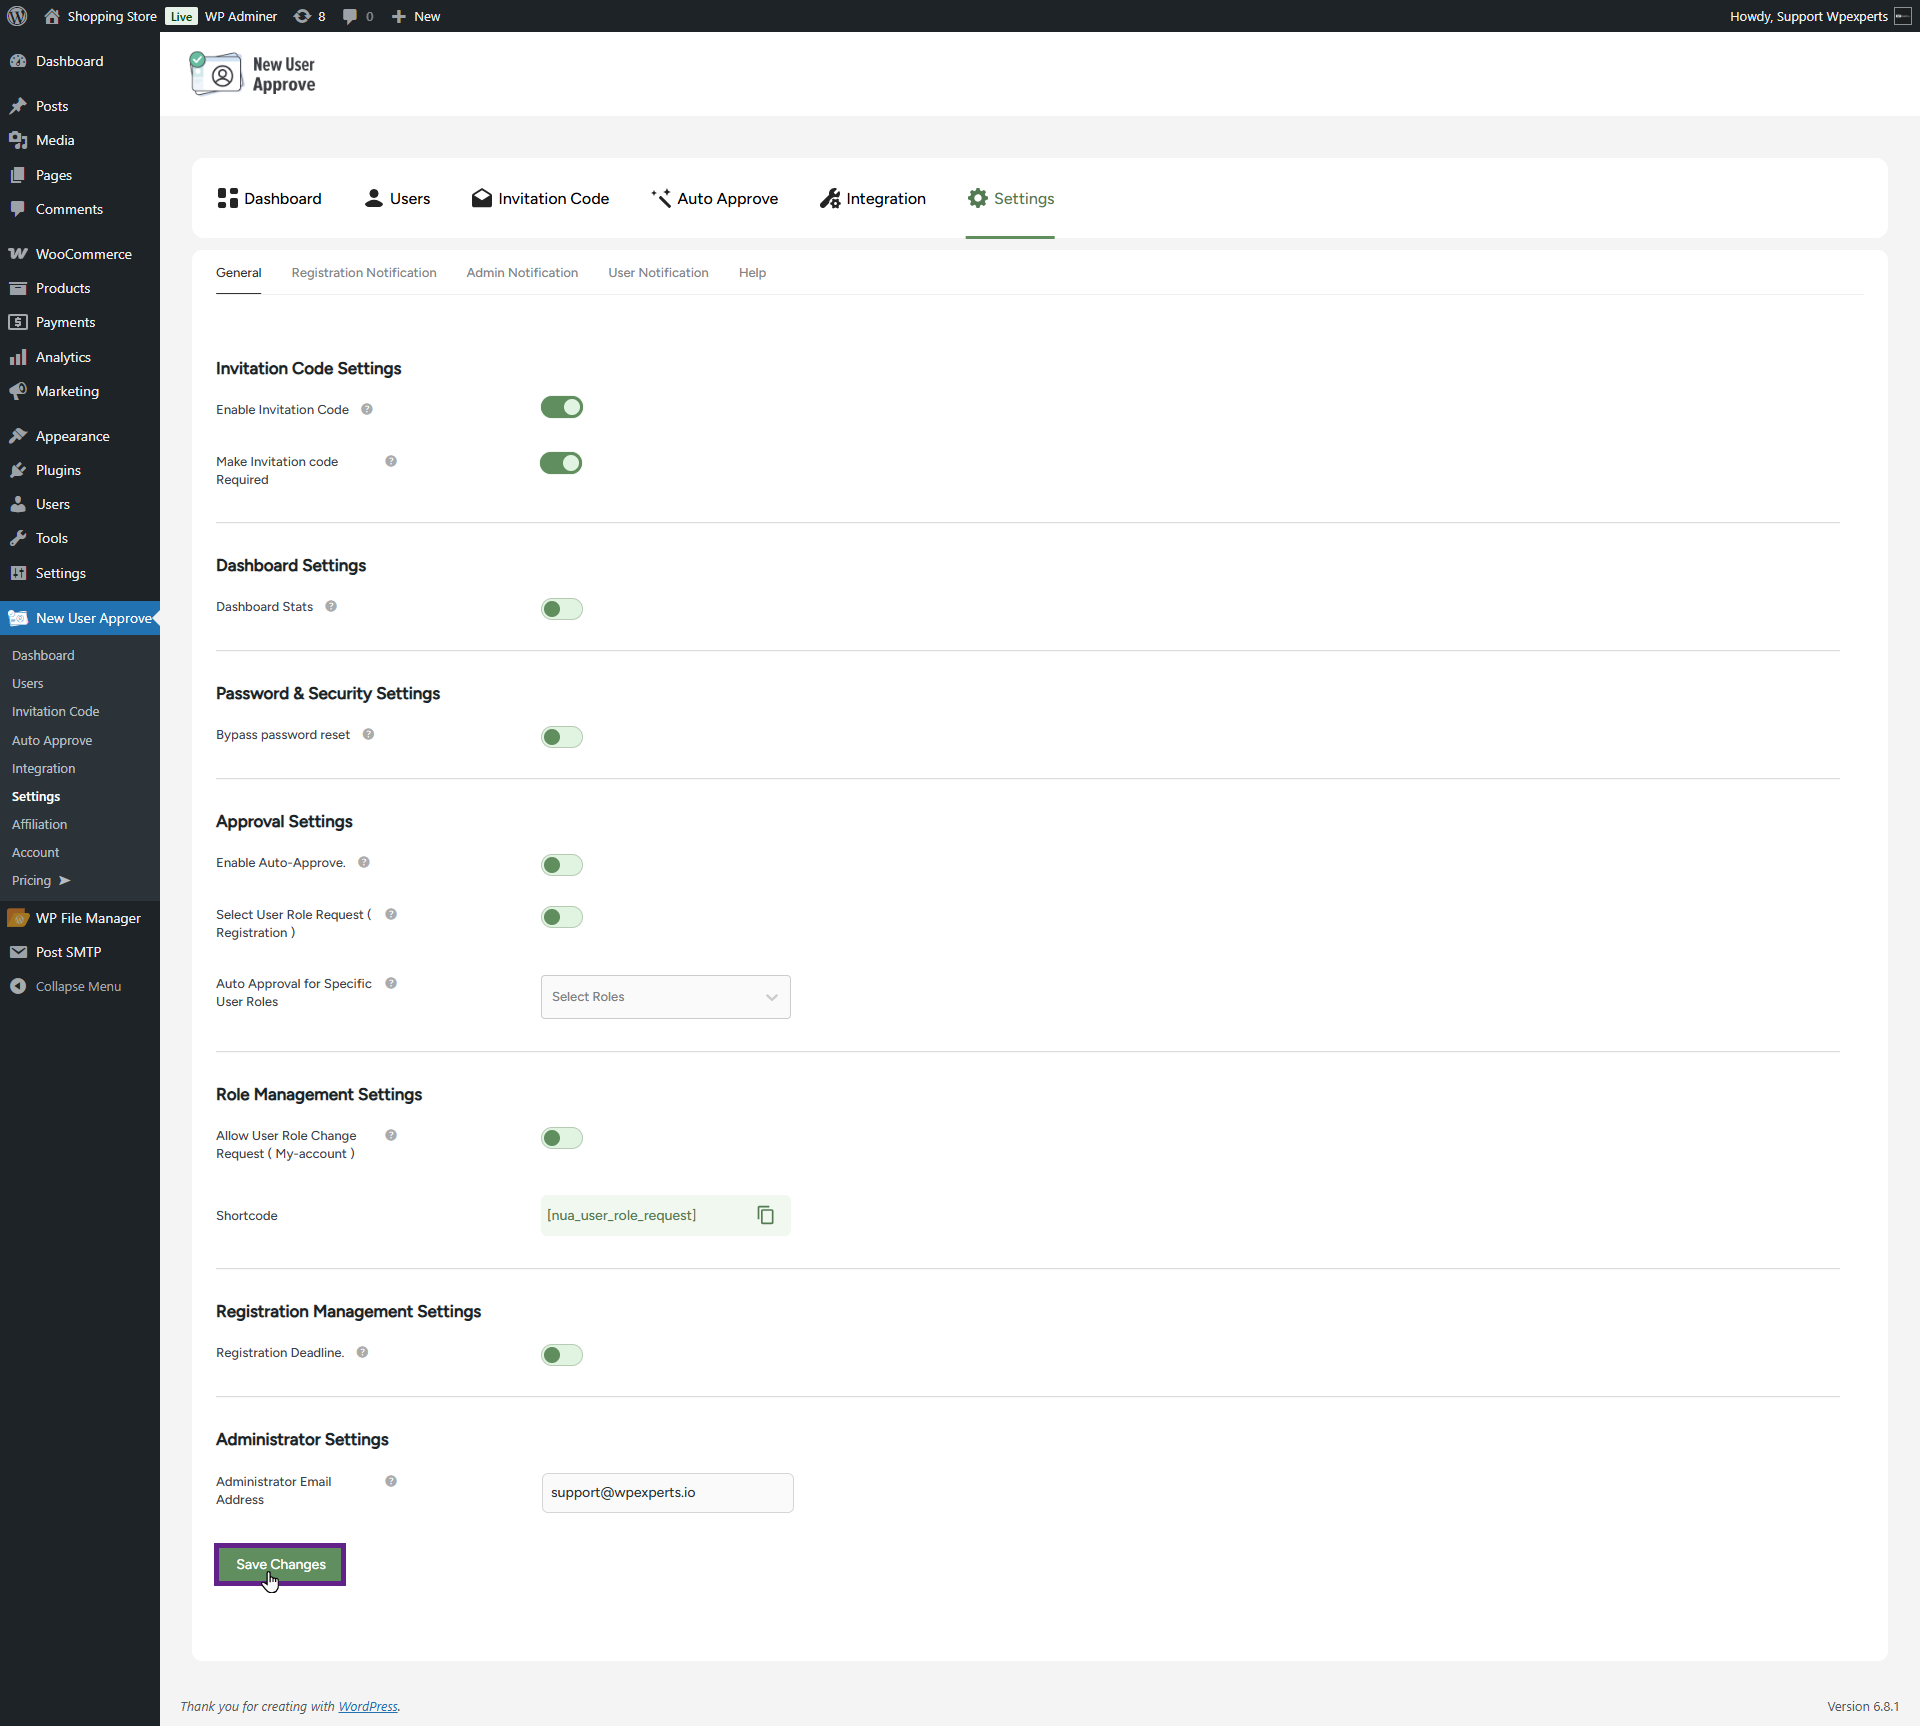
- To make the Invitation Code field visible on the frontend, you need to enable the Invitation Code option in the settings. Go to Admin Dashboard > New User Approve > Settings.

- In the General sub-tab, enable the Invitation Code toggle button.

- Next, enable the Make Invitation Code Required toggle button if the admin wants to make the invitation code field mandatory during registration.

- Now, click the Save Changes button.
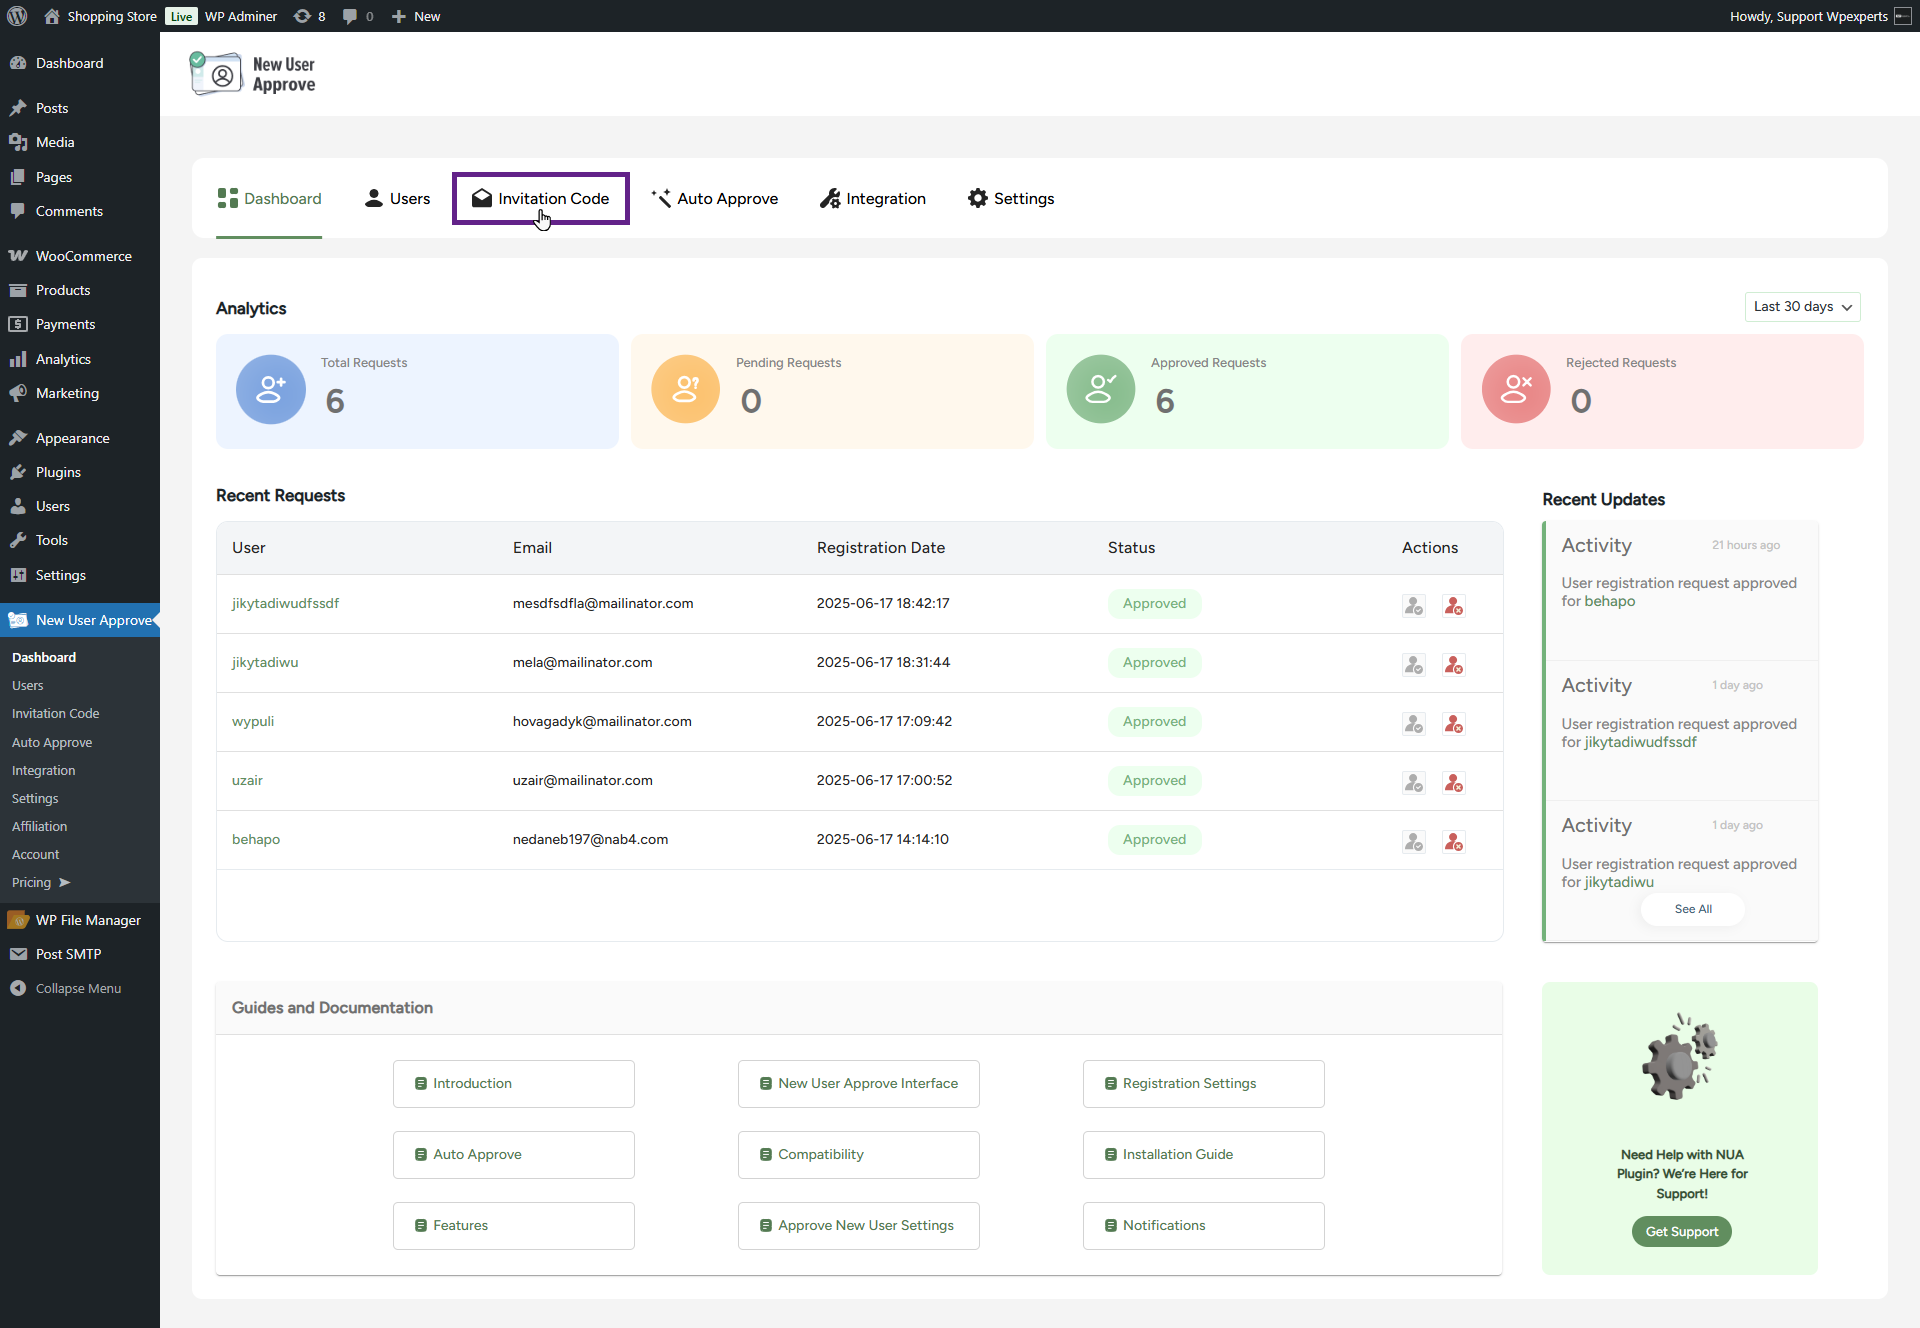
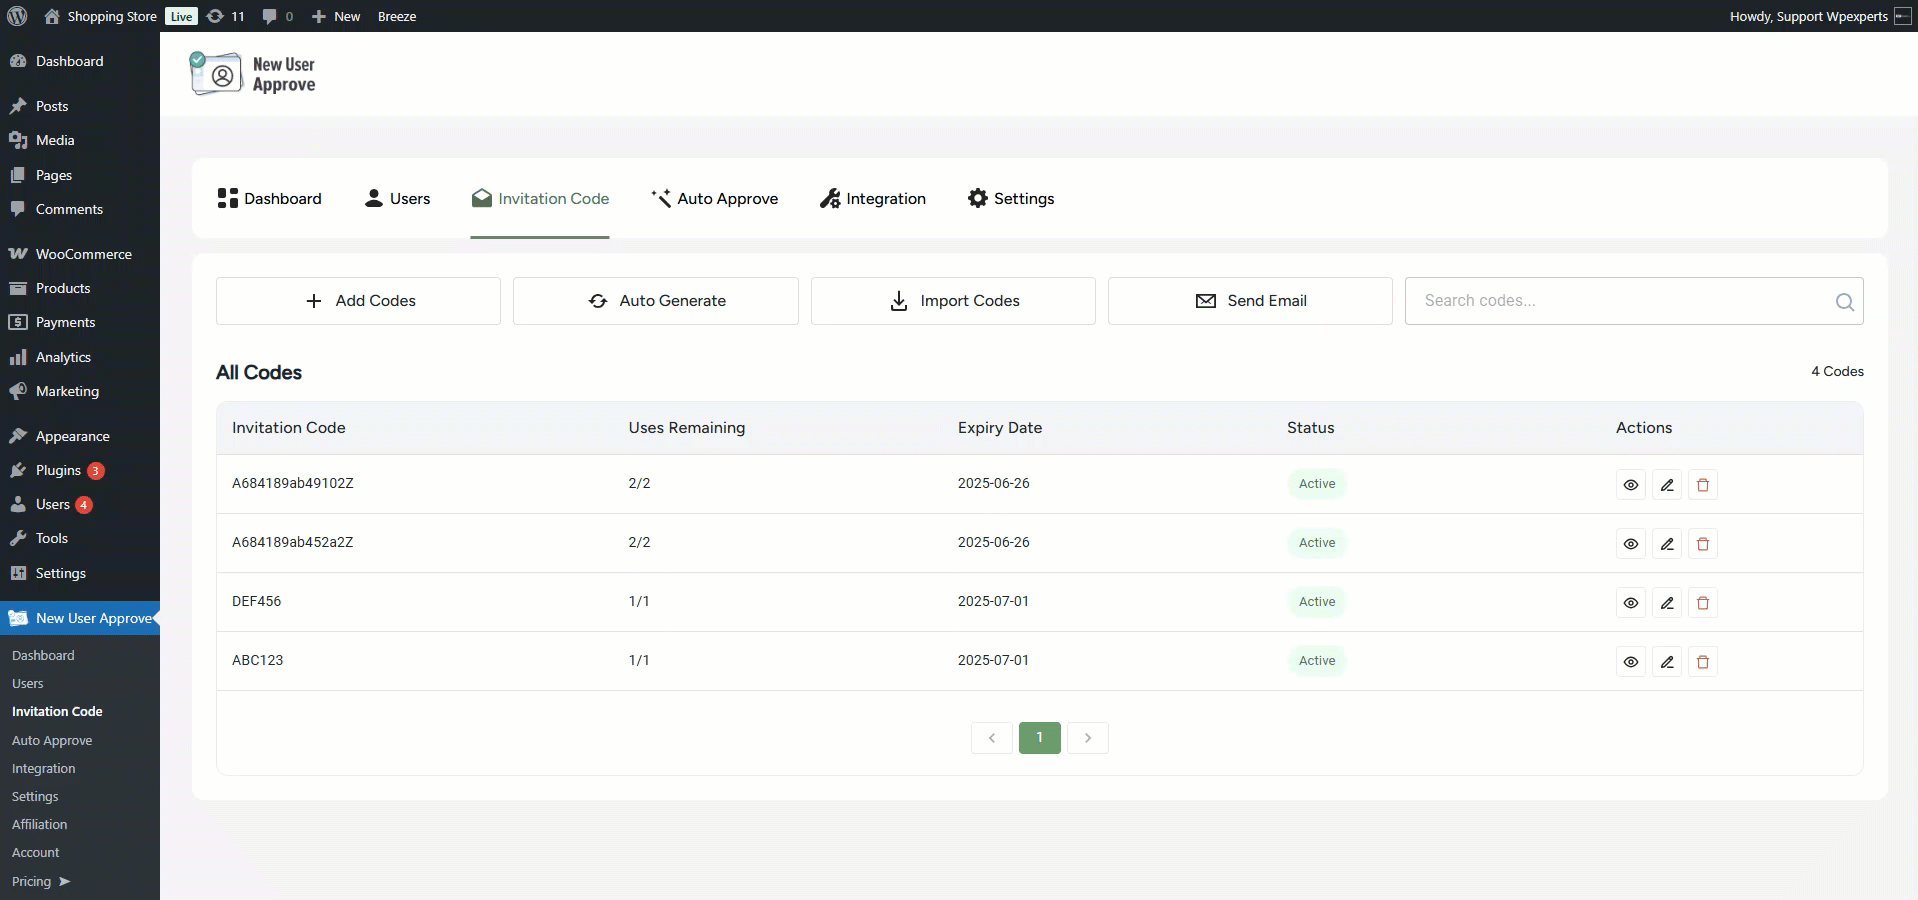
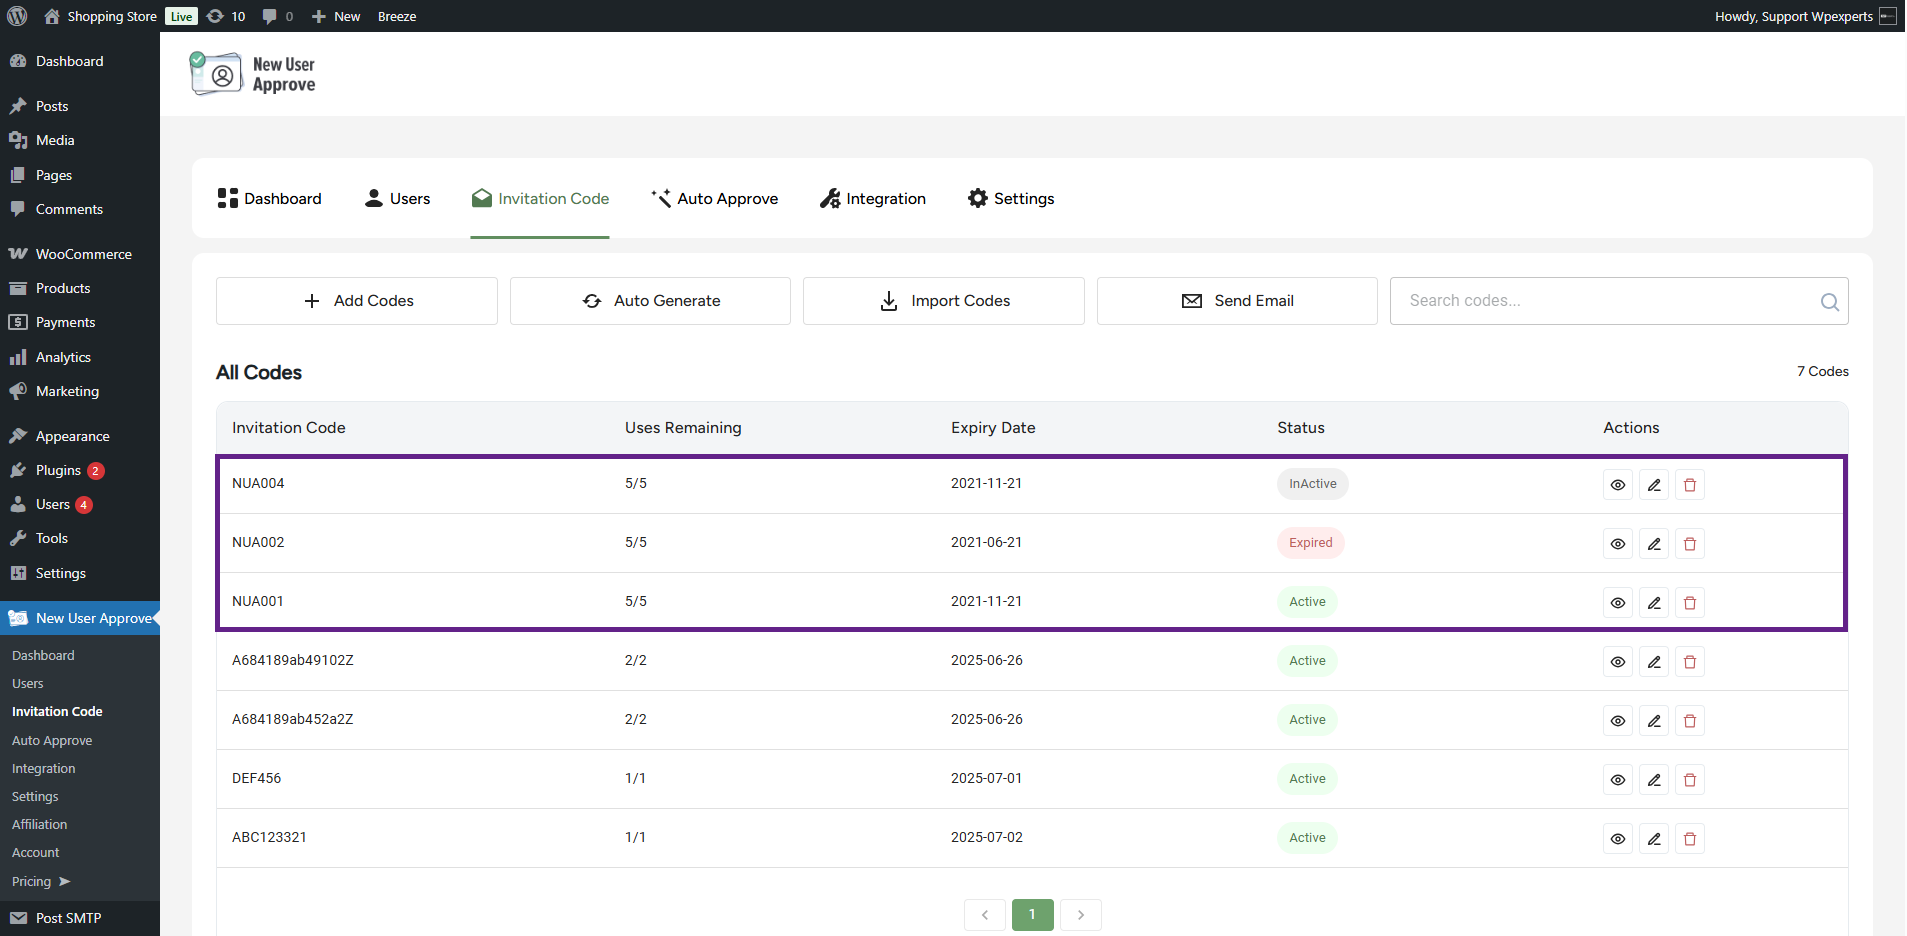
- Now, navigate to the Admin Dashboard > New User Approve > Invitation Code.
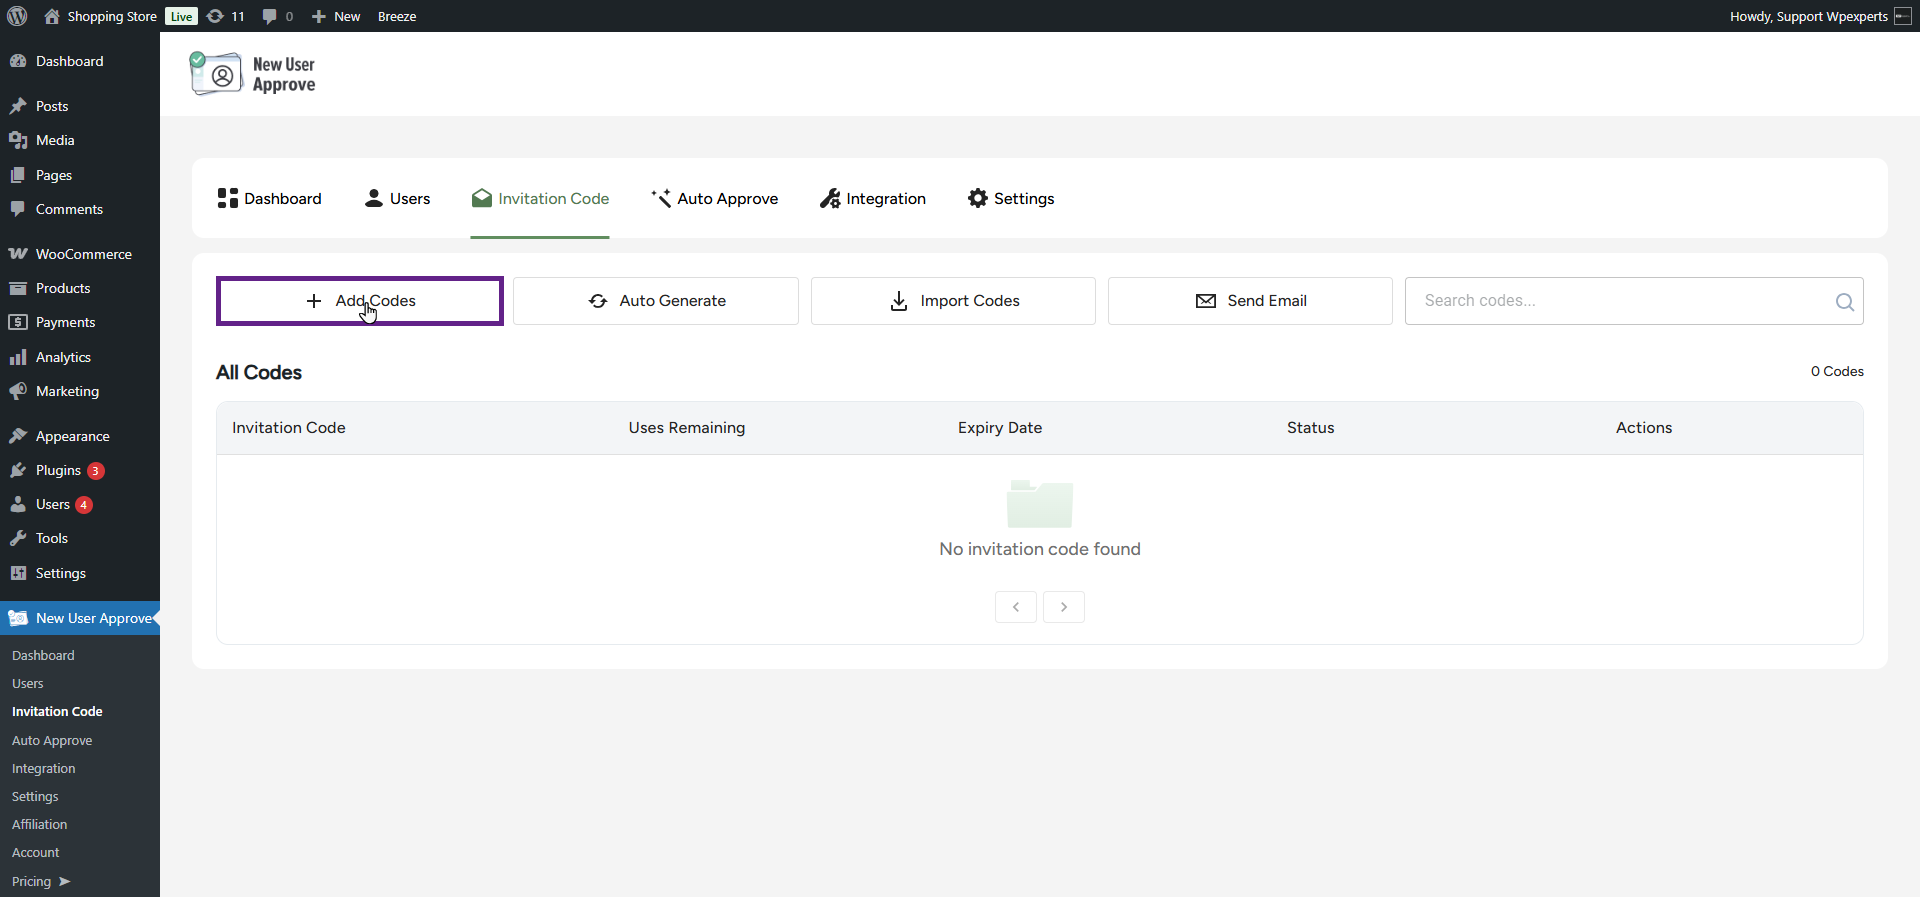
- The invitation code header includes four sub-tabs: Add Codes, Auto Generate, Import Codes, and Send Email.
- The invitation codes can be generated manually or automatically.
- To generate the invitation code manually, click the Add Codes button.
- Once clicked, a pop-up window will appear.
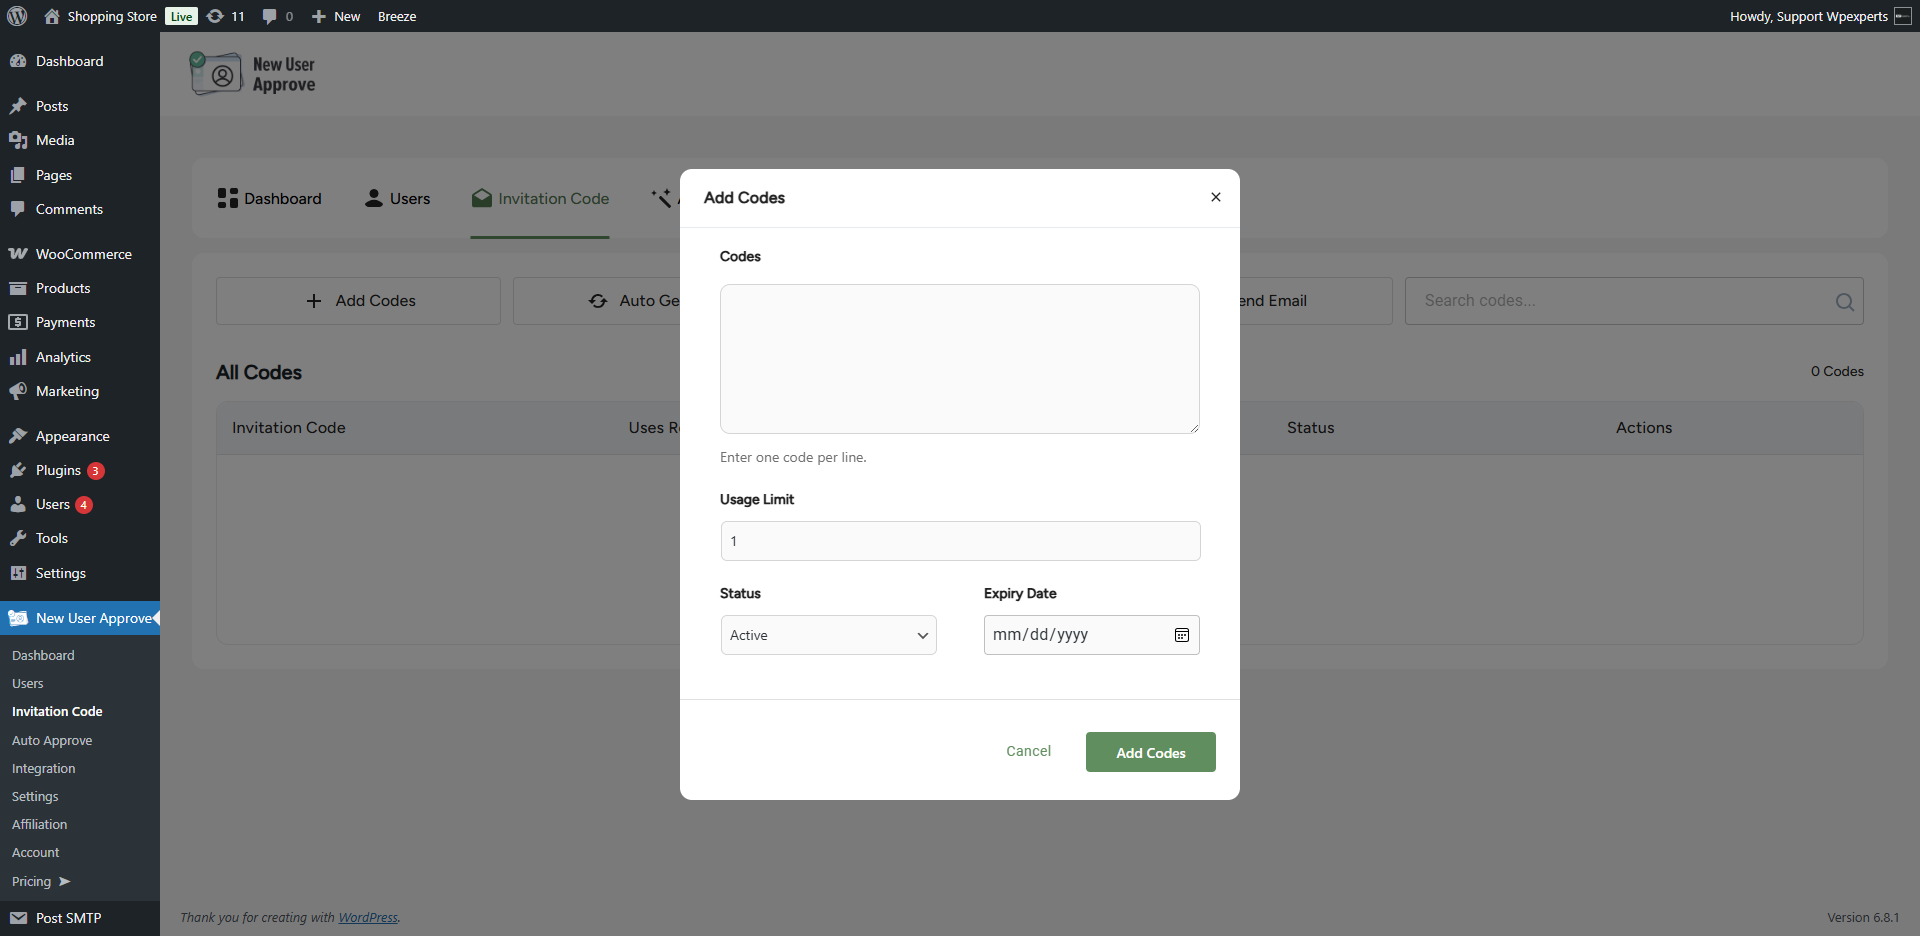
- Enter the codes in the Codes field.
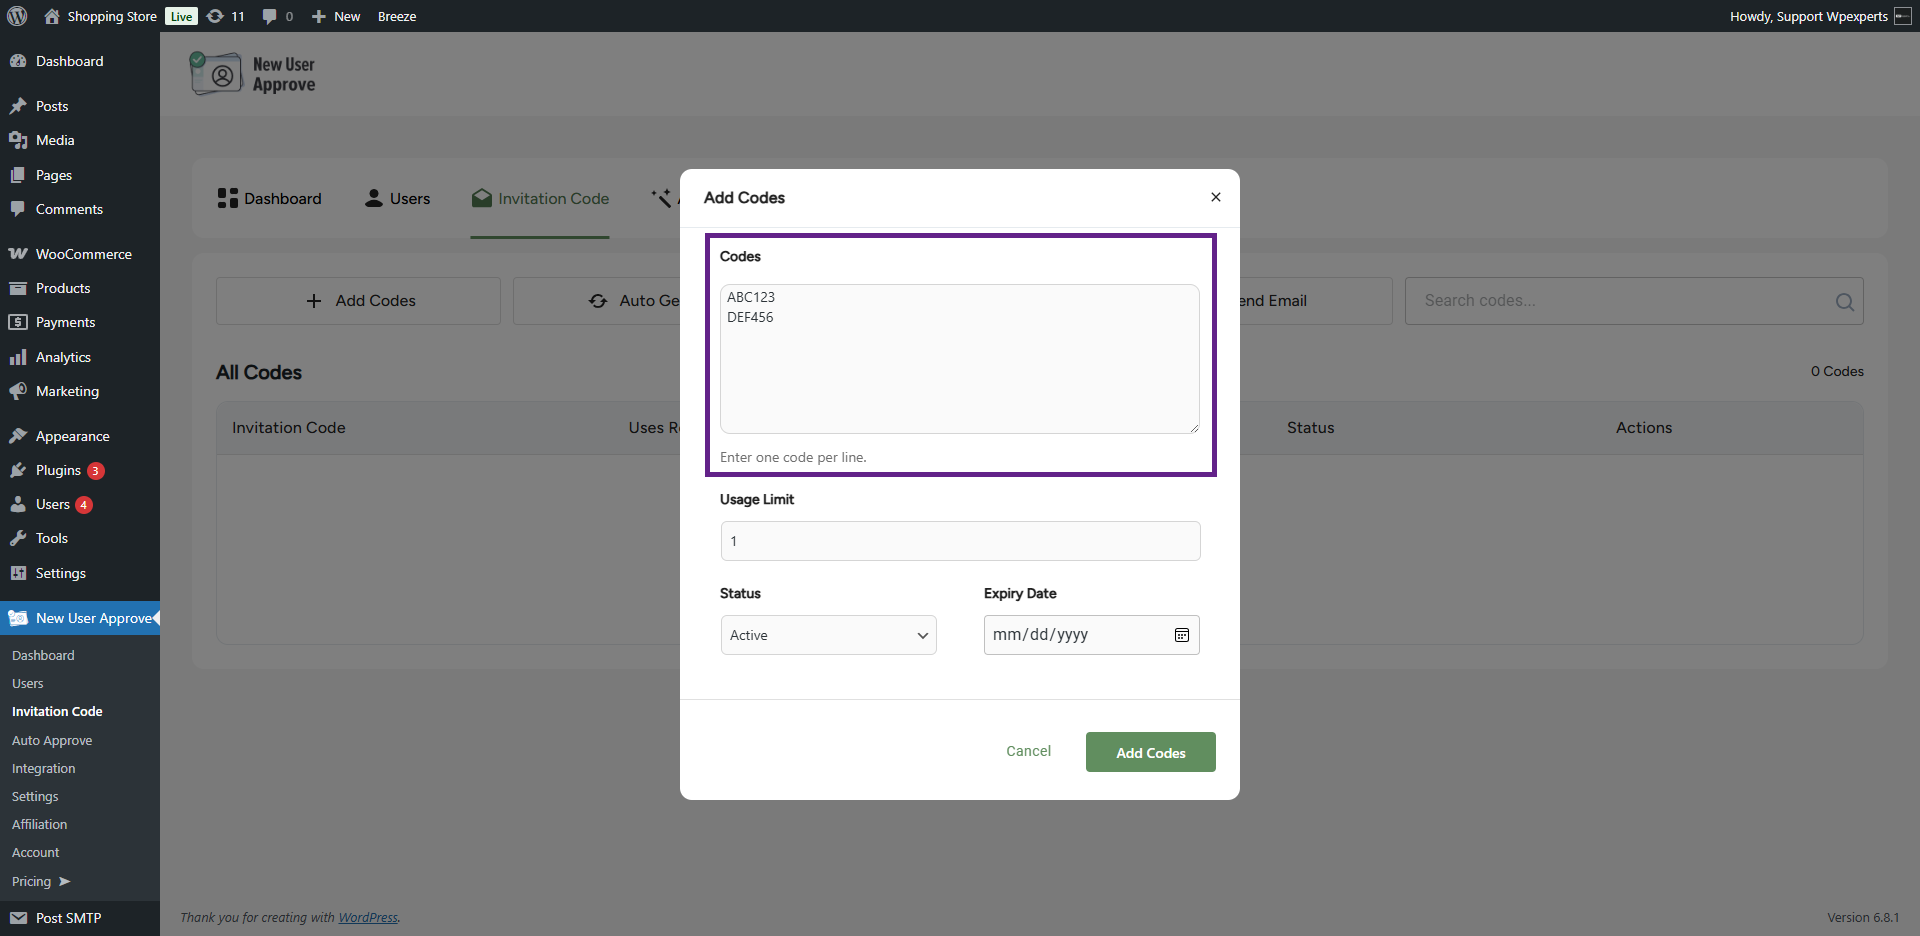
- Next, define the usage limit for the invitation codes.

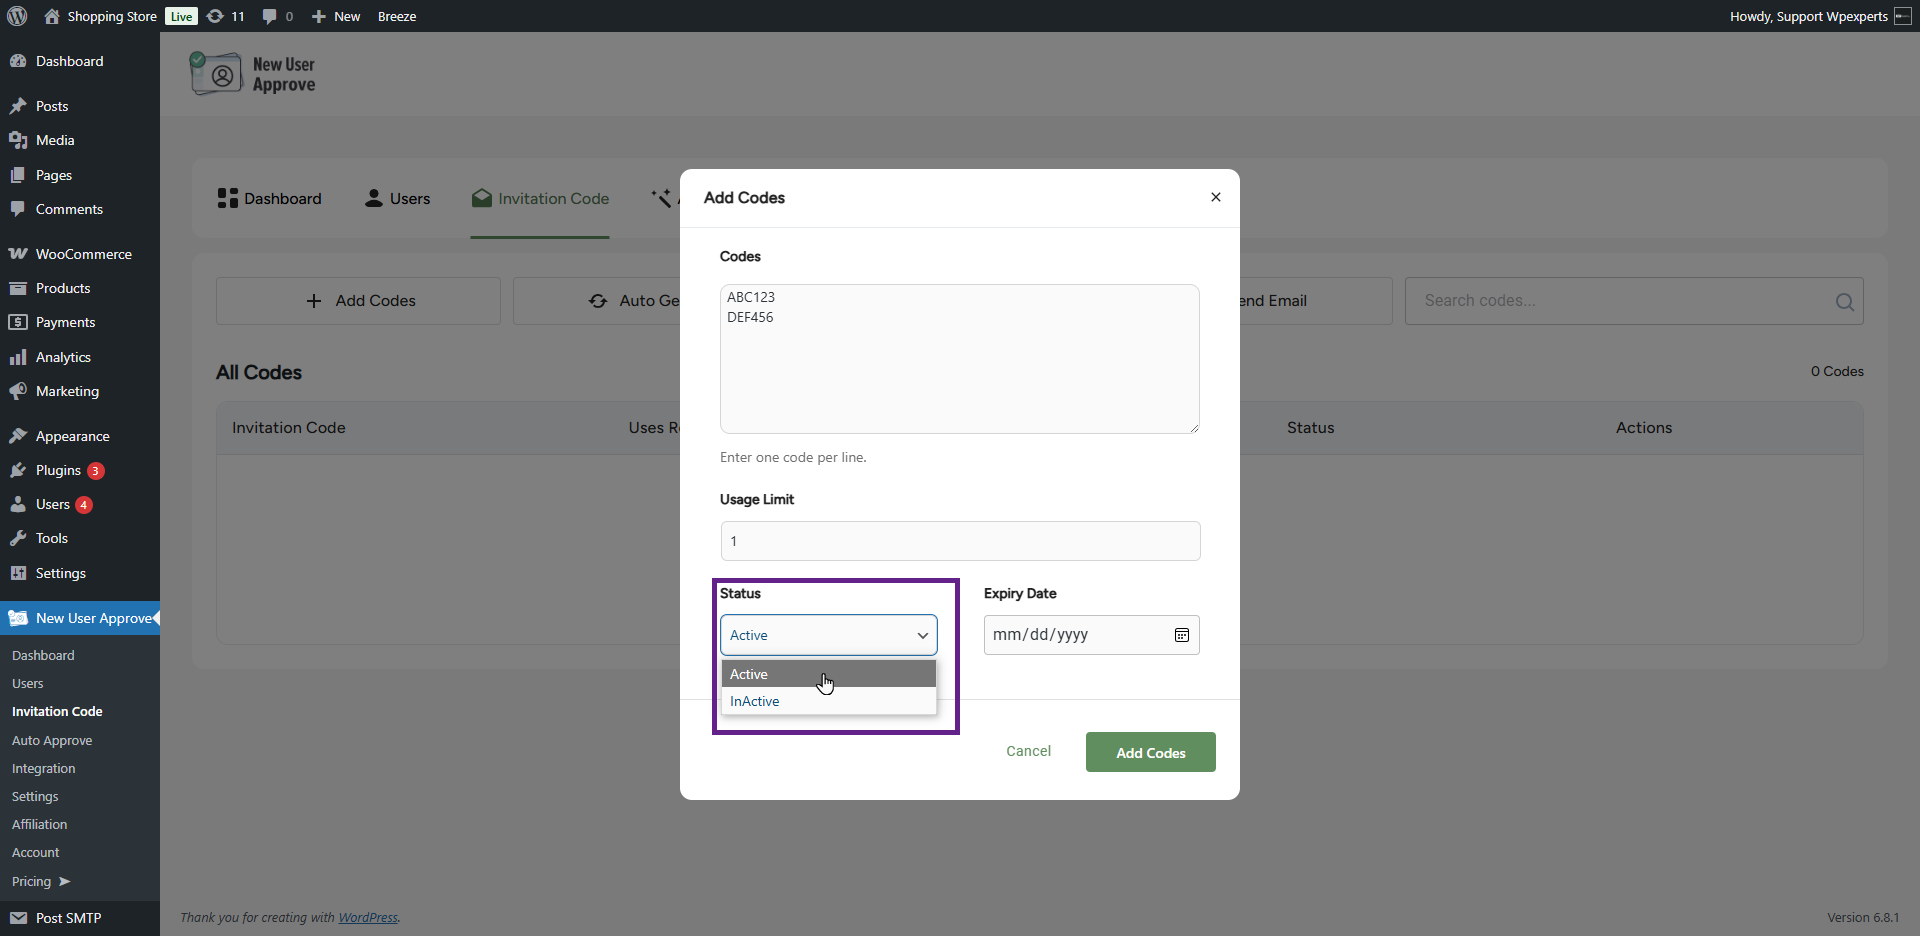
- Select the status of the invitation code from the Status dropdown menu.
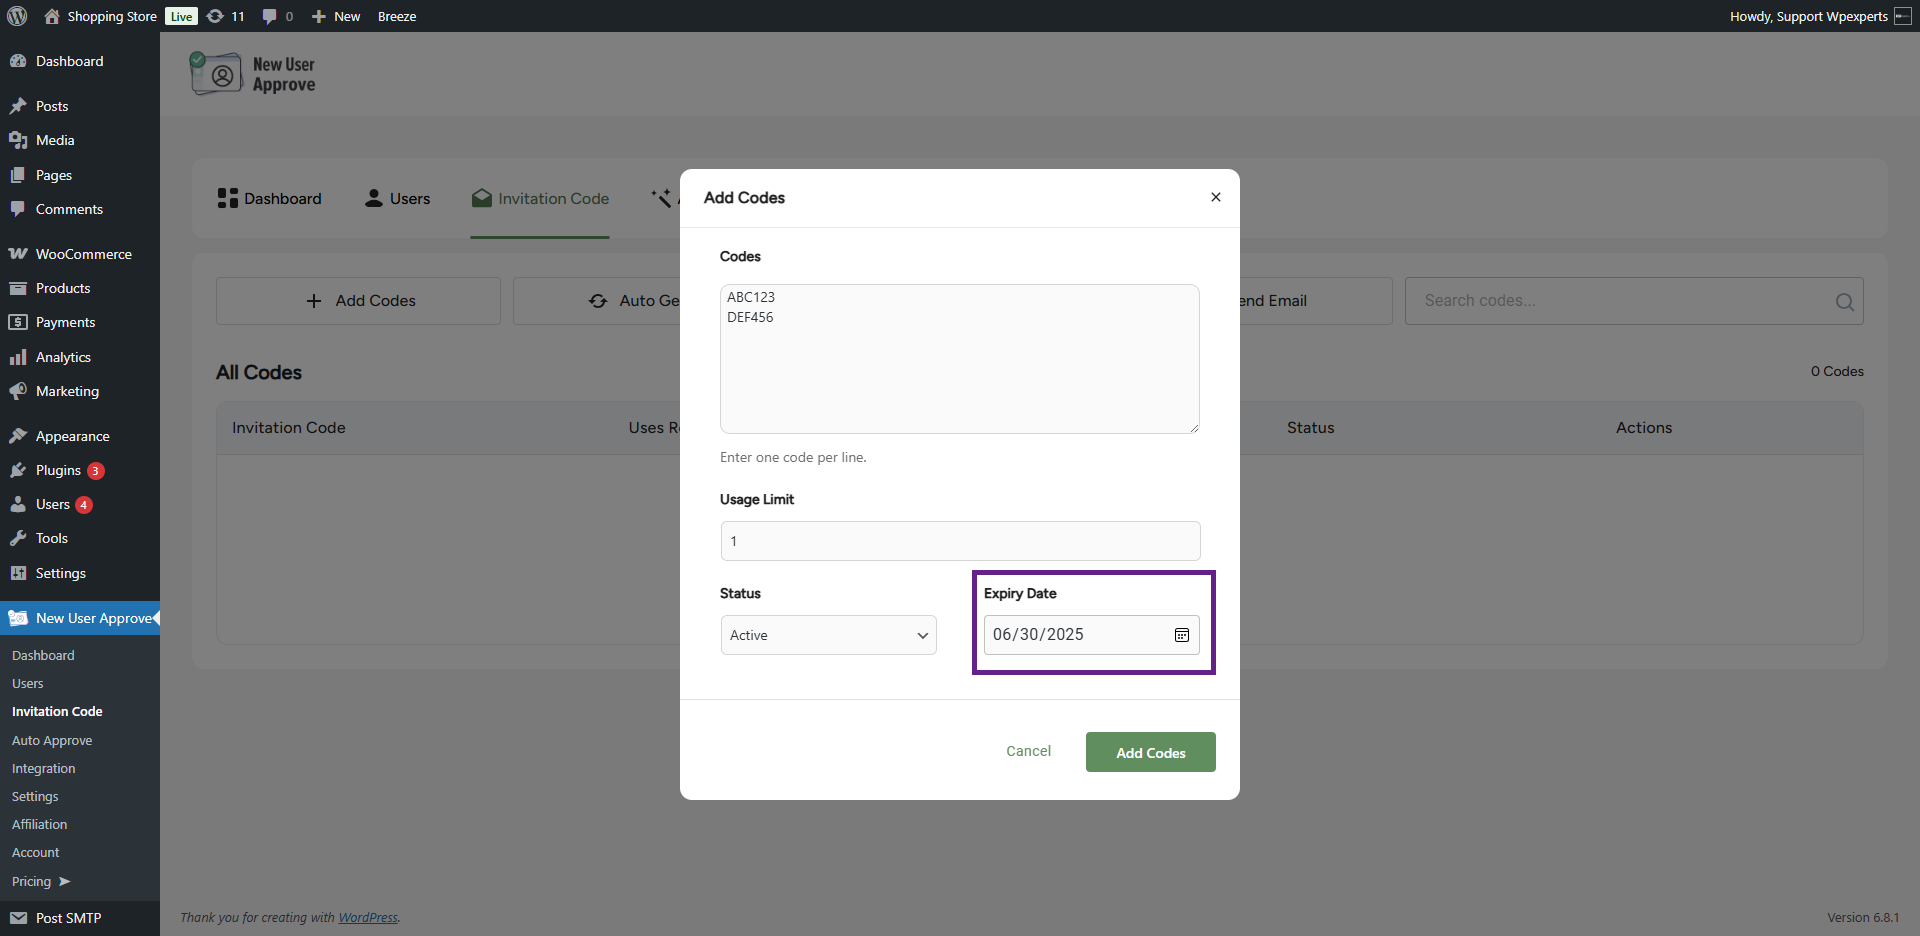
- Finally, specify the expiry date for the invitation code.
- Once done, click the Add Codes button.
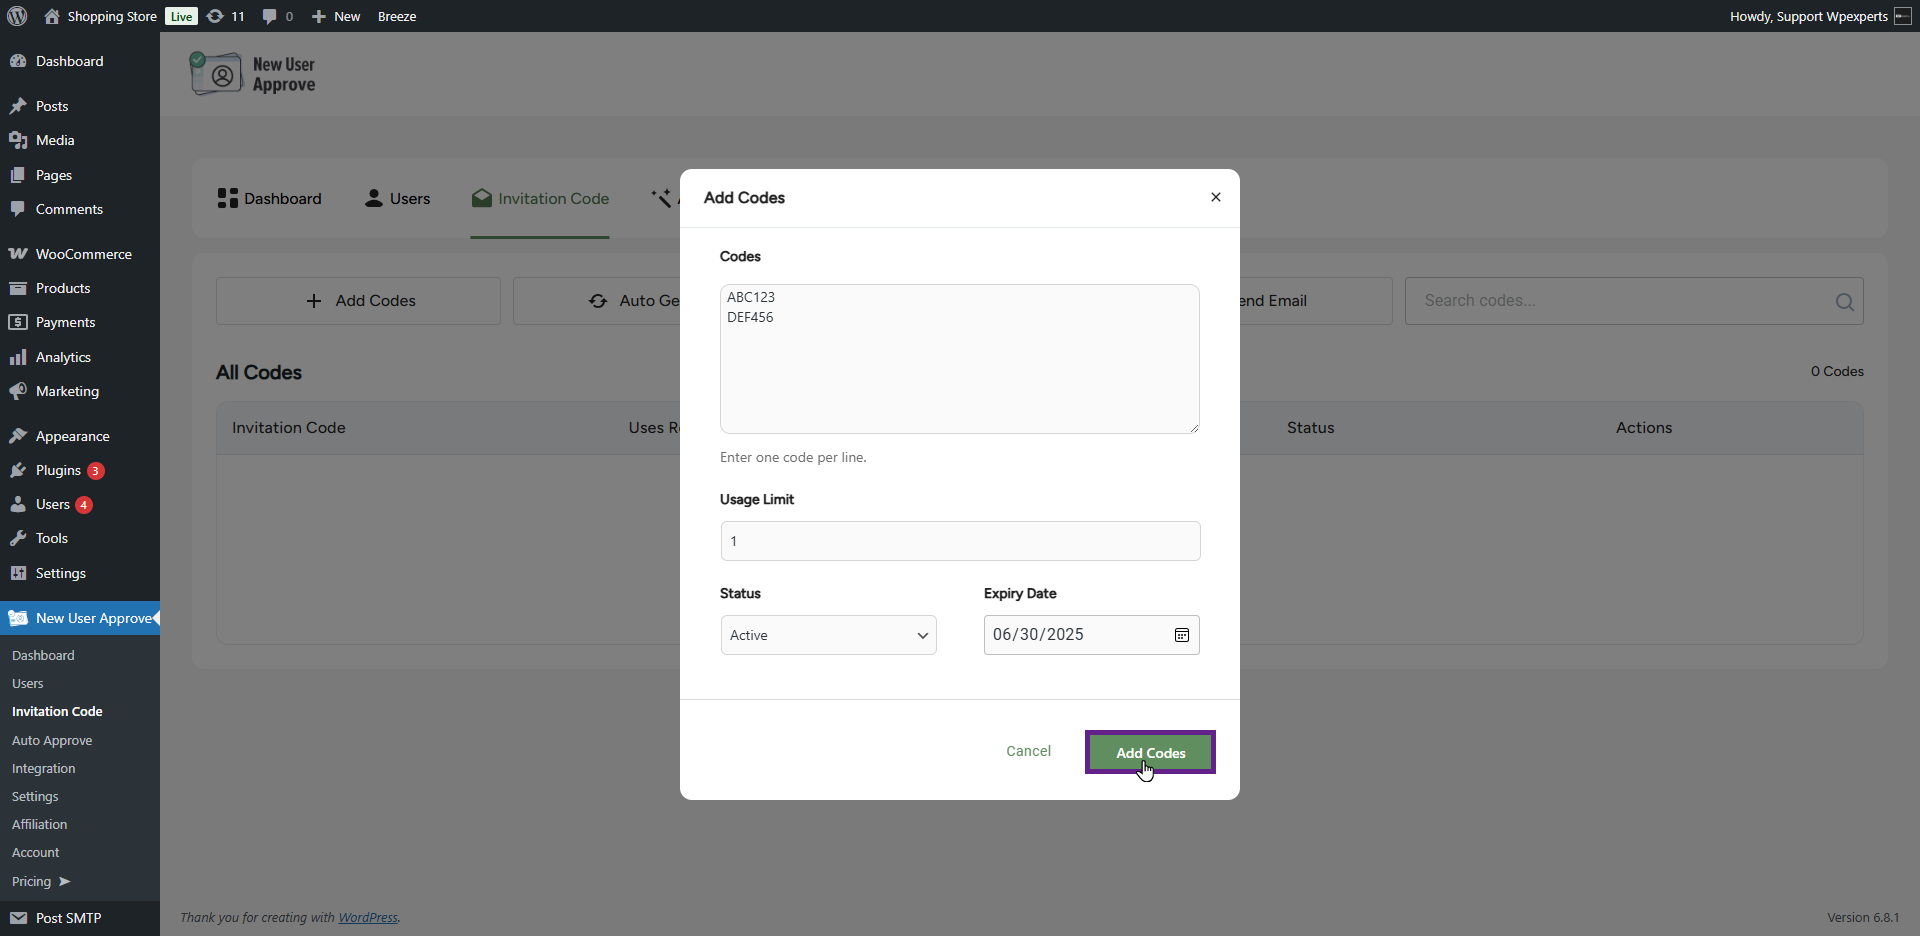
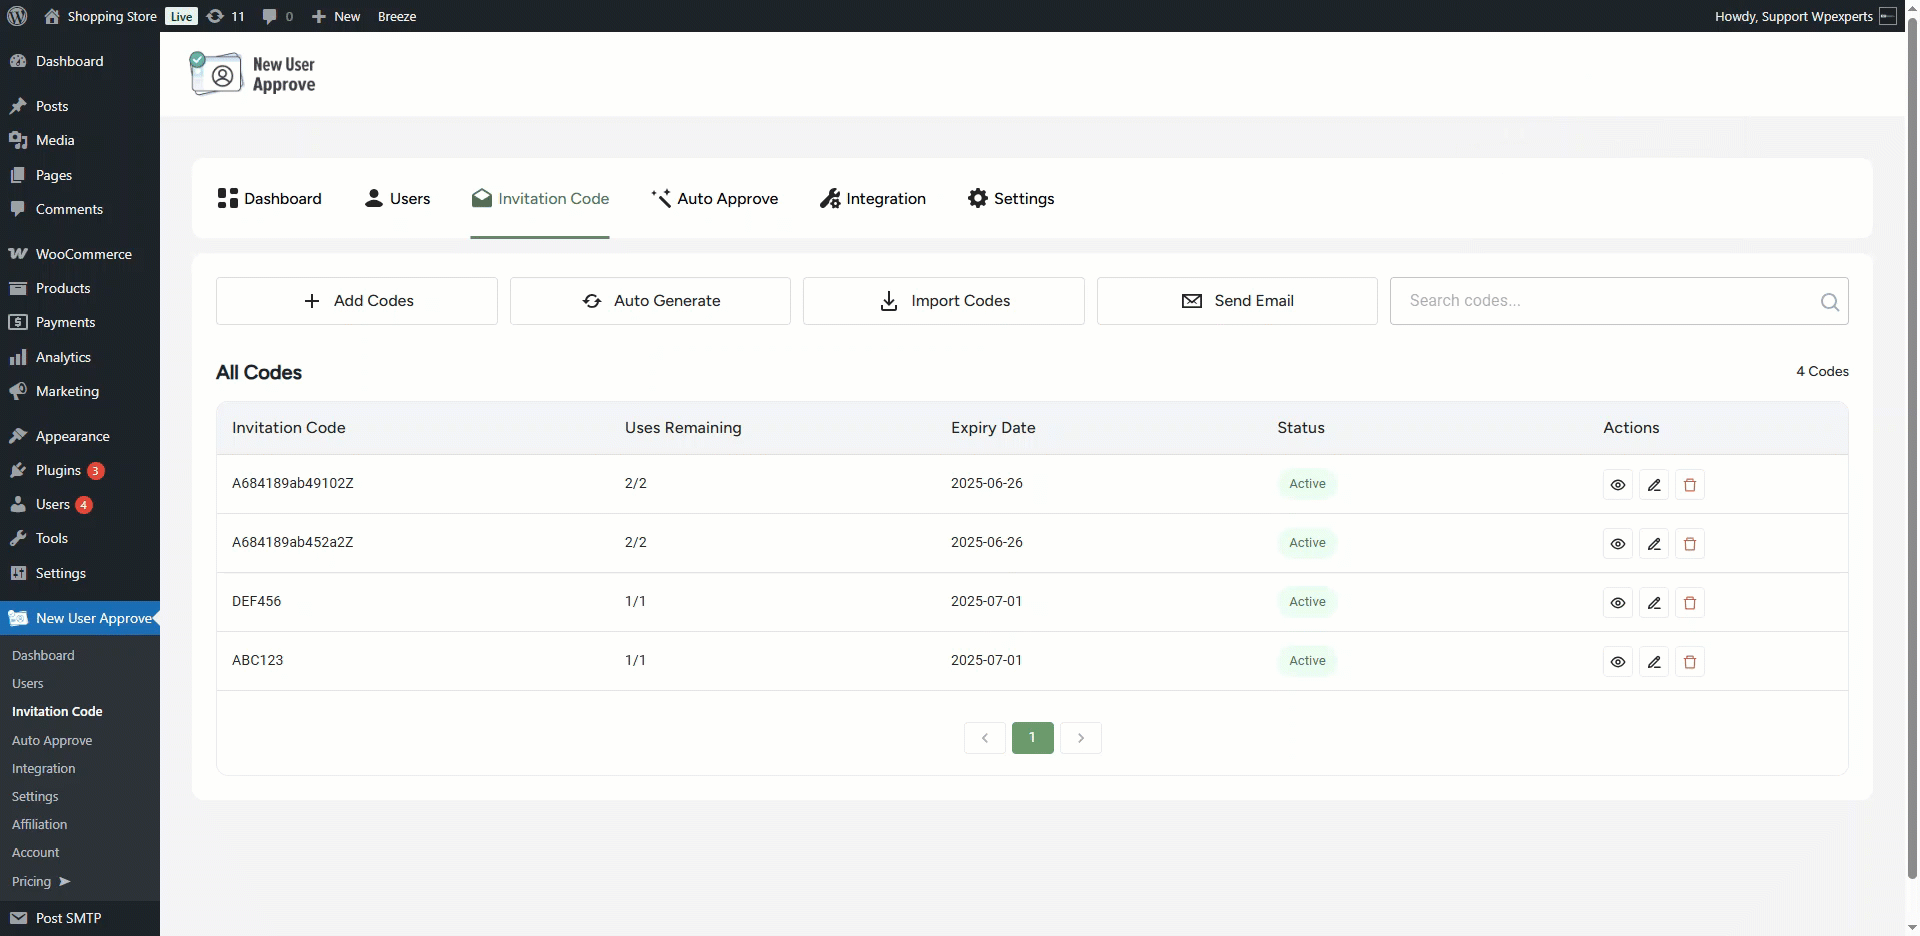
- As you can see, the invitation codes we generated manually are now visible.

- To generate the invitation code automatically, click the Auto Generate button.

- Once clicked, a pop-up window will appear.
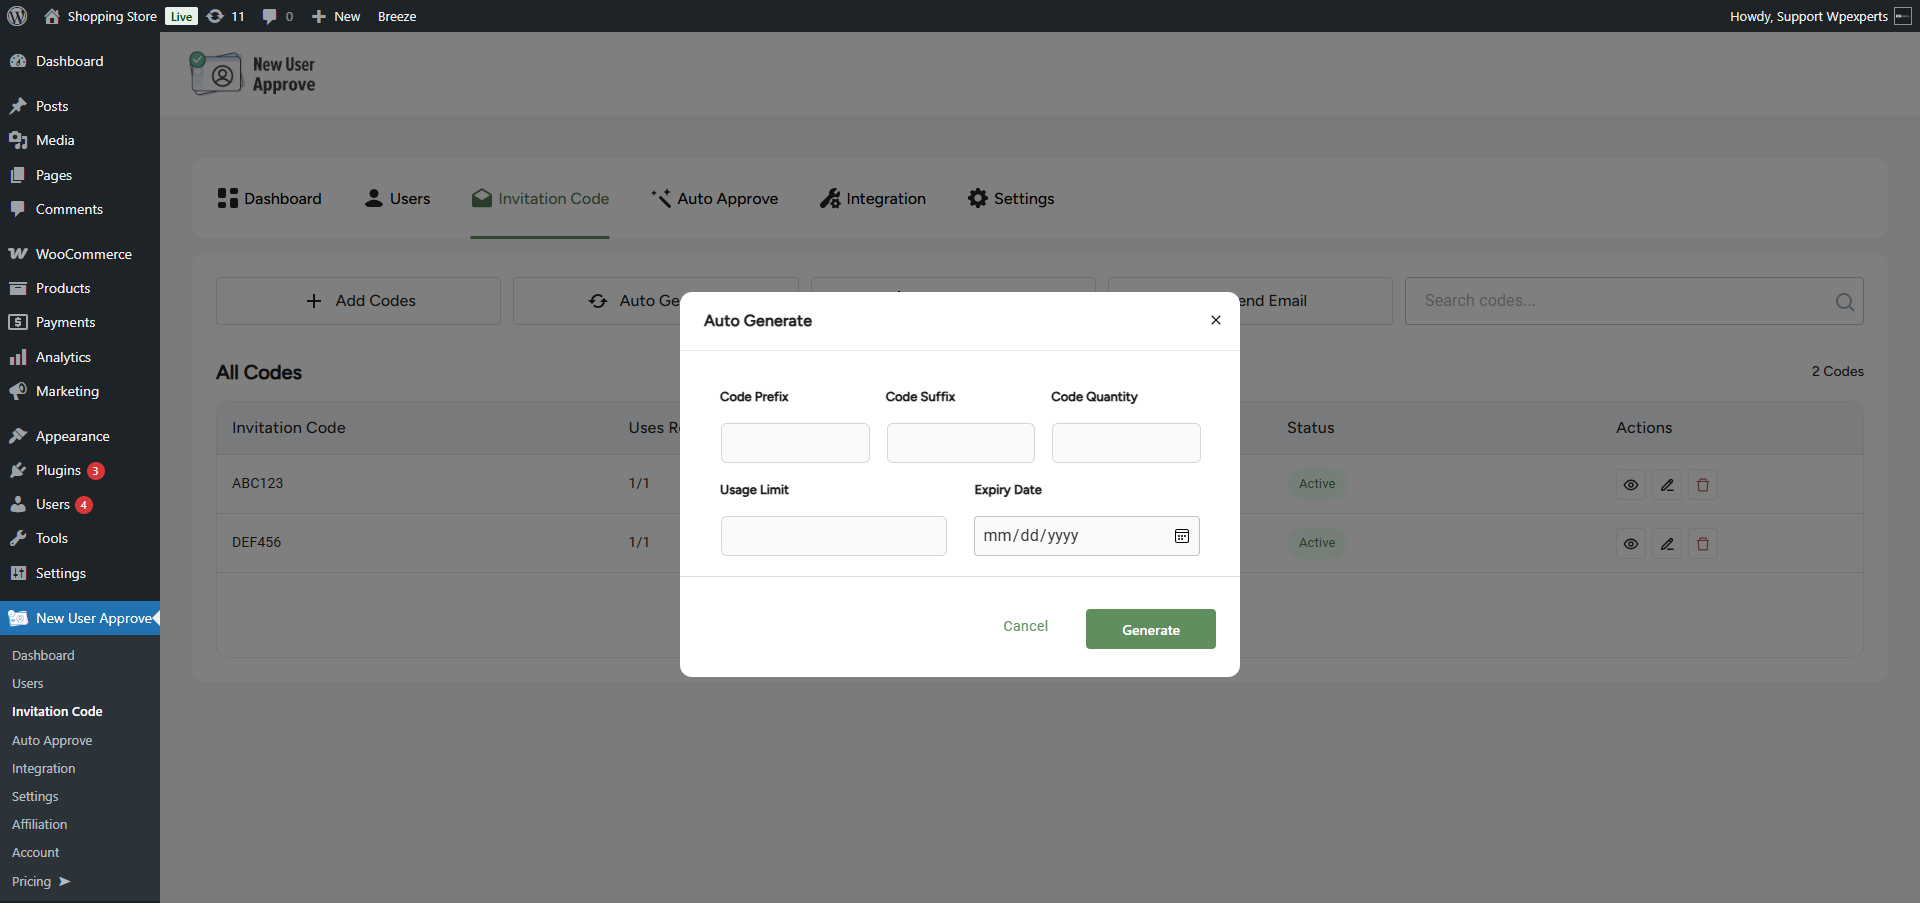
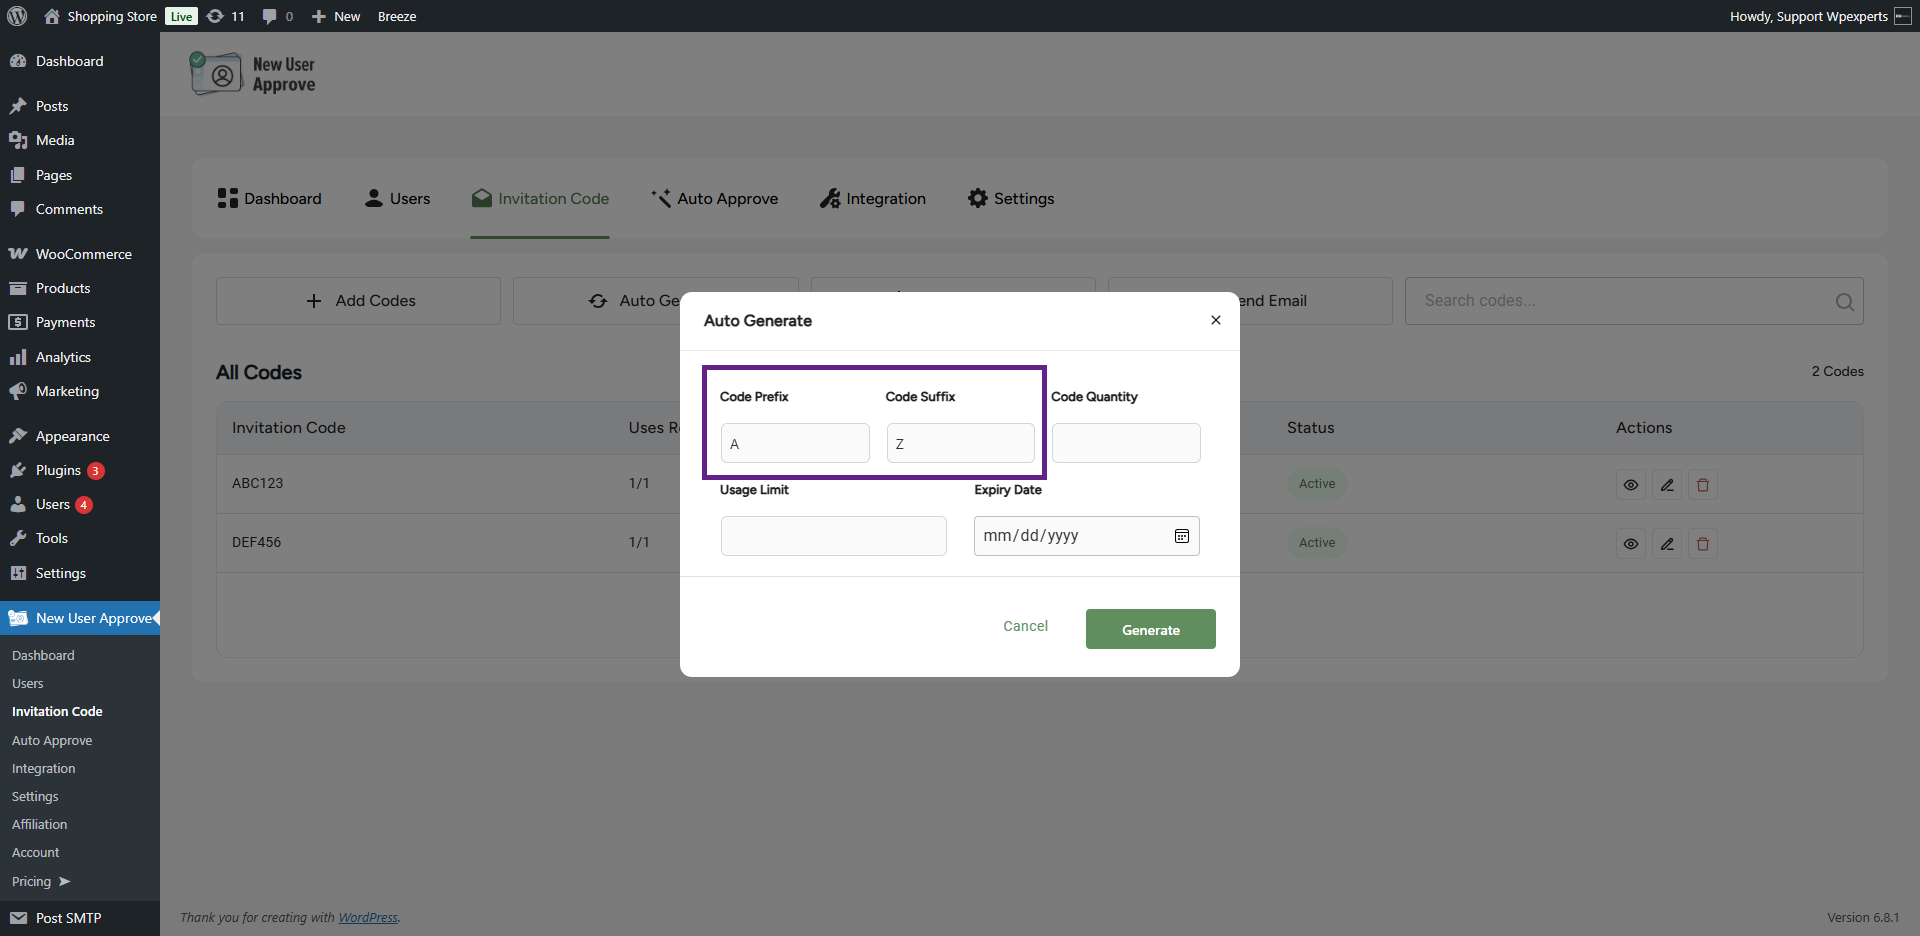
- Enter the code prefix and suffix in their respective fields. The code prefix and suffix represent the beginning and ending segments of the auto-generated code.
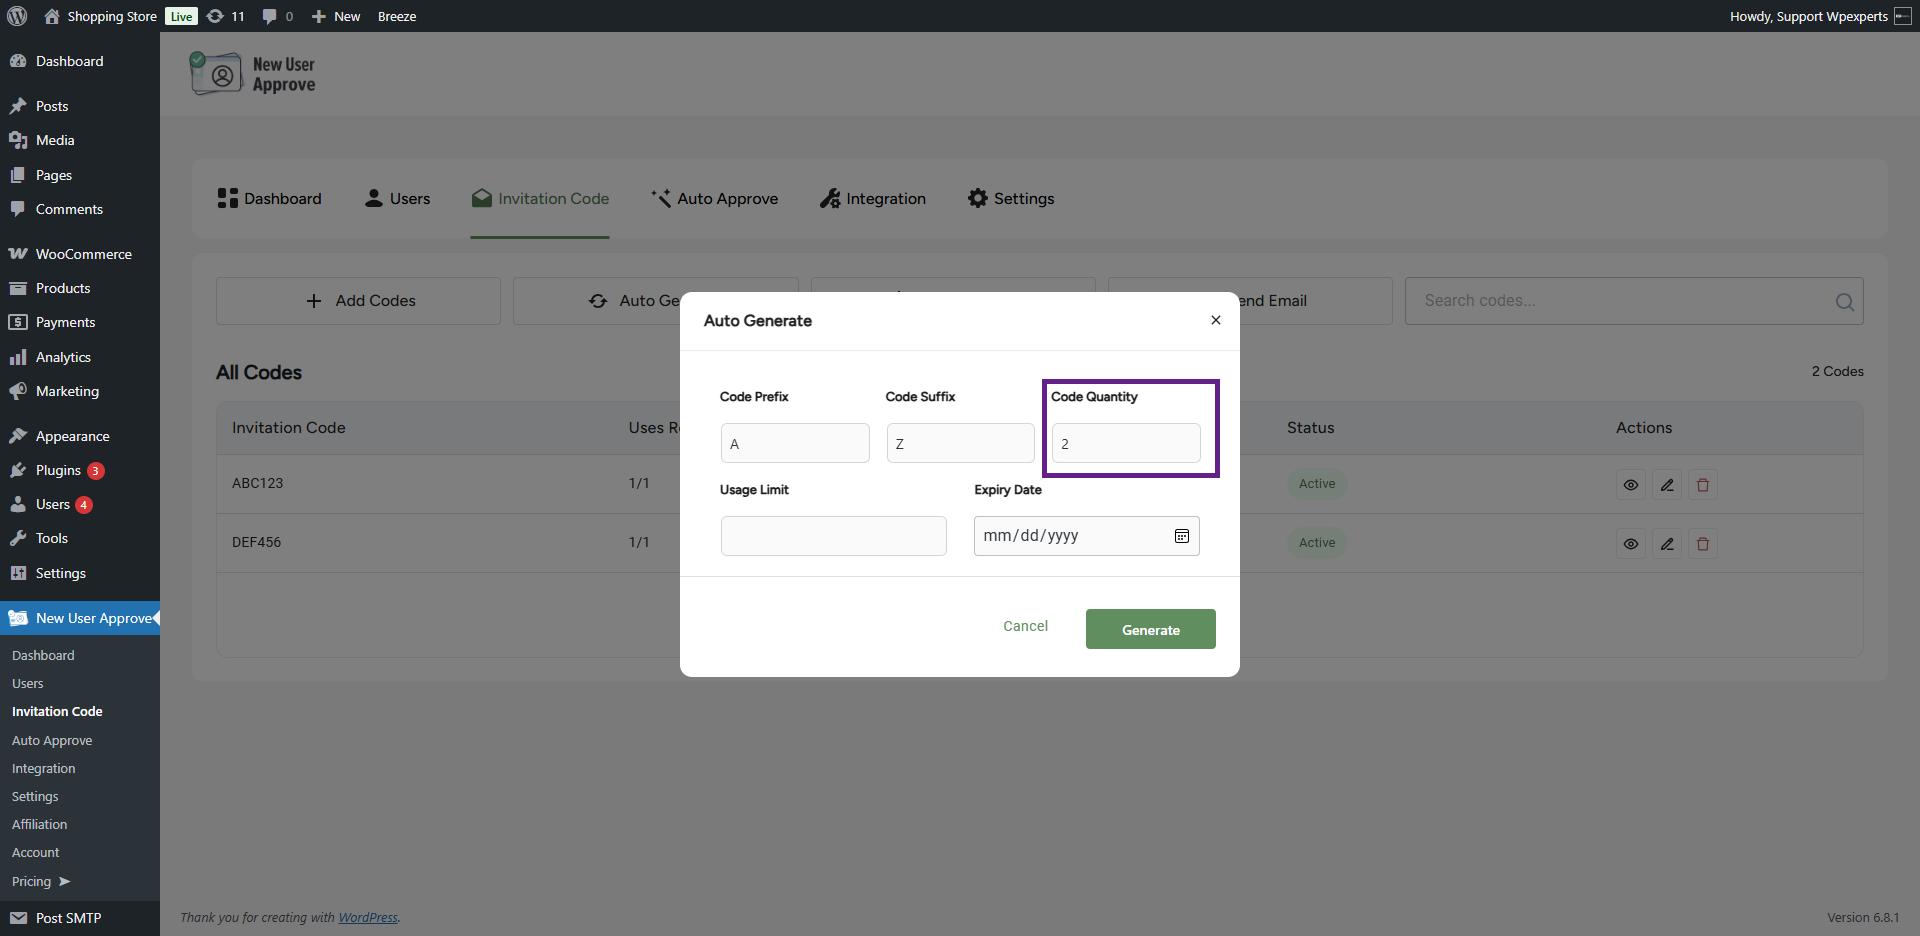
- Next, specify the number of codes the admin wants to generate.
- Define the usage limit for the invitation codes.
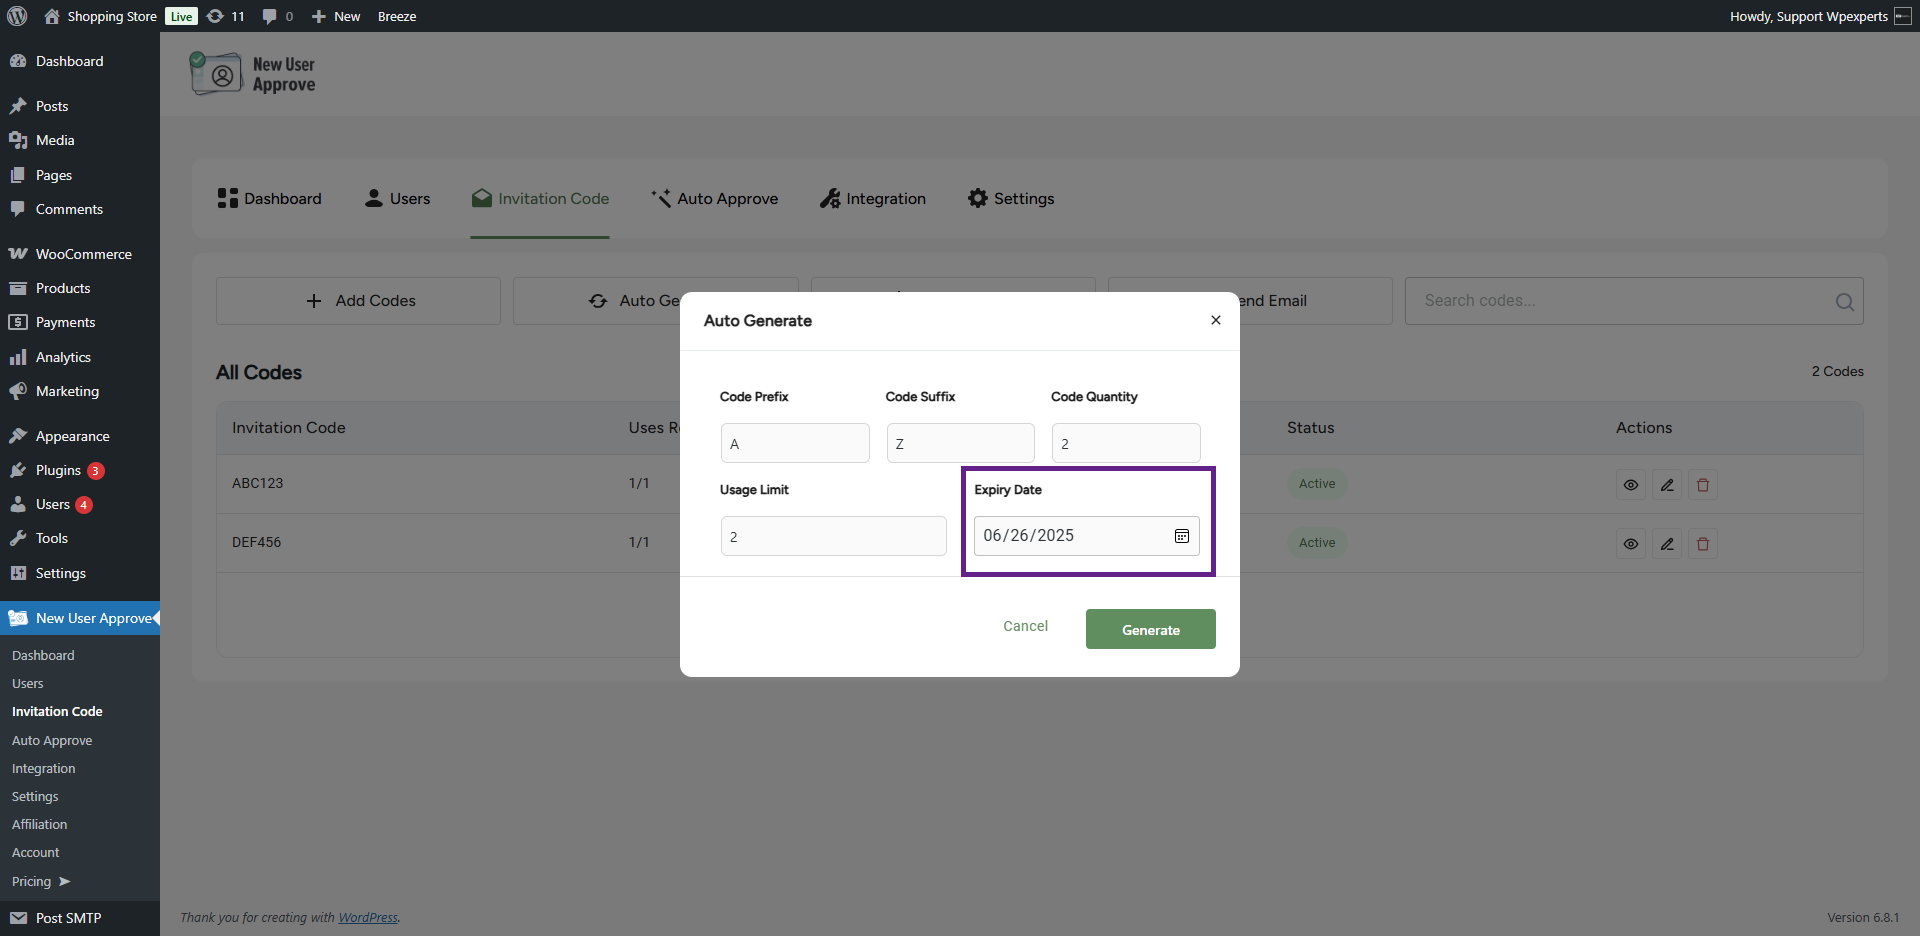
- Finally, specify the expiry date for the invitation code.

- Once done, click the Generate button.

- As you can see, the invitation codes we generated automatically are now visible.

- The admin can view the details of the generated codes by clicking the View icon.

- Upon clicking the View icon, a pop-up window will appear displaying the code details.
- To edit a code, click the Edit icon. A window will appear where you can modify the code as needed.
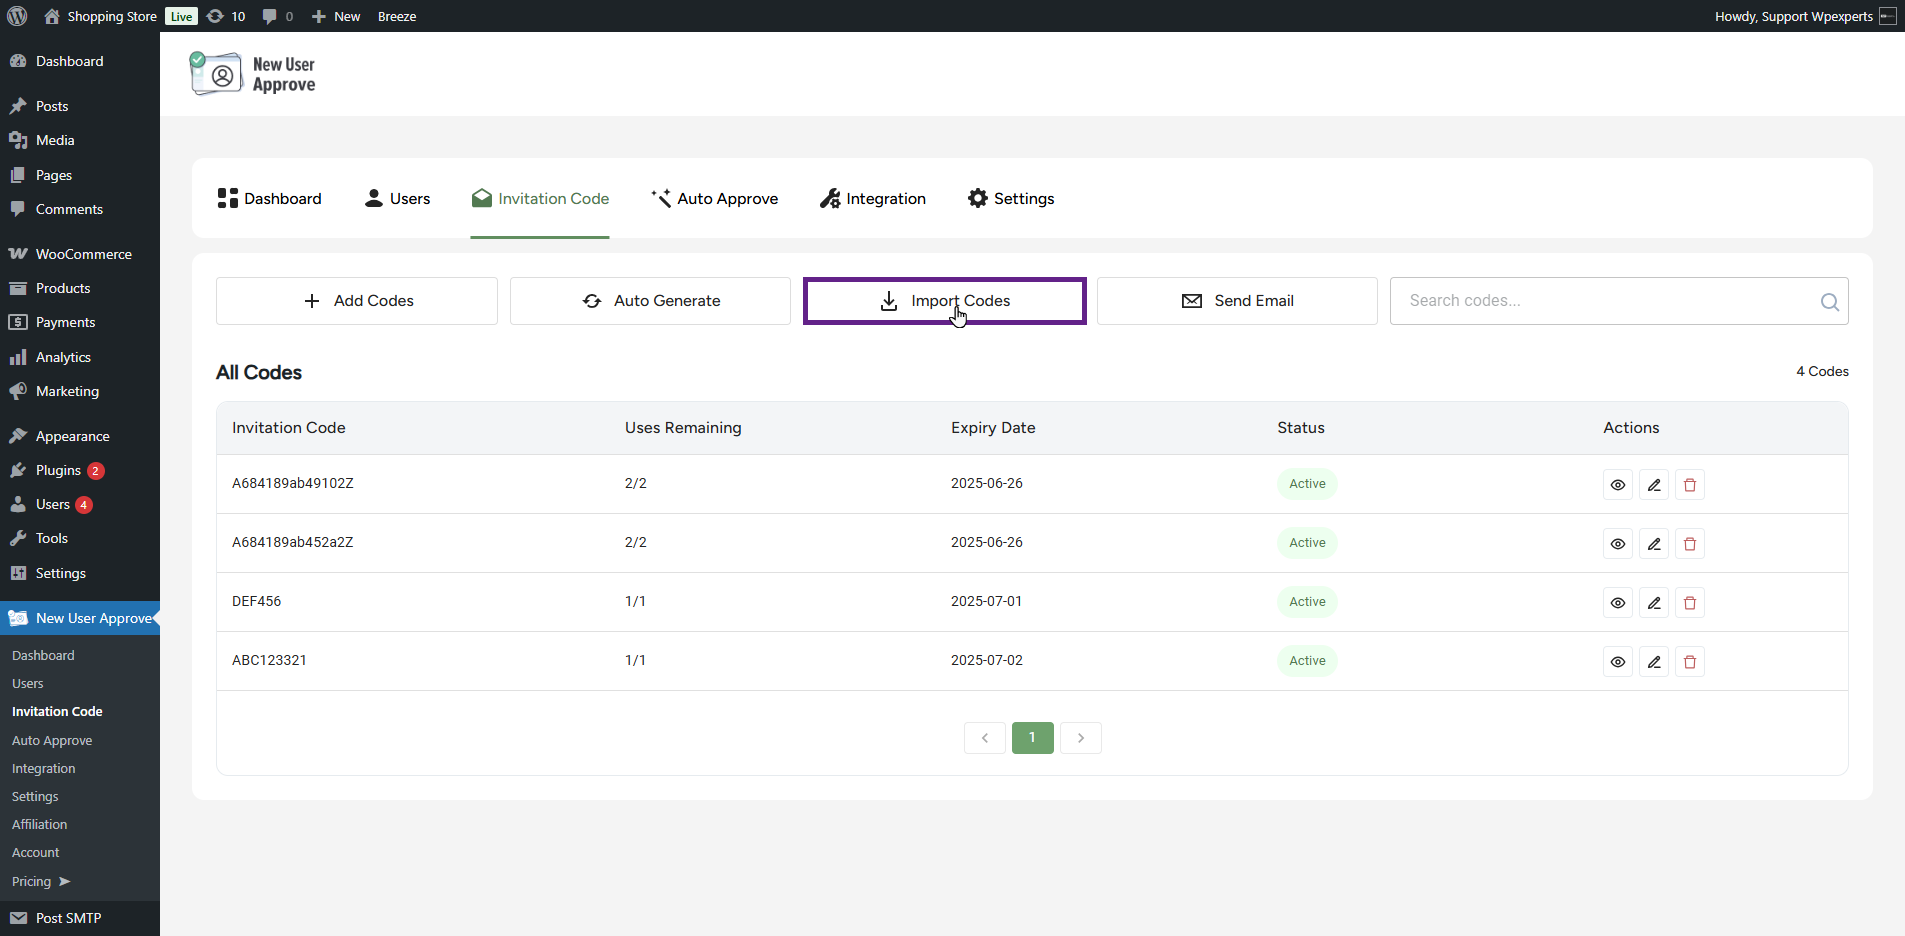
- The admin can import codes using the Import Codes option.
- Click the Import Codes sub-tab.
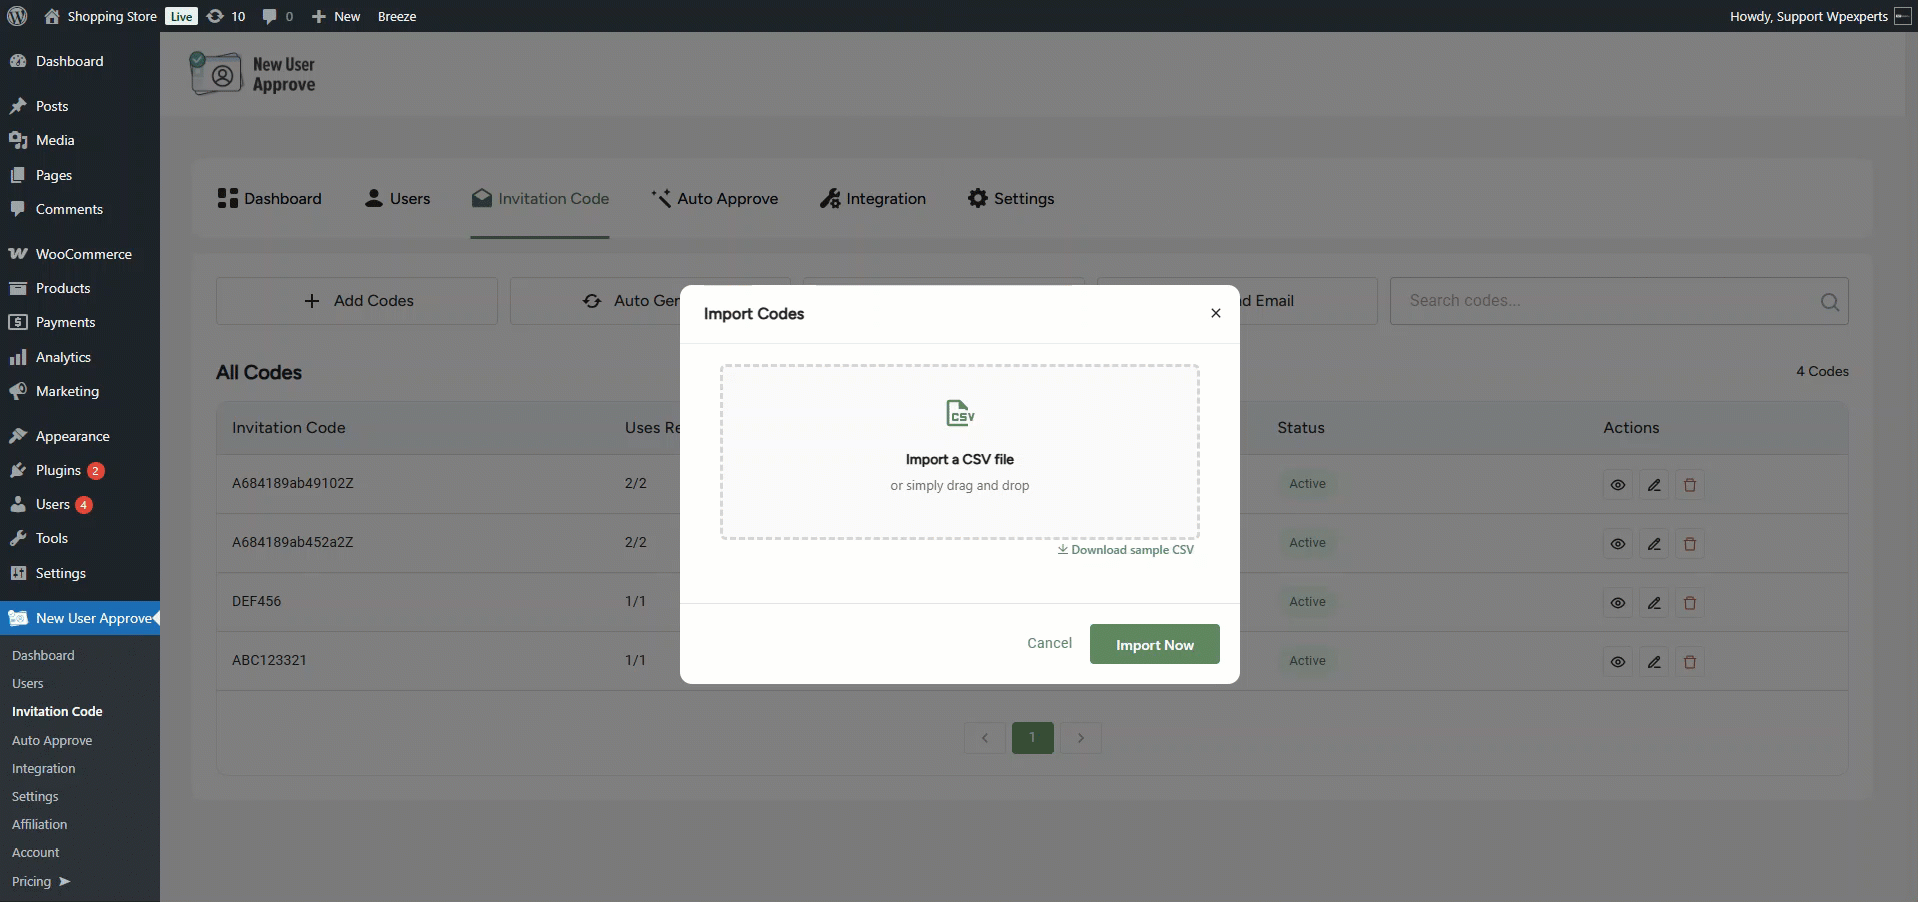
- Selecting the Import Codes sub-tab will open a pop-up window.

- Click the Download Sample CSV link to view the required CSV file format. Once ready, click the Import Now button to import the sample codes.
- As you can see, the imported codes are now visible.
Note: Inactive and expired codes will not function on the front end when users attempt to use them. The status of these invitation codes can be easily updated through the edit option.
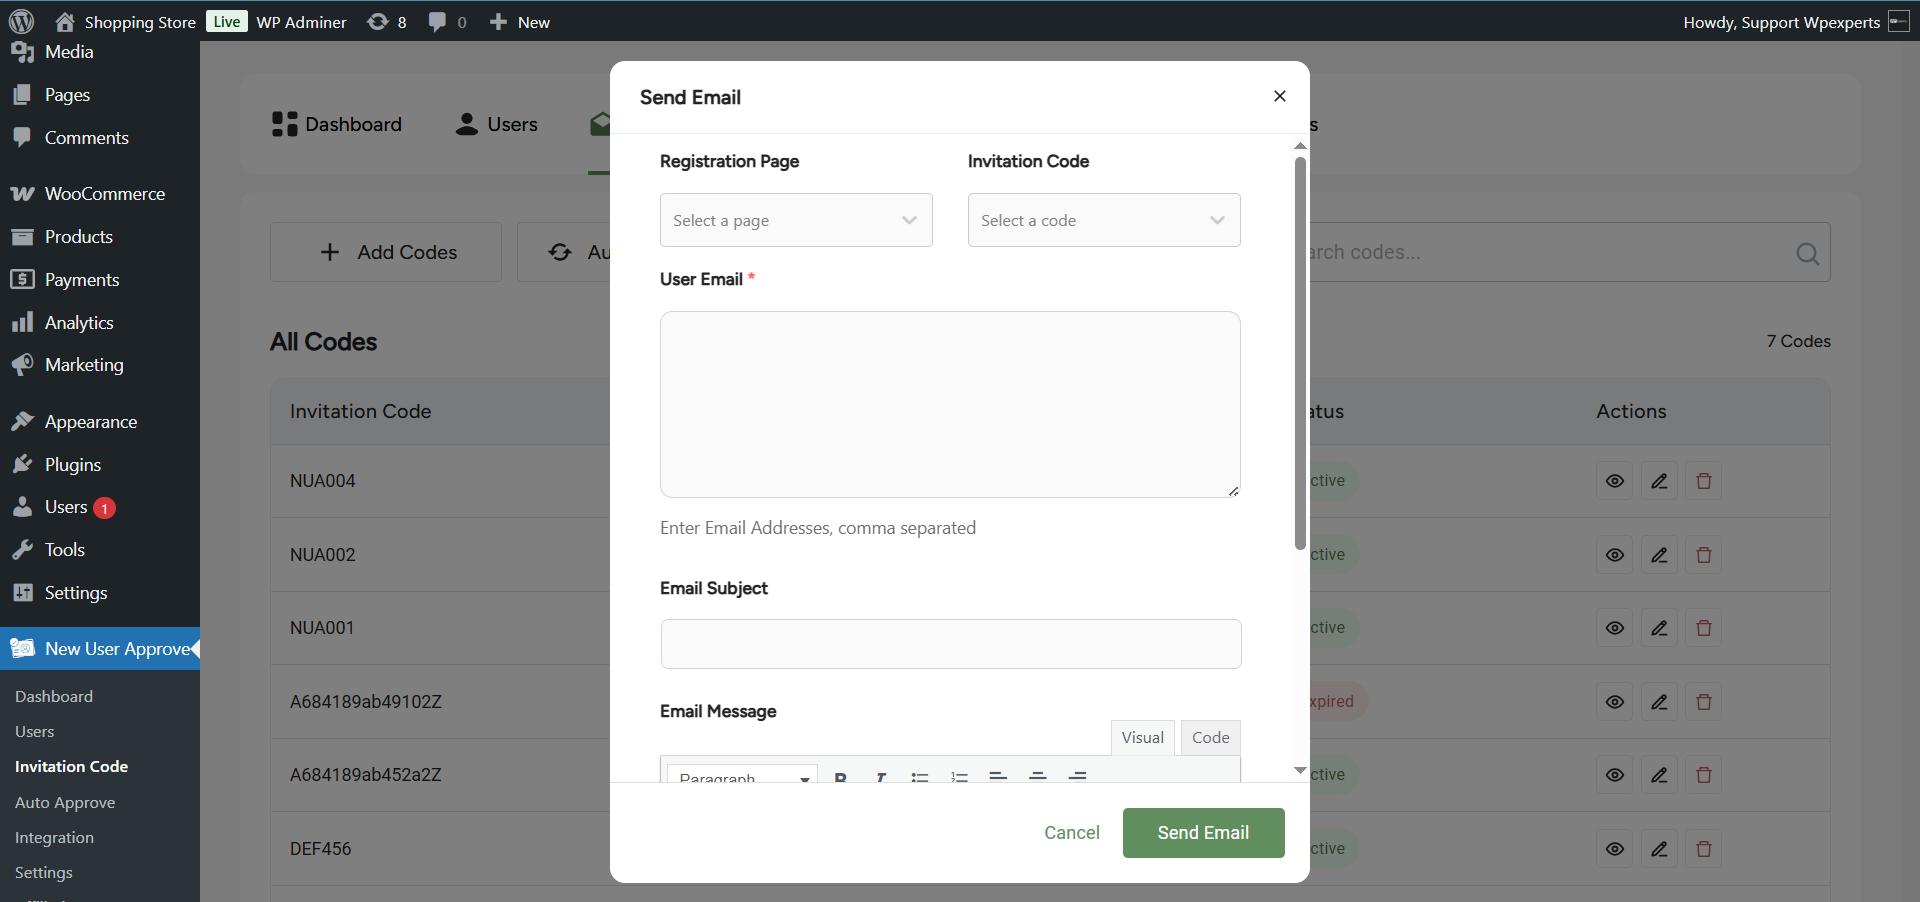
- The invitation codes can be sent via email to get registered.
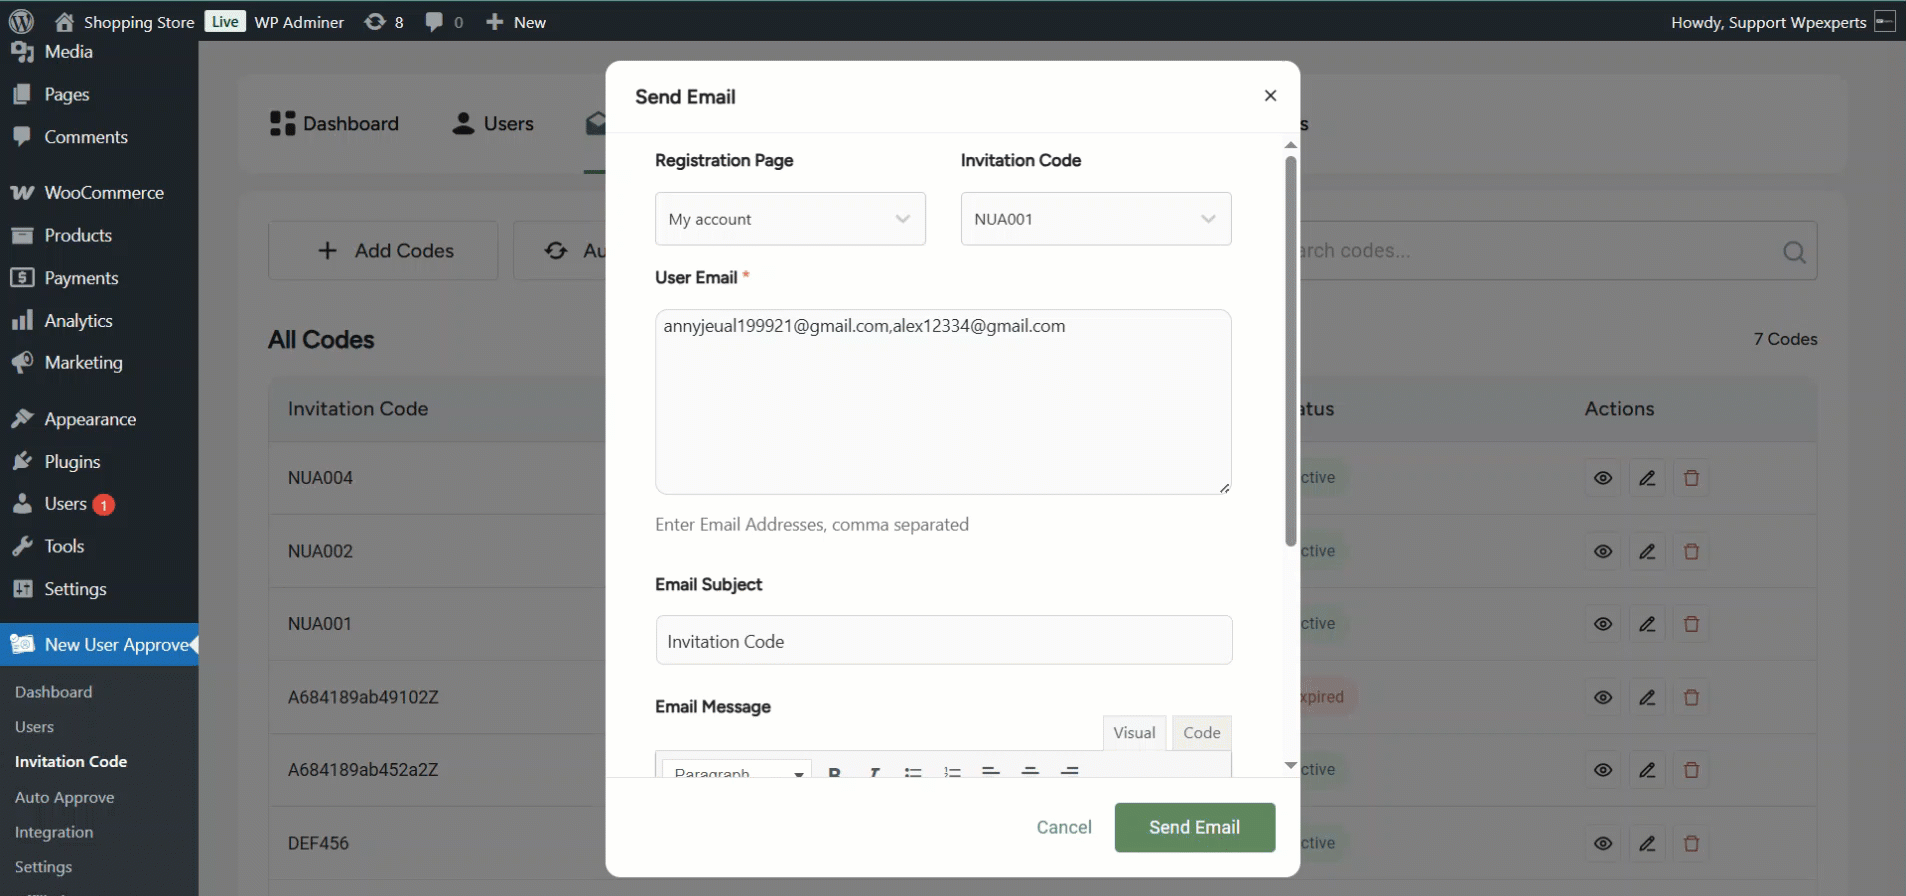
- Click the Send Email sub-tab.

- Selecting the Send Email sub-tab will open a pop-up window.
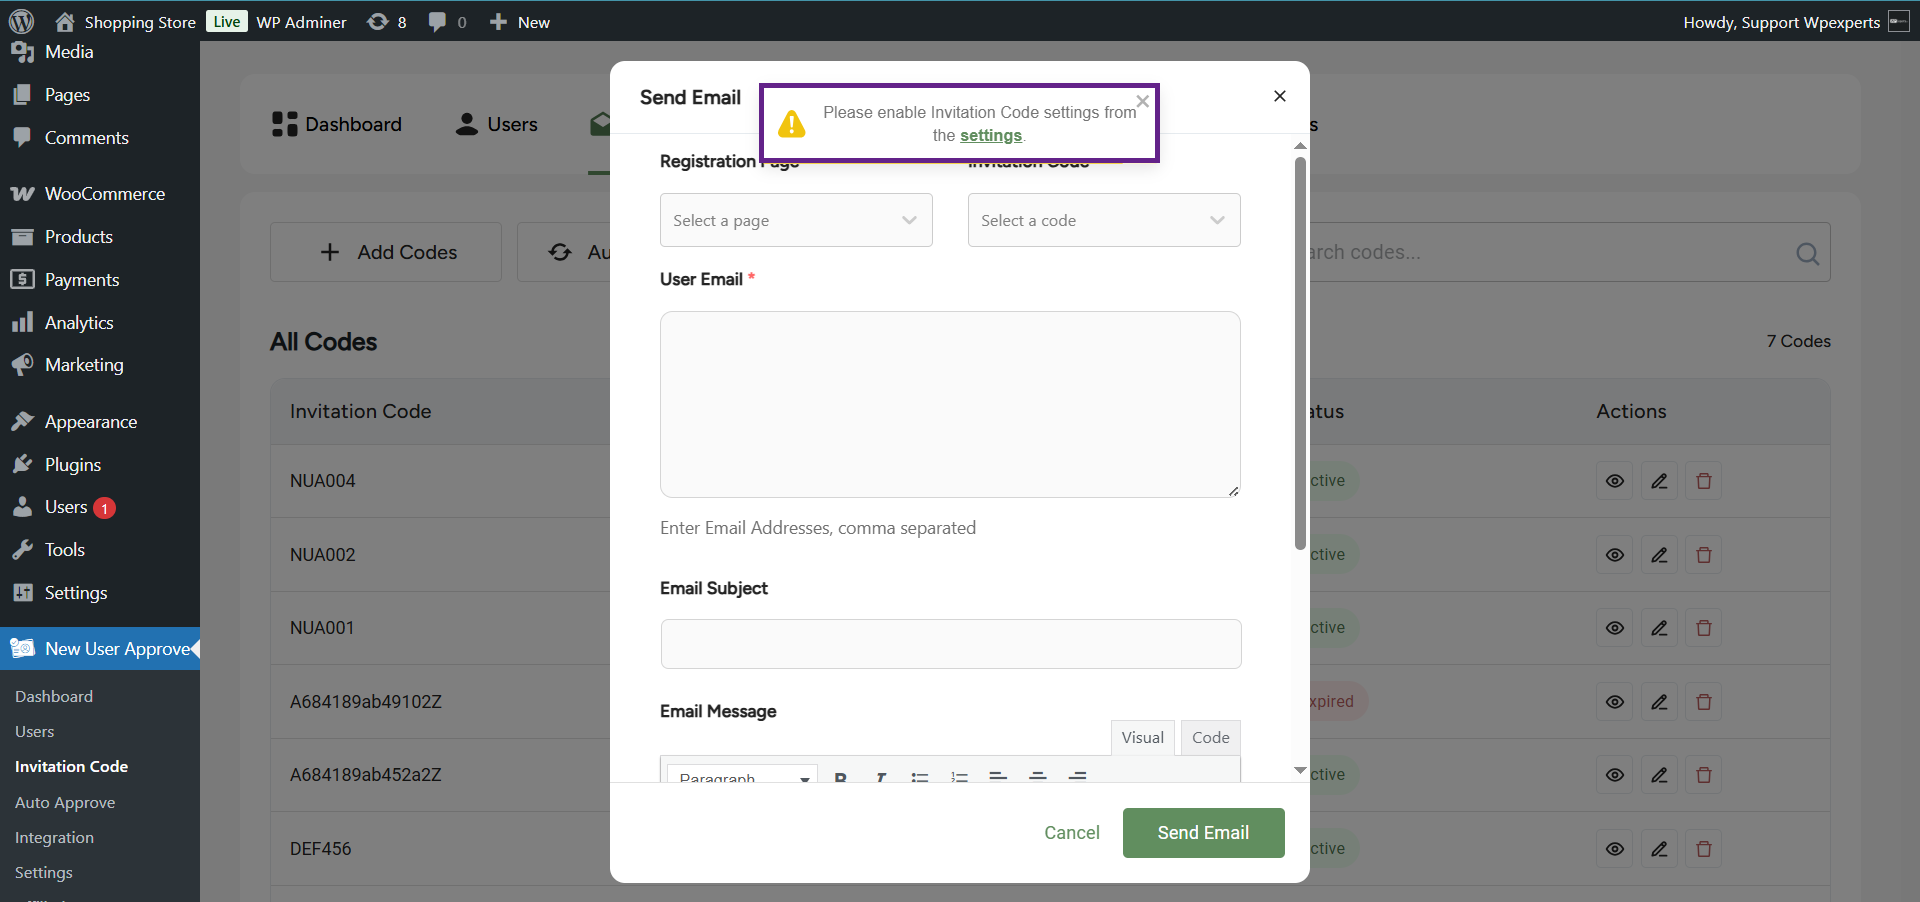
Please note: Make sure the Enable Invitation Code option is turned on in the General Settings.
- A pop-up message will appear if the invitation code option is not enabled under New User Approve > Settings. This is necessary because sending an invitation code serves no purpose if the option is disabled on the front end.
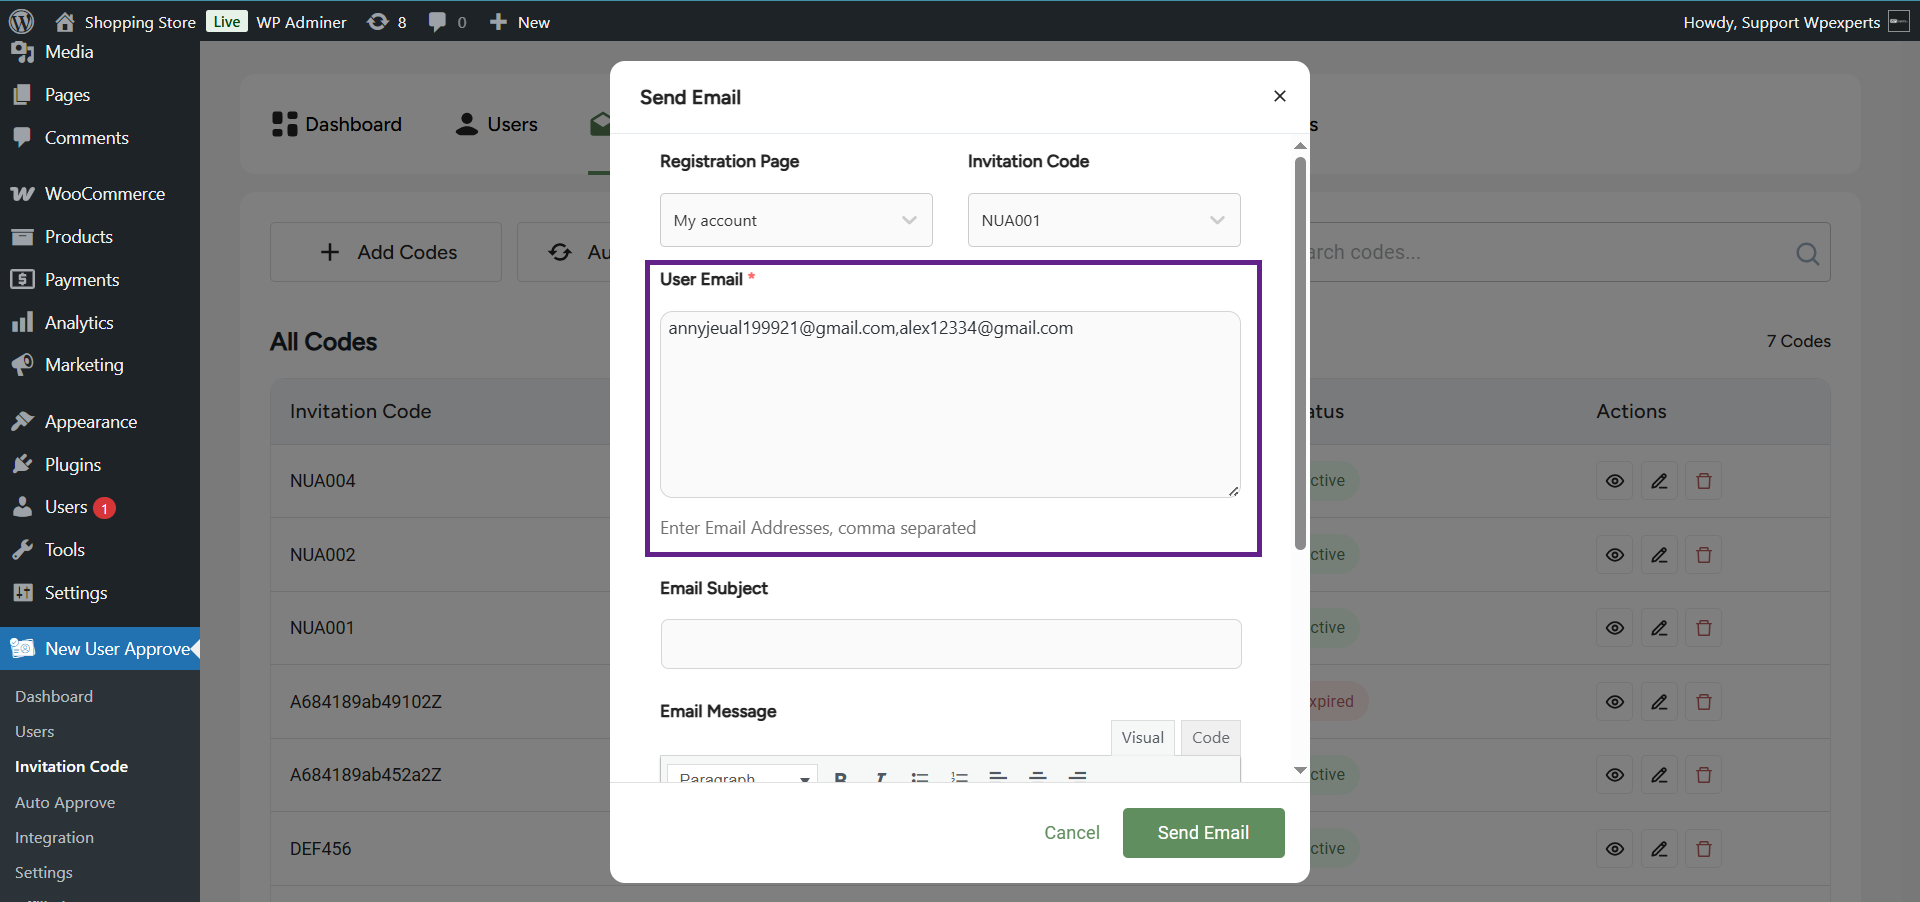
- Select the registration page from the Registration Page dropdown menu. This field allows you to choose from the available registration pages, and the selected page’s link will automatically be included in the email body for redirection.

- The Invitation Code field will display all the active invitation codes. Select any one invitation code that would be sent to the user via email.
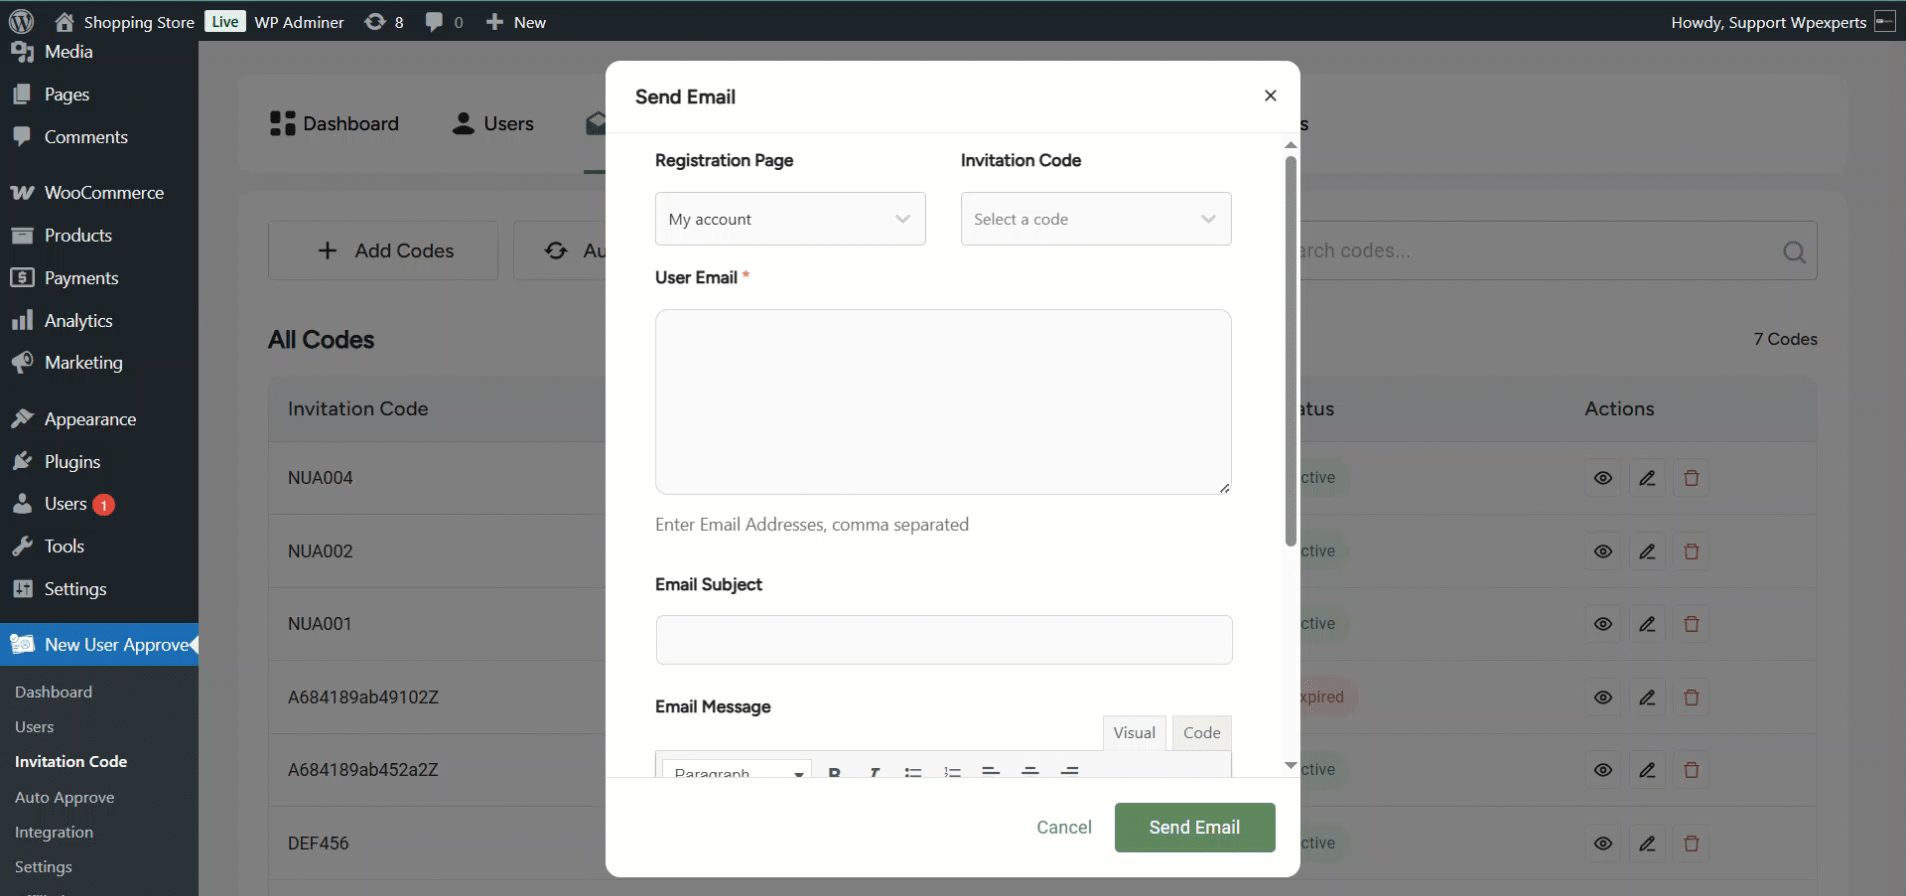
- Next, enter the email address to whom you want to send the invitation code in the User Email field. You can enter more than one email address by adding a comma between the email addresses.
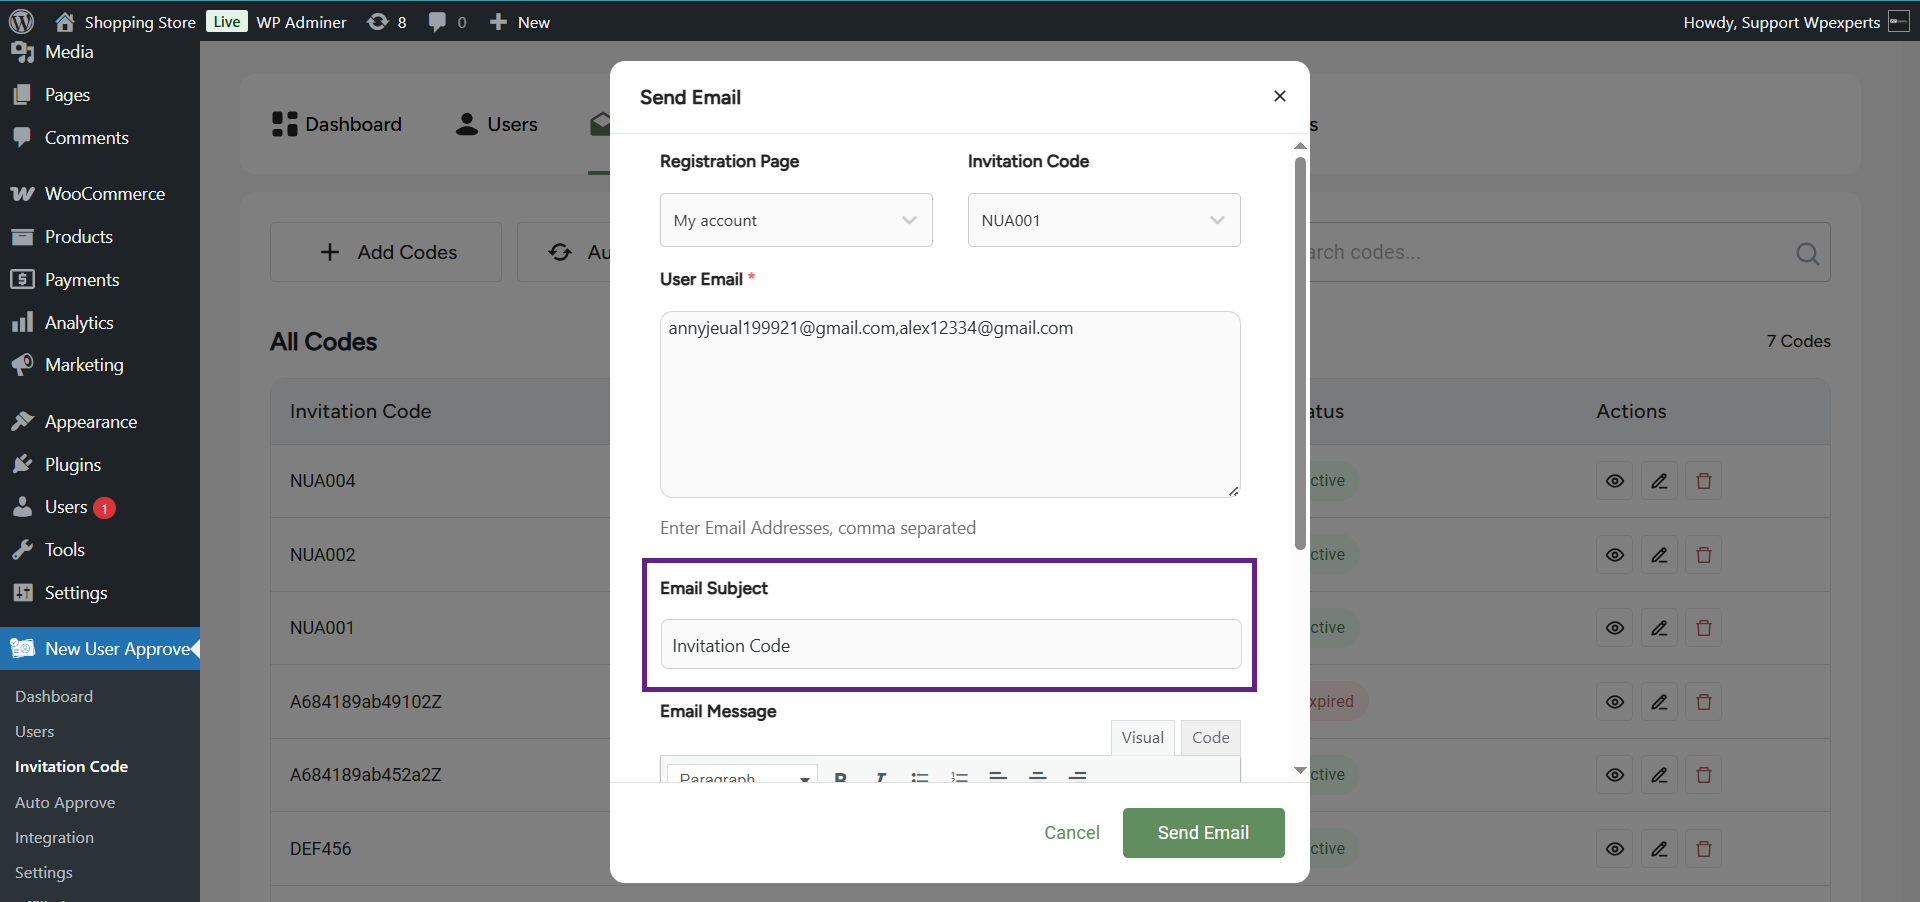
- Now, enter the email subject in the Email Subject field.
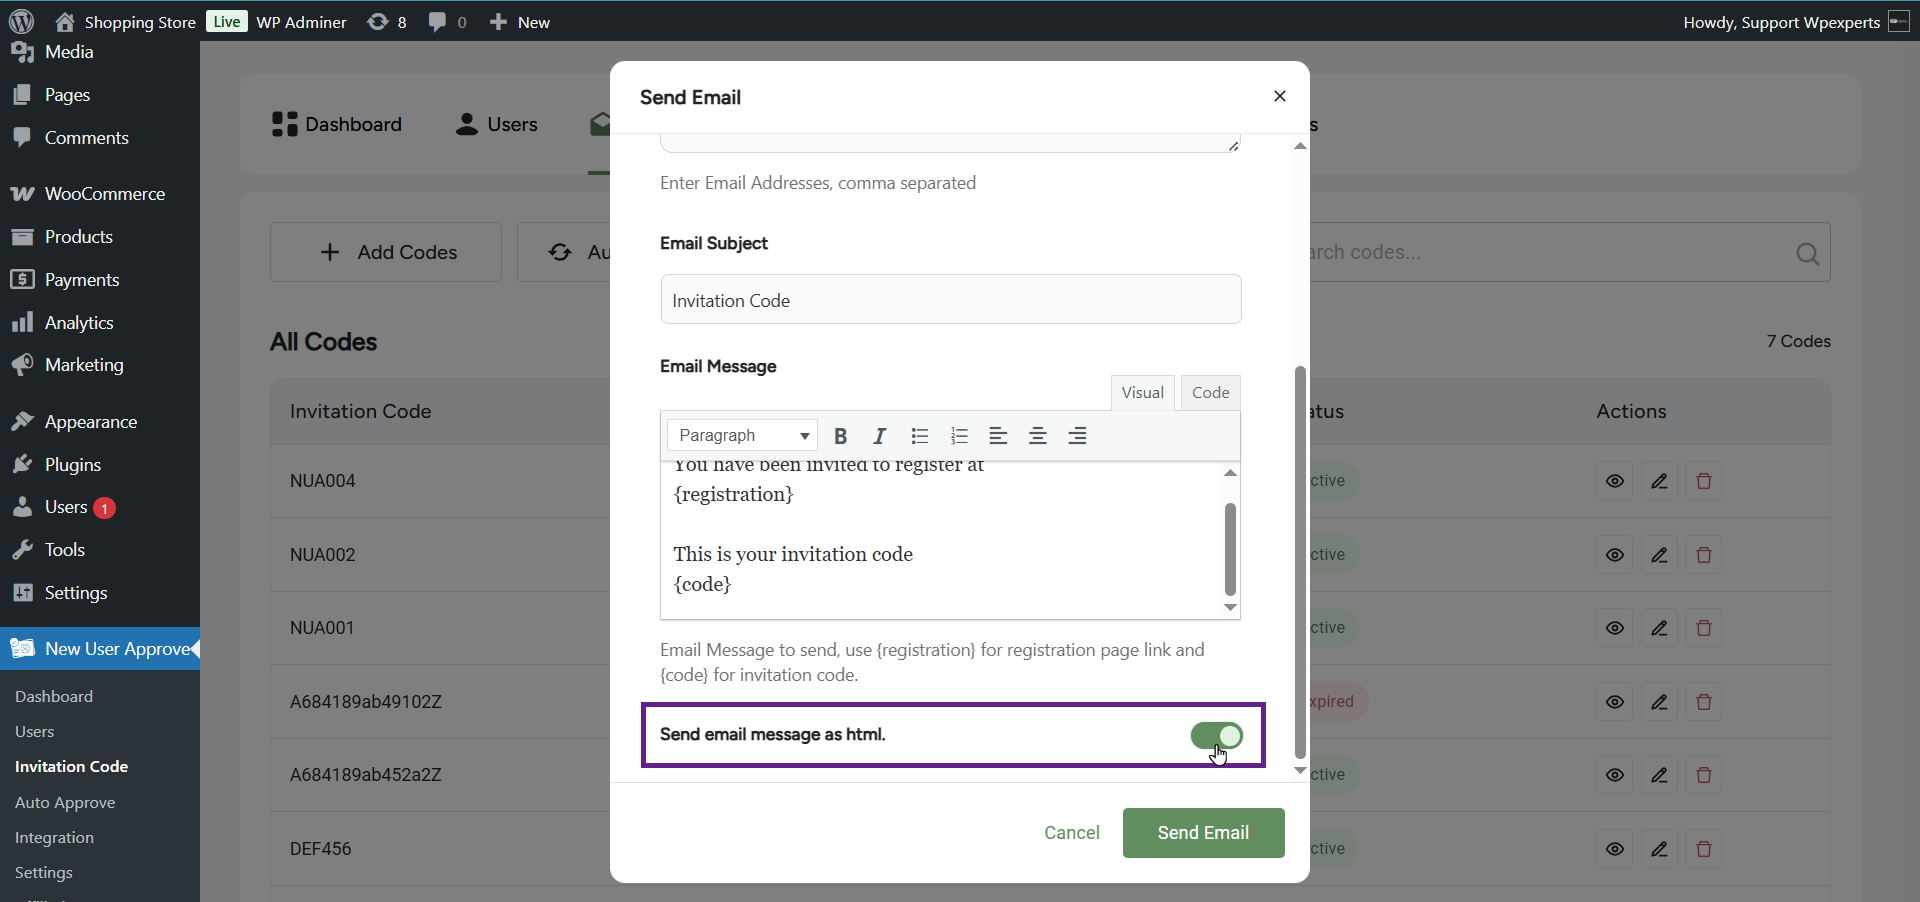
- Set the message in the Email Message field.

- In the HTML Email field, a toggle is given for enabling to sending of the email in rich HTML format.
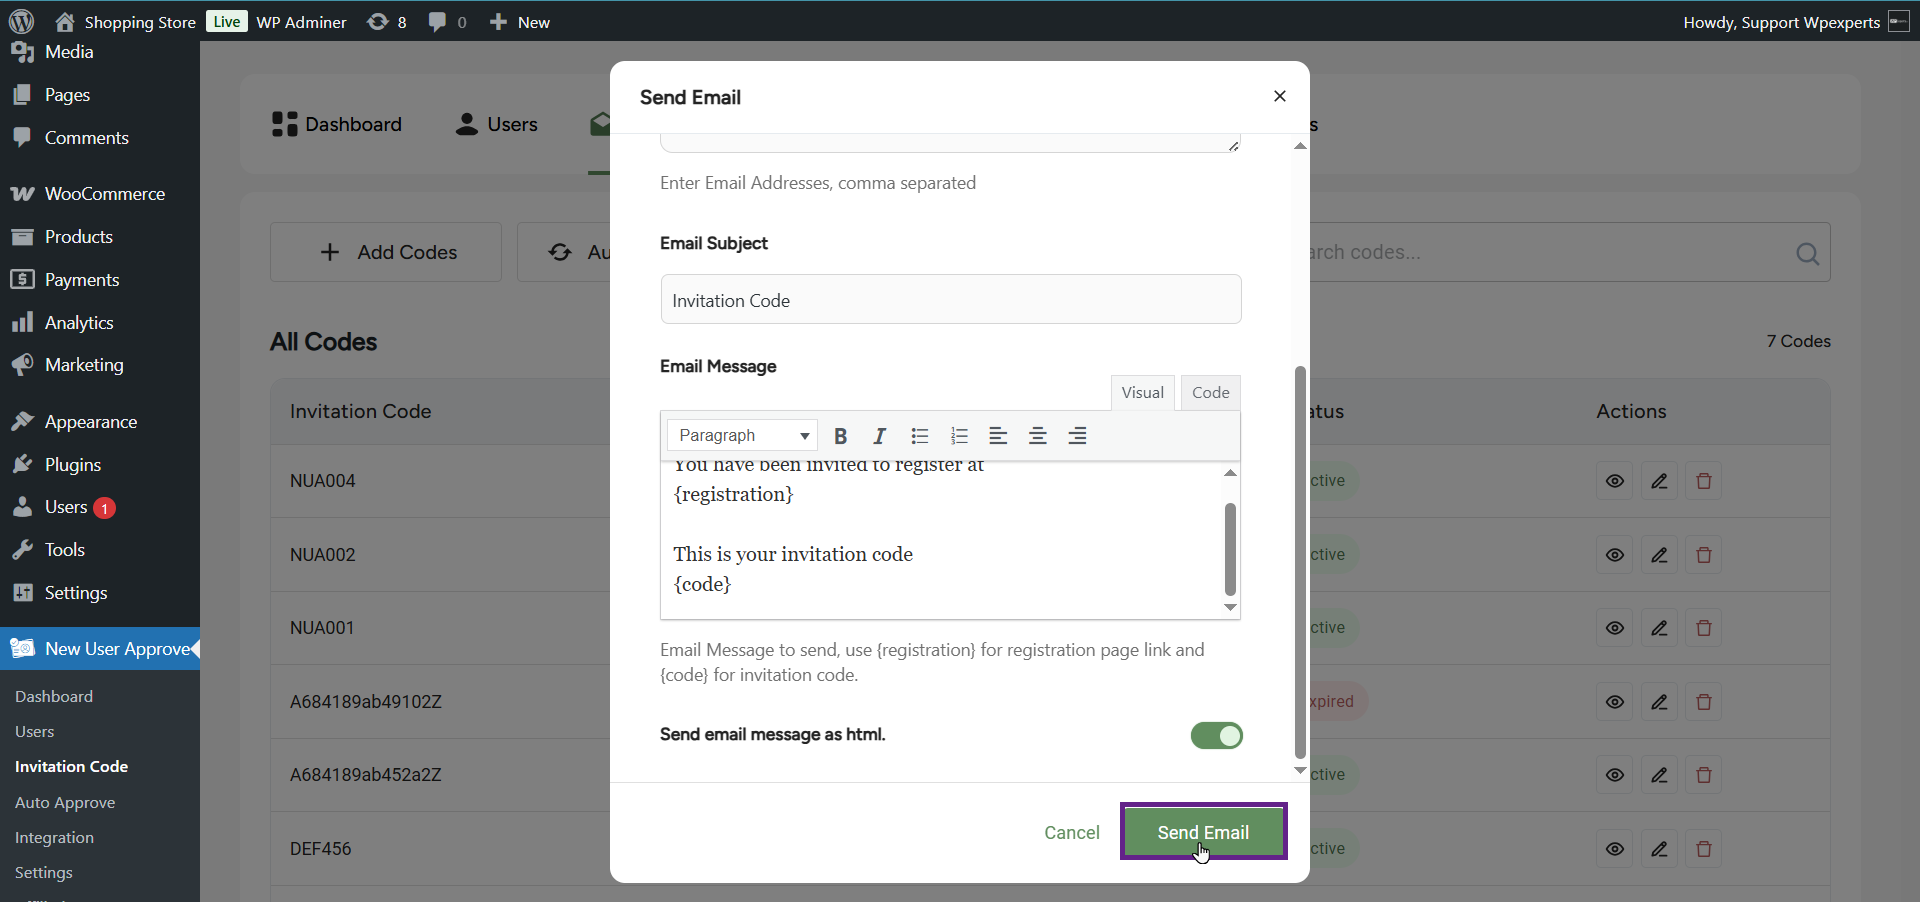
- Click on the Send Email button to initiate email sending.
- Once the operation is successful, a notification will appear stating (Number of Email Addresses entered) Emails successfully sent. For example, as shown in the GIF below, the notification reads 2 Emails successfully sent.
Front-End
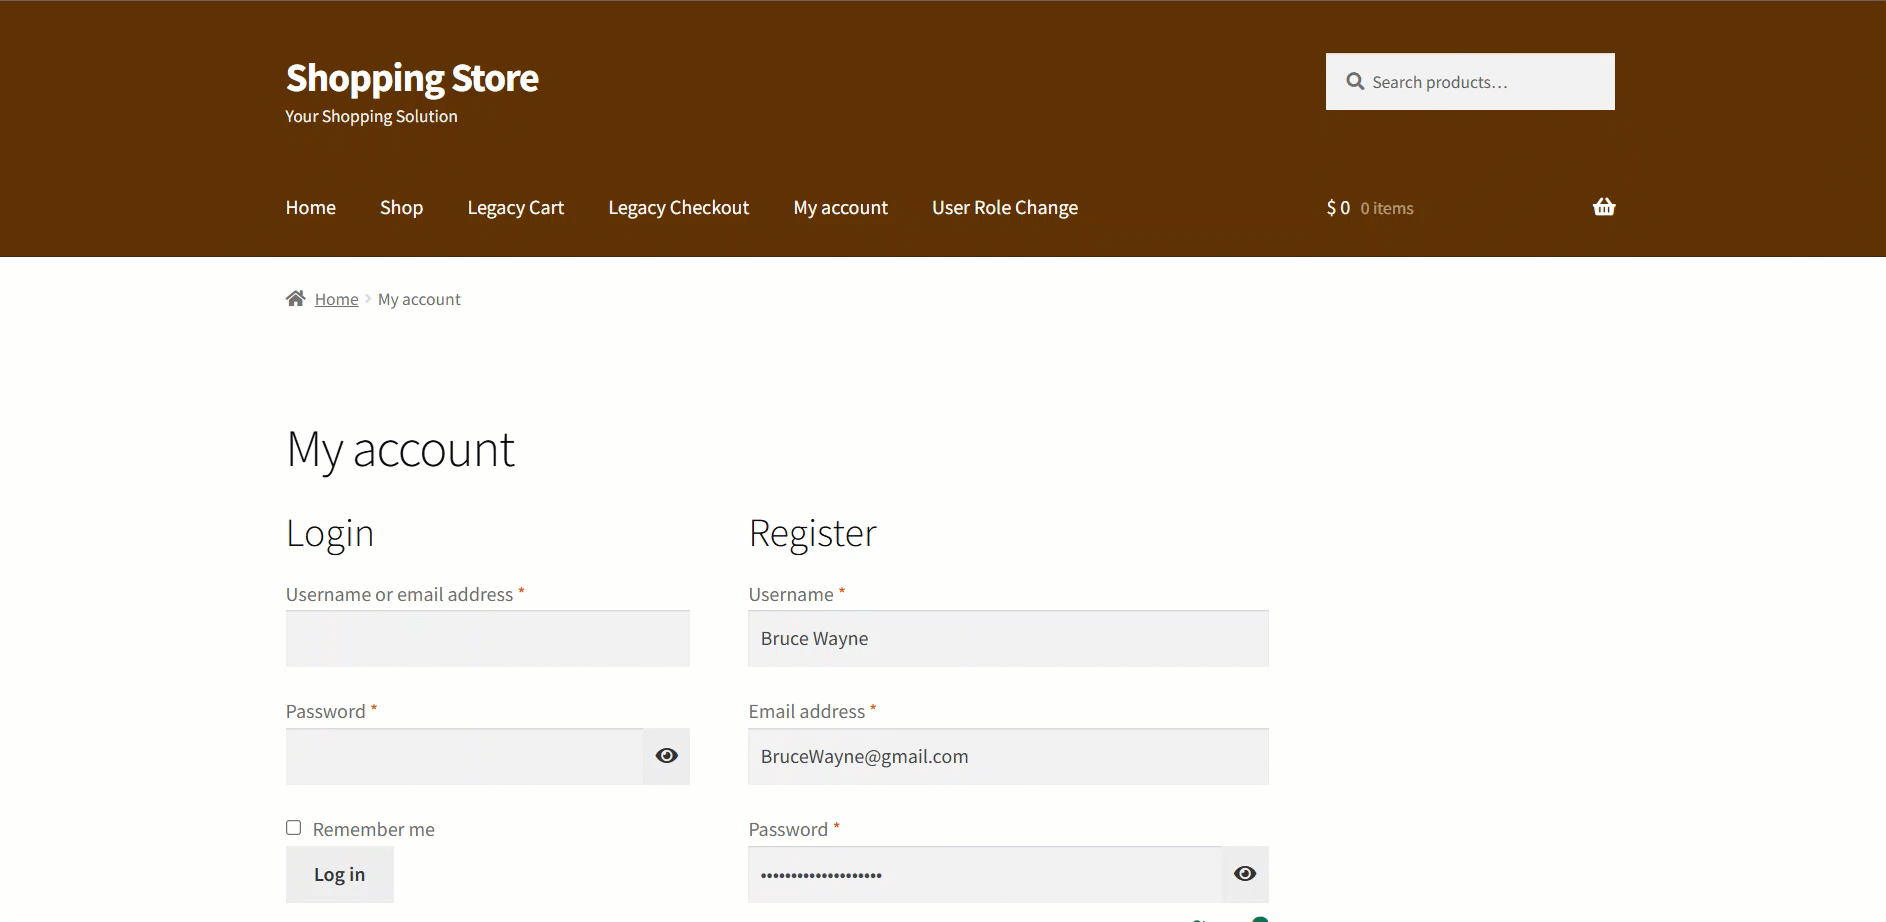
- Go to the website.
- Navigate to the My Account page.
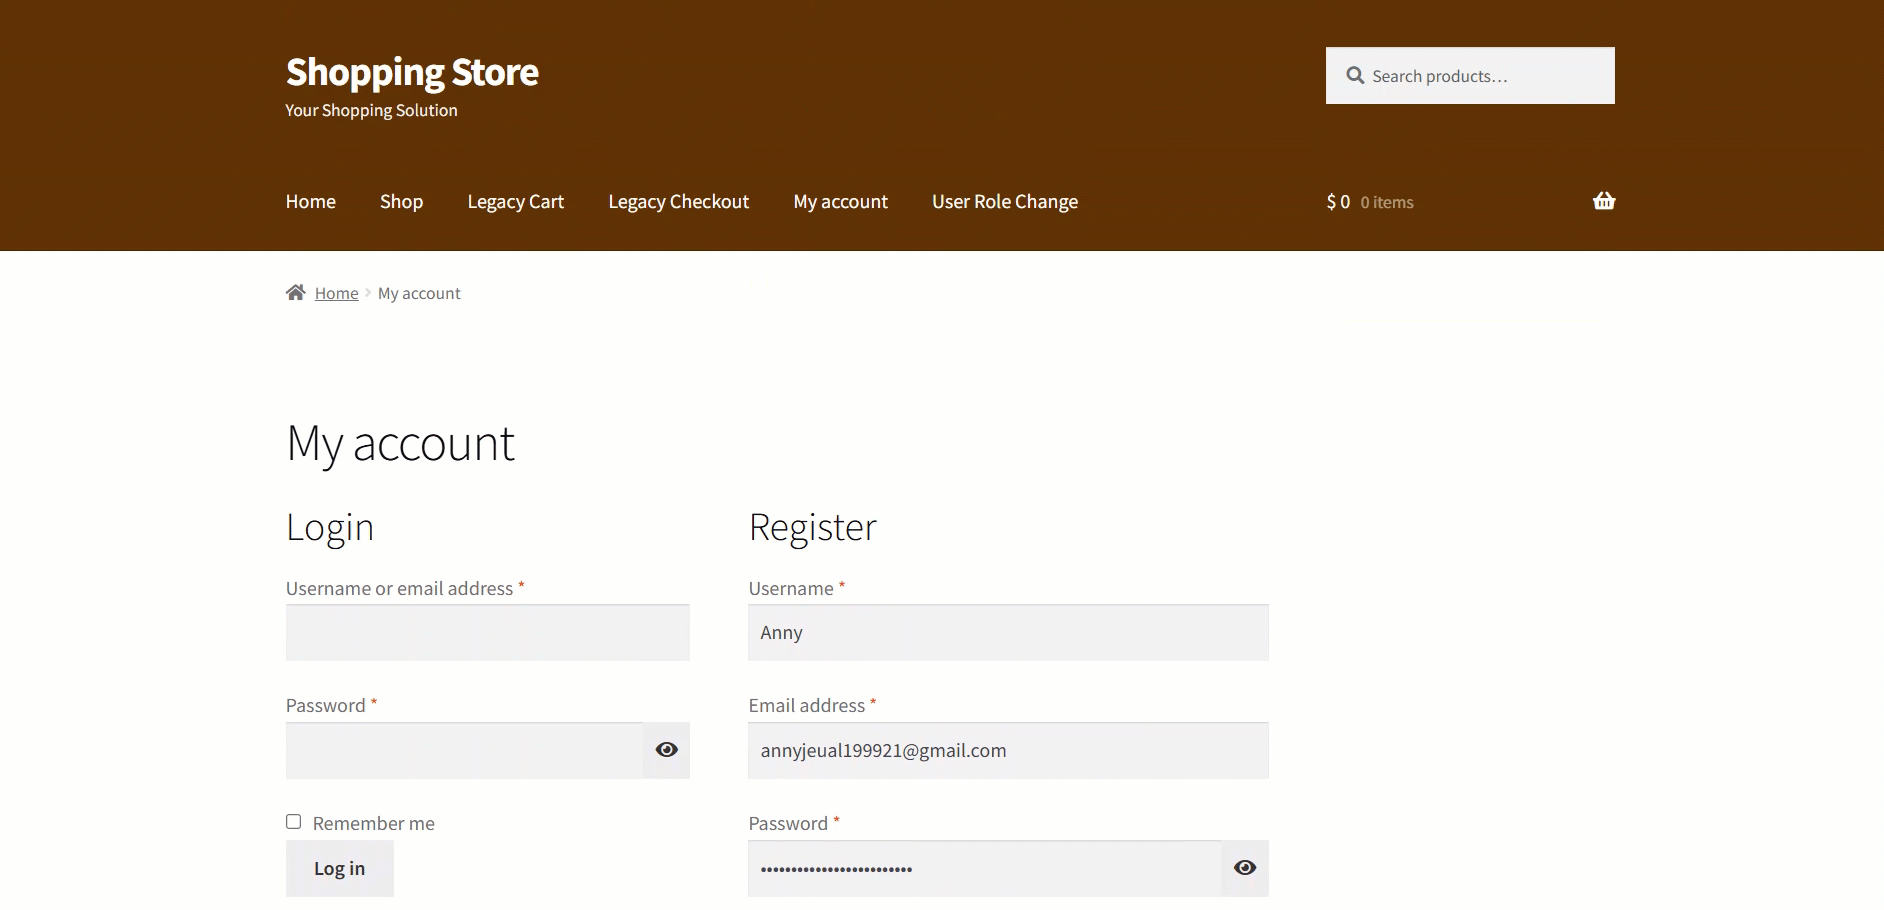
- Sign up on the website using an existing invitation code. In this case, we’re using an auto-generated code.
Note: The Invitation Code field is marked as required with an asterisk (*) above it.
- As you can see, the user has been approved.

- An error banner will appear if the invitation code used by the user during registration is invalid.
- You’ll find the email invitation code in your email account. The email will include all the configured details, such as the subject, registration page link, and the invitation code itself.

- Once the user clicks the URL in the email, the user would be redirected to the registration page and would enter their credentials and the Invitation Code, which was mentioned in the email.

Note: Users who register using an invitation code will be automatically approved and will not require admin approval.
