Summary Snippet
Role Editor Feature in v3.3 enables admin to create new roles and new custom capabilities and assign them as well to particular role.
Previously, people used to have a separate User role editor plugin. But now, we have created our own role editor feature. No need to go outside of New User Approve environment to manage roles and capabilities.
New User Approve v3.3 has been officially rolled out.
With this update released, New User Approve introduces the Role Editor. It is a dedicated module that puts user role creation and capability management directly inside your WordPress admin panel, no third-party plugin required.
This product release note walks you through everything that’s new: what the Role Editor does, how each section works, and where to find each setting.
What’s New in New User Approve v3.3
This release brings one focused, powerful feature:
Role Editor
A complete interface for creating and managing user roles and their capabilities, built directly into New User Approve.
The Role Editor lives under: Admin Dashboard → New User Approve → Role Editor
It contains two sub-tabs: Roles and Capabilities. We’ll walk through each one.

Role Editor
When you open the Role Editor, the Roles tab is shown by default. It displays a clean, paginated table of every user role on your site; including core WordPress roles and any roles added by 3rd-party plugins.
Each row in the table shows:
- Role — the display name with a CORE badge where applicable
- Slug — the unique system identifier for that role
- Users — how many users are currently assigned to it
- Capabilities — the total number of capabilities granted to that role
- Actions — edit and delete controls (delete is only available for custom roles)
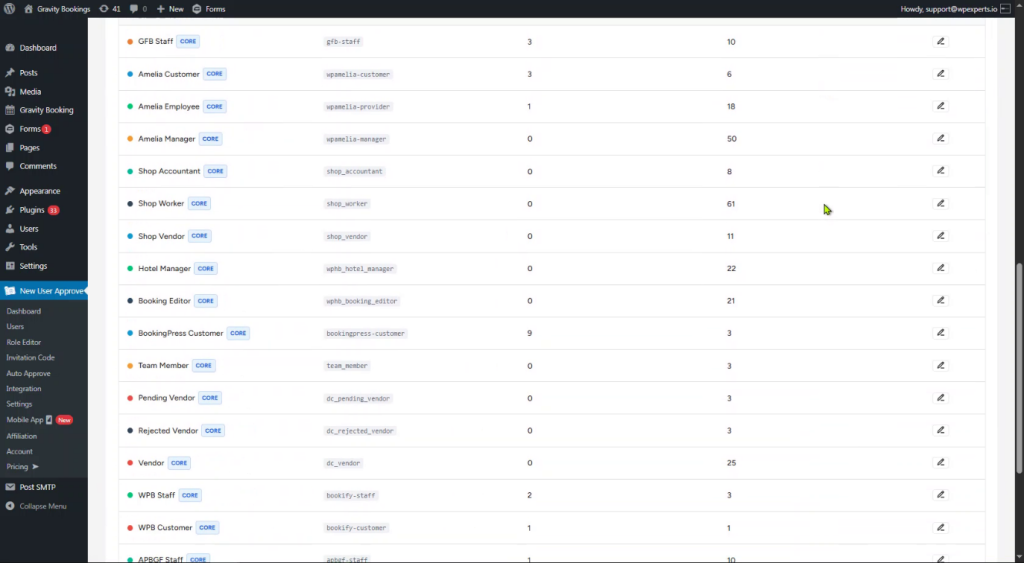
A note on Core Roles: Core roles cannot be deleted. You can update the display name, but the slug is permanent and locked.
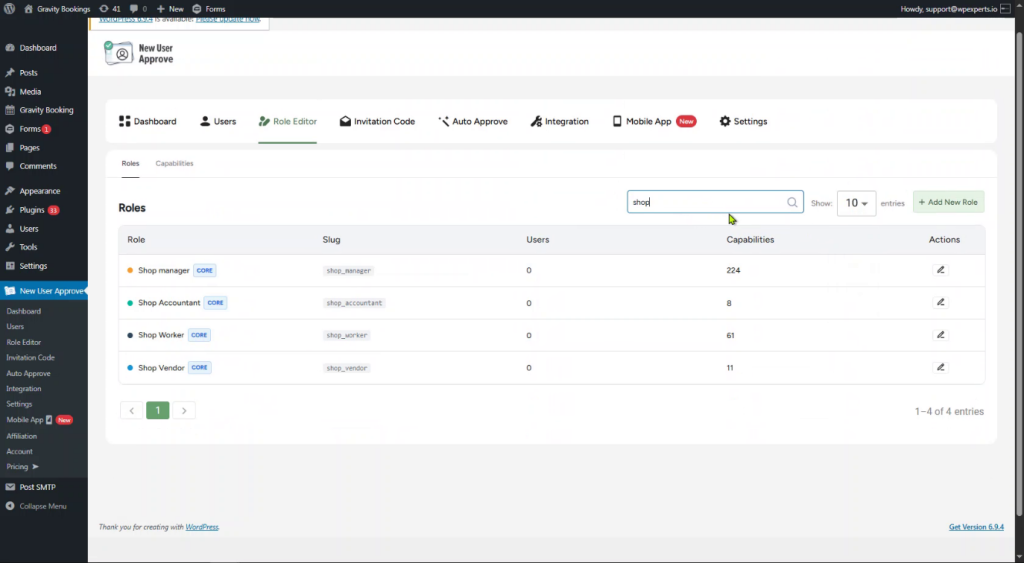
Searching and filtering
Use the Search Roles bar to quickly locate a role by name. The Show entries dropdown lets you control pagination. Choose to display 10, 20, 50, or 100 roles per page depending on your preference.
Adding and Editing Roles
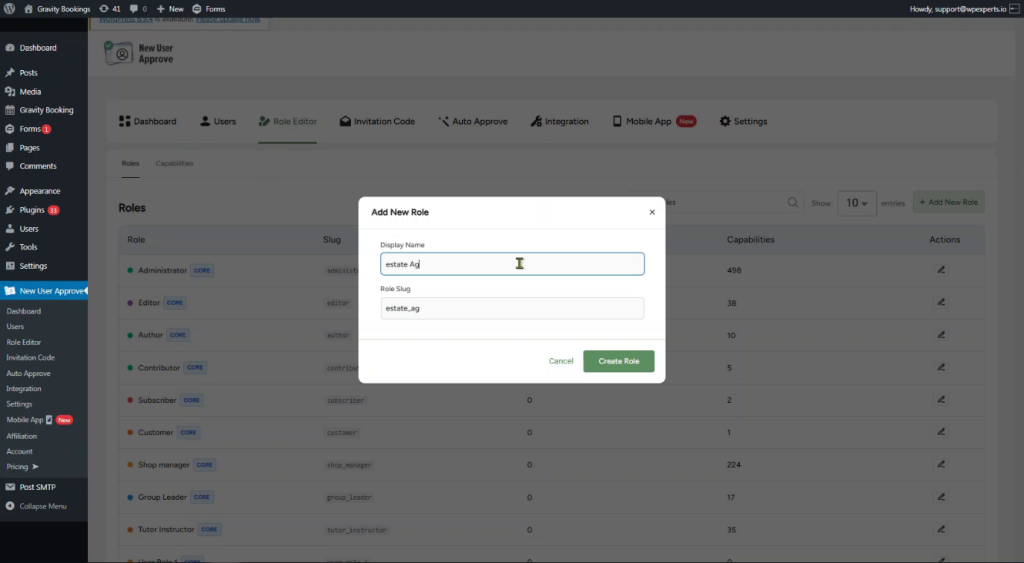
Adding a New Custom Role
To create a new role, click the + Add New Role button at the top right of the Roles tab. A modal will appear with two fields:
- Display Name — the human-readable name shown across the admin (e.g., Estate Agent)
- Role Slug — auto-generated from the display name (e.g., estate_agent), but editable if needed
Click Create Role and the role is added immediately. A Role created confirmation notification appears at the top right of the screen.
Once created, the role appears immediately in the Roles list. Since it’s a custom role, it will also show a delete (trash) icon in the Actions column alongside the edit icon.
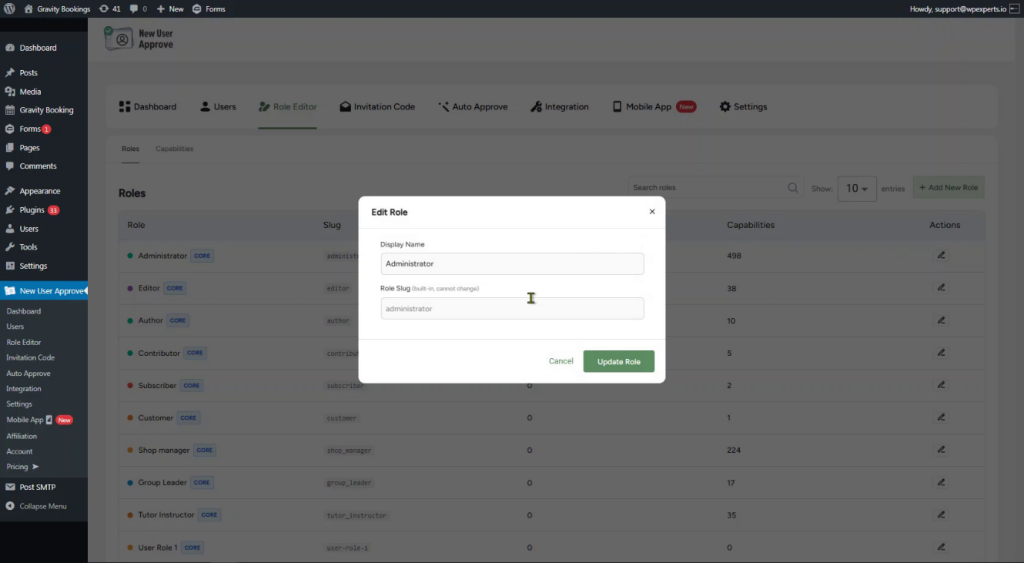
Editing an Existing Role
Click the Edit (pencil) icon in the Actions column for any role to open the Edit Role modal. From here you can:
- Update the Display Name for any role
- Modify the Role Slug for custom roles only
For core roles, the slug field is labeled (built-in, cannot change) and is read-only; consistent with standard WordPress behavior. After making changes, click Update Role. A Role updated confirmation will appear at the top right.
Role Editor [The Capabilities Tab]
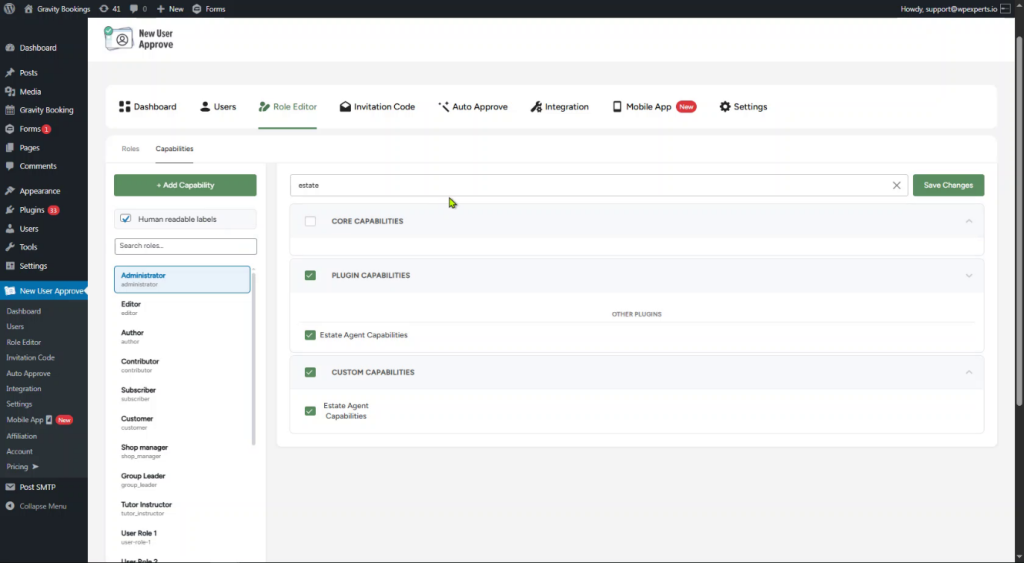
The Capabilities tab is where the real control lives. Switch to it by clicking the Capabilities sub-tab at the top of the Role Editor.
This tab is split into two panels:
- Left panel — a list of all roles, with a Search Roles bar
- Right panel — all capabilities for the selected role, grouped into three sections:
- Core Capabilities — standard WordPress capabilities (e.g., read, edit_posts, delete_posts)
- Plugin Capabilities — capabilities added by third-party plugins installed on your site
- Custom Capabilities — capabilities you’ve created manually
Click any role in the left panel to load its capabilities on the right. Capabilities already assigned to that role are marked with a green checkbox.
Managing and Customizing Capabilities
Assigning or Removing Capabilities
Capability management is checkbox-based and straightforward:
- Check a checkbox to assign that capability to the selected role
- Uncheck it to remove it
- Use the section-level checkbox (next to Core Capabilities, Plugin Capabilities, or Custom Capabilities headers) to select or deselect an entire group at once
When you’re done, click Save Changes at the top right. A Capabilities saved confirmation notification will appear.
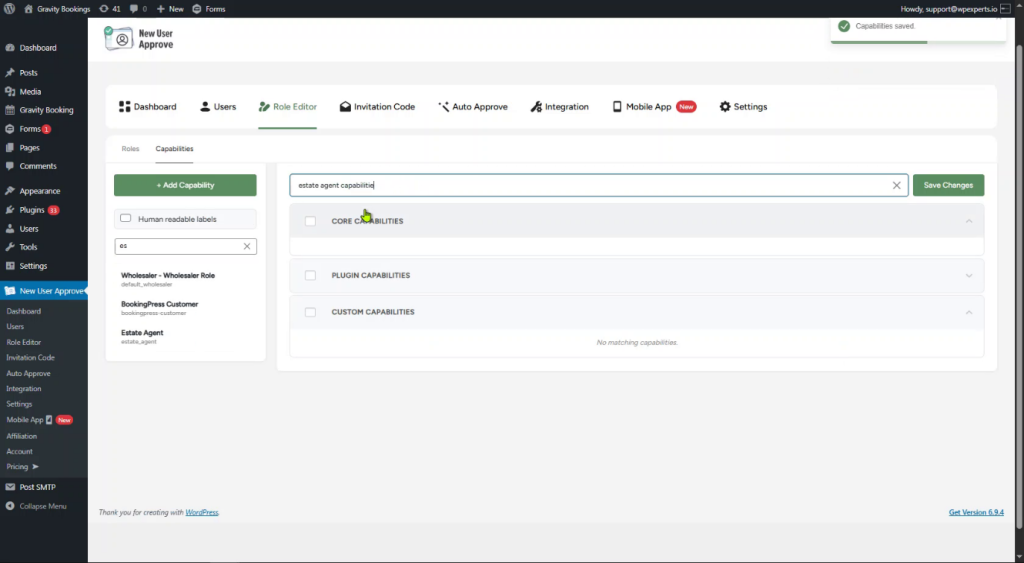
Searching Capabilities
The Search capabilities bar at the top of the right panel lets you filter by keyword. Type edit, read, or delete and matching capabilities are shown under their respective category headers. This is especially useful on sites with many plugin-added capabilities.
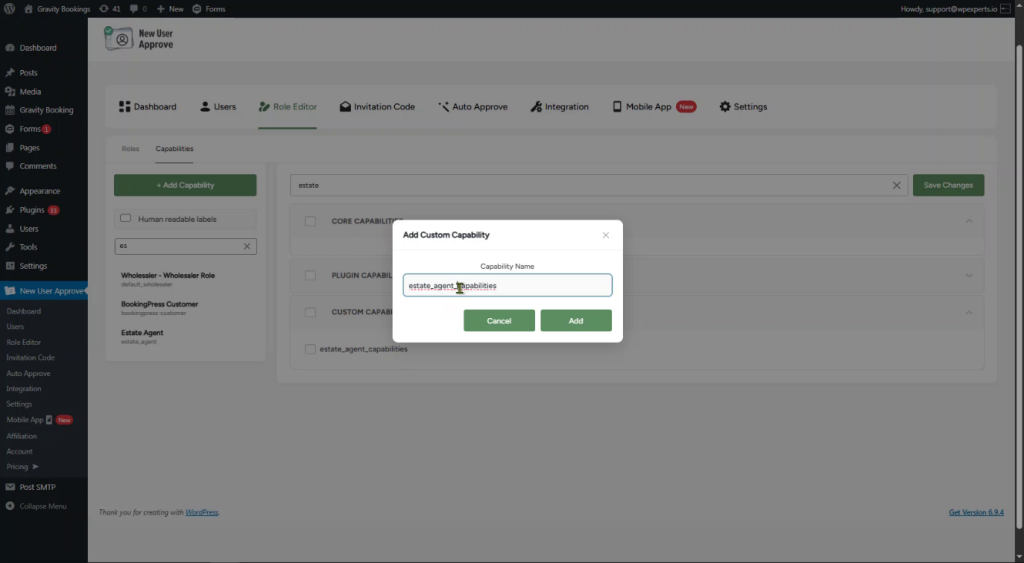
Adding a Custom Capability
To create a capability that doesn’t exist by default, click the + Add Capability button in the left panel. A modal titled Add Custom Capability will appear.
Enter a Capability Name using lowercase letters and underscores (e.g., estate_agent_capabilities), then click Add. The new capability will appear under the Custom Capabilities section immediately.
Human Readable Labels
A small but genuinely useful toggle sits in the left panel: Human readable labels.
- Off (default): capabilities show as technical names – read, edit_posts, delete_posts
- On: capabilities show as plain English – Read, Edit Posts, Delete Posts
This makes the Capabilities tab far easier to navigate for admins who aren’t deeply familiar with WordPress internals.
Editing or Deleting Custom Capabilities
Hover over any capability in the Custom Capabilities section and two icons appear:
- Edit (pencil) — rename the capability
- Delete (trash) — permanently remove it from the system
Why This Product Update Matters
This release note marks an important step in New User Approve’s software release cycle. Concretely, this product update helps you:
- Create custom roles tailored to your site’s specific needs
- Assign only the capabilities each role actually requires
- Keep your permission structure clean without relying on additional tools
- Understand your site’s access model at a glance
Whether you’re running a membership community, an online learning platform, or a multi-vendor marketplace, getting roles right matters. This version update makes that significantly easier.
Ending Note
New User Approve v3.3 is now live. Update your plugin from your WordPress dashboard to start using the improved Role Editor today.
As part of our regular software release cycle, this update released alongside full documentation. So, if you want a deeper walkthrough of any specific section, our documentation has you covered.
We build New User Approve to give WordPress site owners complete control over who gets in and what they can do. The Role Editor is the next step in that direction.
Update, explore, and as always, if you have questions or feedback, our support team is one click away.