Automating the user registration process on your WordPress powered website sounds simple but is it really? Often, website owners struggle keeping up with registration forms and user requests but New User Approve takes care of it for you and more.

What is New User Approve?
New User Approve gives you complete control over your WordPress website’s user registration and management system by automating processes such as sending approval emails with credentials.
Here is how the default WordPress registration process works:
- User fills out a registration form;
- User is shown a message to check their email;
- Login credentials are sent to the new user in an email;
- User logs in to the site using login credentials;
New User Approve modifies the WordPress registration process by introducing a few extra steps:
- User registers for access to the site;
- User is shown a message to wait for approval;
- Admin is notified of new user sign up via email;
- Admin approves or denies new users;
- Approved and rejected emails are sent to the user. If approved, email will include login credentials.
- User logs in to the site using login credentials.
New User Approves Features
- Welcome New Users: Welcome new users onboard using an effortless and automated registration process.
- Message For Approval: When a user sends a request to register on a WordPress site, the ‘New User Approval’ plugin shows a message to wait for the approval.
- Approval Notification: New User Approval plugin notifies the website admin of a new user sign up via email.
- Admin Decision: The New User Approval plugin gives the admin a choice to either approve or deny the registration request.
- User Status Email: New User Approval plugin sends an email to the user indicating whether they were approved or denied.
- User Credentials: If the user is approved, an email will be sent to them that includes their login credentials.
- Welcome Message Customization: Customize your ‘welcome message’ and display it above your site’s registration form.
- Customize Pending Error Message: Display a customized ‘registration pending’ message to the user.
- Customize Registration Complete Message: Customize the ‘registration complete’ message displayed after the user submits their form.
- Customize Denied Error Message: Customize your ‘welcome message’ and display it above your site’s registration form.
- Admin Email Customization: Customize emails sent to admin when a user registers for the site.
- Approved Status Email: Customize emails sent to the user when their registration is approved by the site admin.
- Denied Status Email: Customize emails sent to users when their registration is denied by the site admin.
- Template Tags: Choose from different template tags for notification and other emails on the site.
- Remove Admin Panel: Remove the admin panel specifically added to update the user’s status from the site.
New User Approve installation process (STEP BY STEP GUIDE)
STEP#1 (PLUGIN INSTALLATION)
- After purchasing the ‘New User Approve plugin’ from its official site, Go to your WordPress admin panel and upload it using the ‘Upload Plugin’ button.
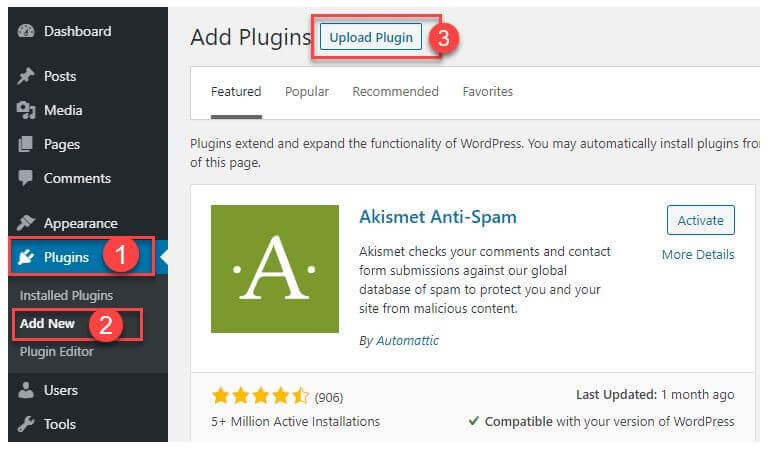
- Add the Plugin.

- Activate the plugin.

- Activate the license

STEP #2 (NEW USER APPROVE SETTINGS)
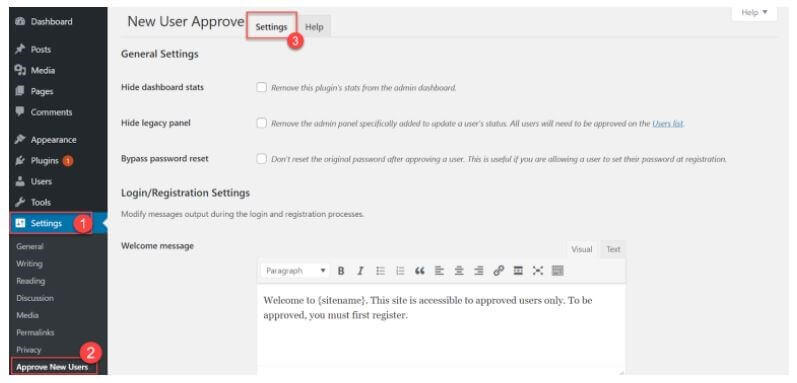
You can configure General settings, Registration, and Email notifications from here.
Go to Settings → Approve New Users.
STEP #3 (GENERAL SETTINGS)
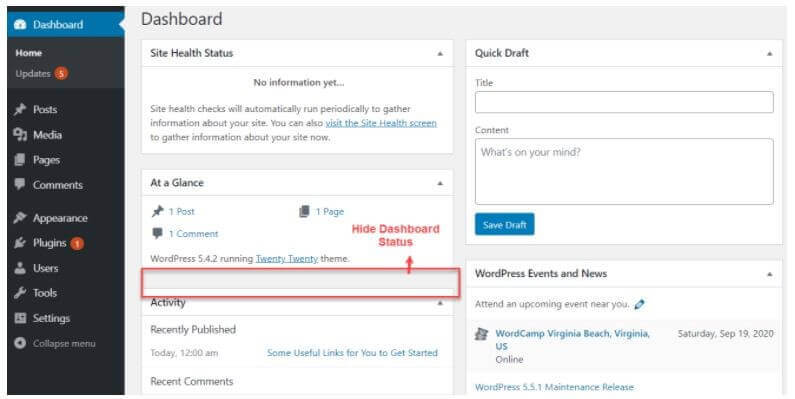
- Hide Dashboard Stats: Admin can Show/Hide plugin stats on the Admin Dashboard.
- Hide Legacy Panel: Show/Hide Approve New user sub-menu from Users menu. Allowing to approve users’ requests from the WordPress users section.

- Bypass Password reset: Enable this option to disable the password reset functionality when a new user is approved. If a user sets their own password at registration their password will remain the same after their request is being approved, the system will not change their password automatically after the approval. It is useful if you are allowing your users to set their own passwords at registrations.

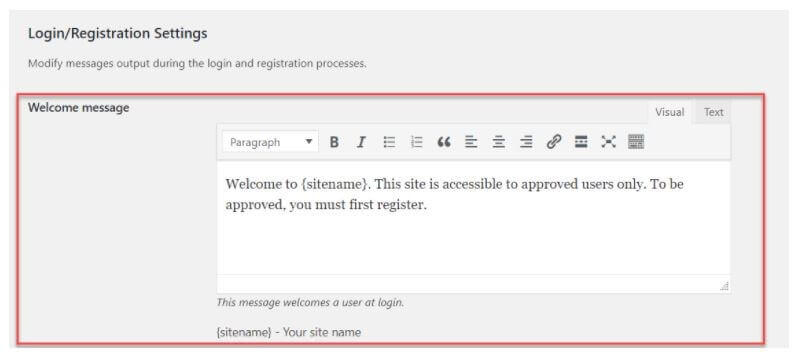
- Login/Registration Settings: Setup custom messages for login and registration on your website. You can also use the pre-defined site template tag to display your site name in your custom messages to users.
STEP #4 (NEW USER REQUEST SETTINGS)
Go to Users → Approve New User.
There you can see the list of all Pending Approvals, Approved Users, and Denied Users.
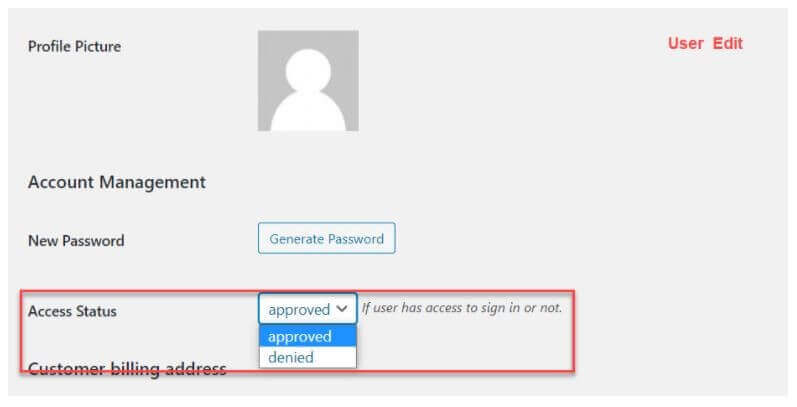
You can Approve or Deny the user’s request from this page. Admin can see all registration request along with those who are already approved or denied. You can set the status of any approved users to deny or approve any user with a denied status at any time.

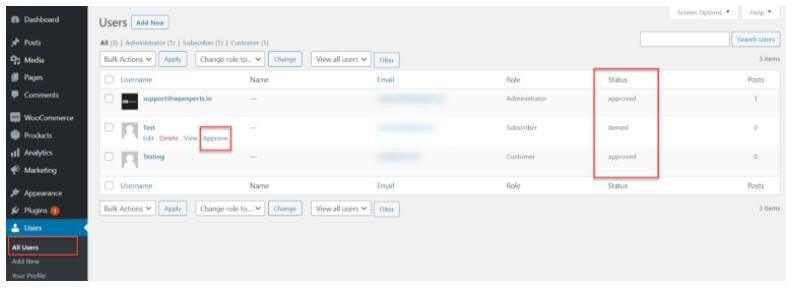
Go to Users → All Users
You can also approve and deny requests of users from the All Users section.
Another detailed view of the dashboard for All User Settings:
Here you’re done with your ‘New User Approve’ plugin backed-settings to APPROVE & REJECT new users on your WORDPRESS-powered site. Good Luck!


