Do you want to use a unique and engaging way to register users on your WordPress website? If so, it’s about time you started using invitation codes. Unfortunately, WordPress doesn’t allow the creation of invitation codes to register users by default. Therefore, you’ll have to add this functionality to your site on your own. One of the easiest and quickest ways to add an invitation code to your website’s registration process is by using a plugin.

If you are thinking about which plugin is best to enable user registration with an invitation code, then we recommend New User Approve.
This leading user registration plugin gives you the power to create custom user registration pages with ease. In today’s guide, we’ll show you how to enable invitation codes for user approval. However, before we start with the steps, let’s examine why using invitation codes is beneficial.
The Importance of Using Invitation Codes to Register Users on WordPress
Are you looking for a way to provide exclusive access to specific users on your site? Well, once you start using the invitation code system, you’ll be able to allow users of your choice the opportunity to register and access your website.
This clearly means only those who possess the invitation code can sign up on your WordPress website. This is very helpful for those who are looking for a way to limit the number of people who wish to register on their site.

For example, if you plan on hosting a webinar, workshop, or online course with limited seats, you can control the number of participants. Once the slots are filled, you can disable the invitation code. Also, as you will only send the invitation code to those who are interested, you won’t have to go through the effort of witnessing irrelevant or spam registrations.
In addition, you can easily assign various user roles for members depending on the invitation code they use. You can also make temporary codes that users can use to get to certain pages or special content.
If you are looking for a way to generate revenue with these invitation codes, you can sell them to users for access or simply give them out for free. Now that you are aware of why people are using invitation codes on their WP sites, it’s time you learn how to enable them.
How to Use an Invitation Code to Register Users on WordPress?
As we mentioned previously, you can’t enable invitation codes for registration without a plugin on WordPress. In the coming steps, we’ll show you how you can use the New User Approve plugin to create custom registration forms and enable invite codes for registration in no time.
1. Install New User Approve for WordPress
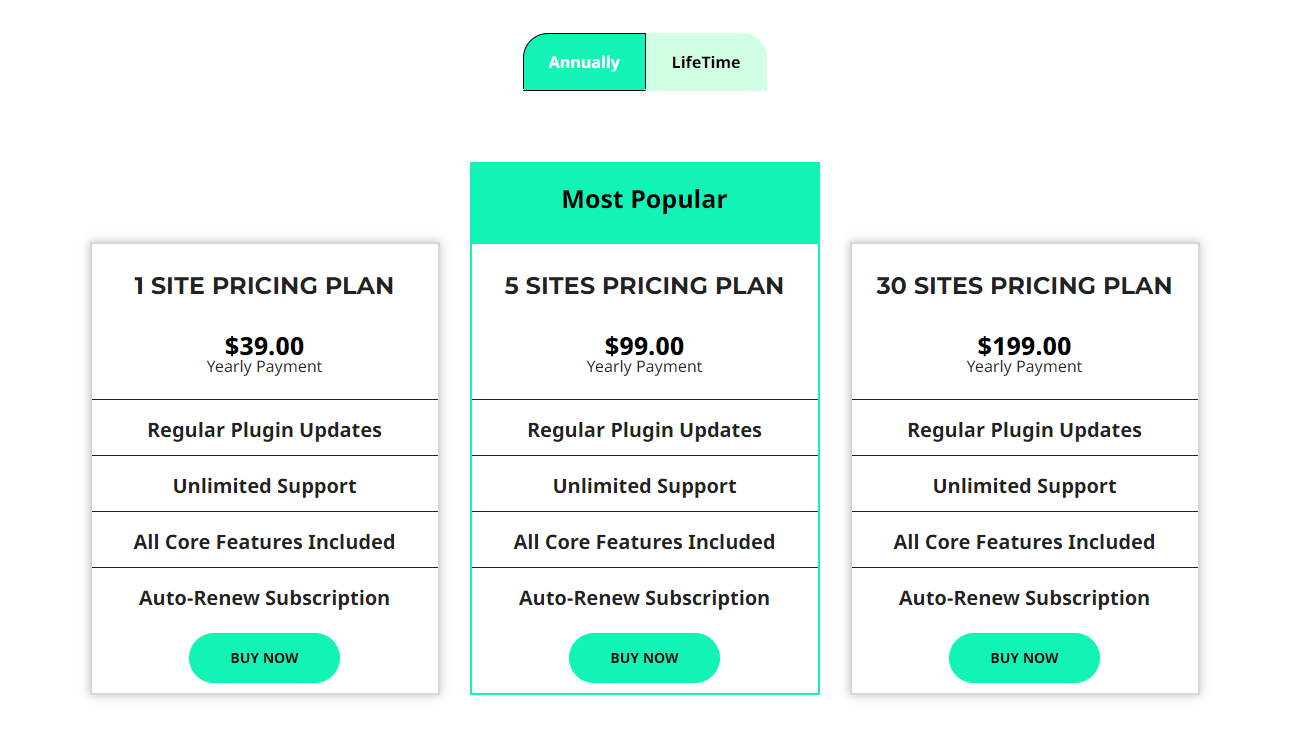
Before we start, we’d like to inform you that invitation codes can be used to register users with both the free and premium versions of New User Approve. However, the features are limited if you go for the free version. Therefore, we recommend you choose the premium version of New User Approve for a flawless experience. Take a look at the pricing plans of New User Approve and buy the plan you feel is better according to your requirements. Once you complete the payment process, the premium version will be available for download.
Once you have decided whether you are going for the free or paid plan, you can open your website’s dashboard.
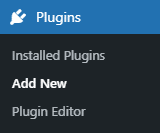
Navigate to ‘Plugins → ‘Add New.’
- Click on the ‘Upload Plugin’ button on the top left corner of your screen.
![]()
- Next, click the ‘Choose File’ button in the box that appears below.
- Select the zip file that you have downloaded and upload it.
- Click on the ‘Activate Plugin’
You can also find the amazing plugin in the search option available on the page once you click ‘Add New.’

Once you are done, make sure that you have enabled membership for the invitation code to work.
Navigate to Settings and click ‘General.’ Find the ‘Membership’ tab and click the checkbox to enable ‘Anyone Can Register.’
This option is usually turned off to prevent unwanted people from trying to register on your website. Once you enable this feature, only then will your users be able to register with the invitation code you’ll create later on.
2. How to Enable Invitation Codes?
Now that you have the New User Approve plugin up and ready, let’s move on to learning how to use invitation codes.
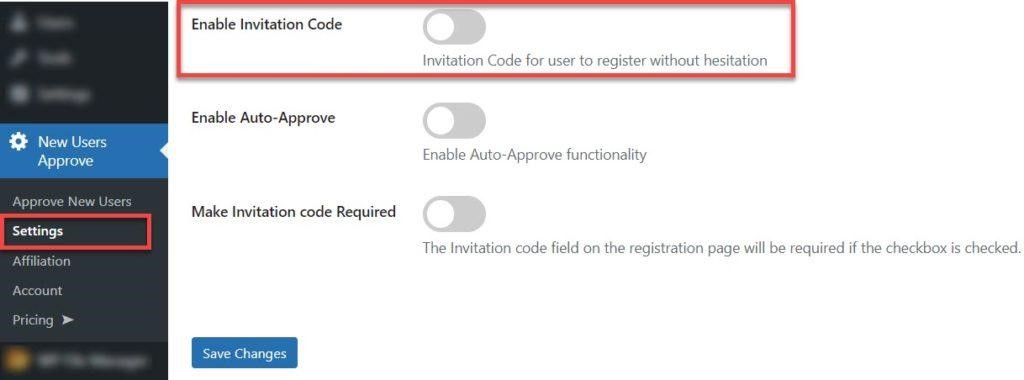
Open your website’s dashboard. Navigate to ‘New User Approve’ and click on ‘Settings.’
Enable the ‘Invitation Code’ by clicking on the toggle button.
Click on the ‘Save Changes’ button.
Once enabled, you’ll see ‘Invitation Code’ in the New User Approve tab.
3. How to Use Invitation Codes?
This plugin’s premium version allows you to create invitation codes in three different ways.
- Add Codes
- Import Codes
• Add Codes
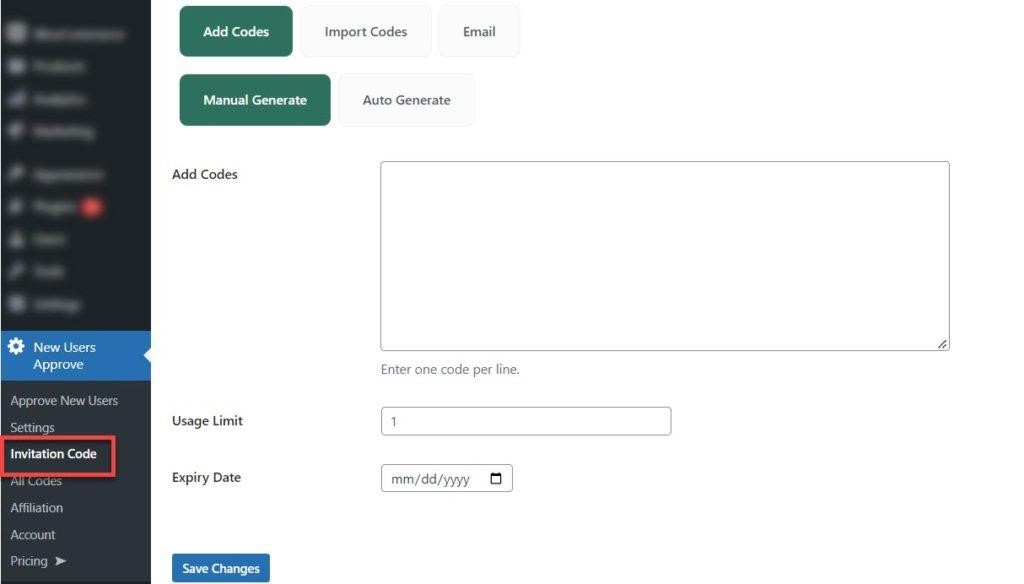
With this option, you can either manually create codes or auto-generate them. You can also set the usage limit and expiry date according to your requirements.
Once you click ‘Auto Generate,’ you’ll be shown the following interface.
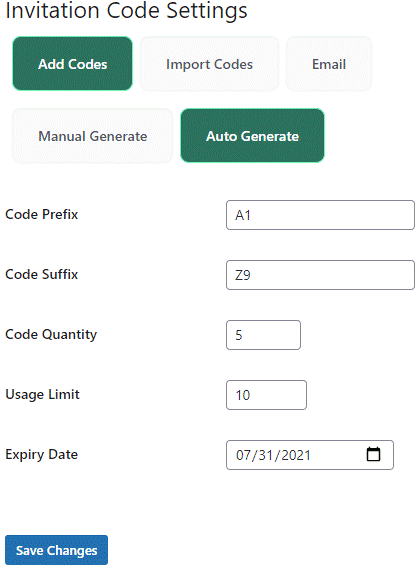
Once you click ‘Save Changes’ the invitation code will be generated automatically.
• Import Codes
You can import codes by uploading a CSV file if you wish to add multiple codes.
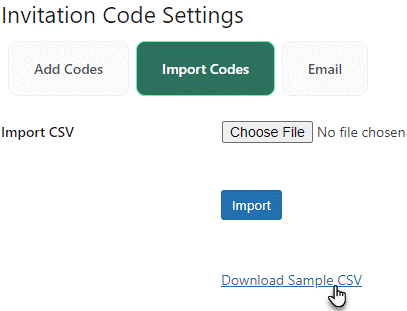
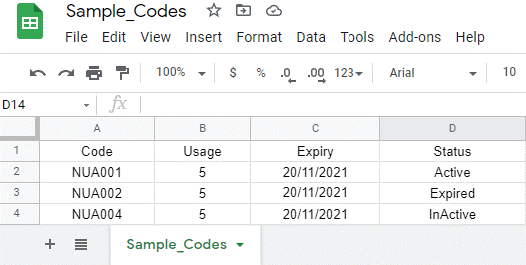
Download the sample CSV file to get an idea of the format that needs to be uploaded for the invitation code to function correctly.
Here is a preview of the format for the CSV file.
• Email Codes
If you plan on running an email marketing campaign to invite people who have shown interest in your website, then you can customize the invitation in the email tab.
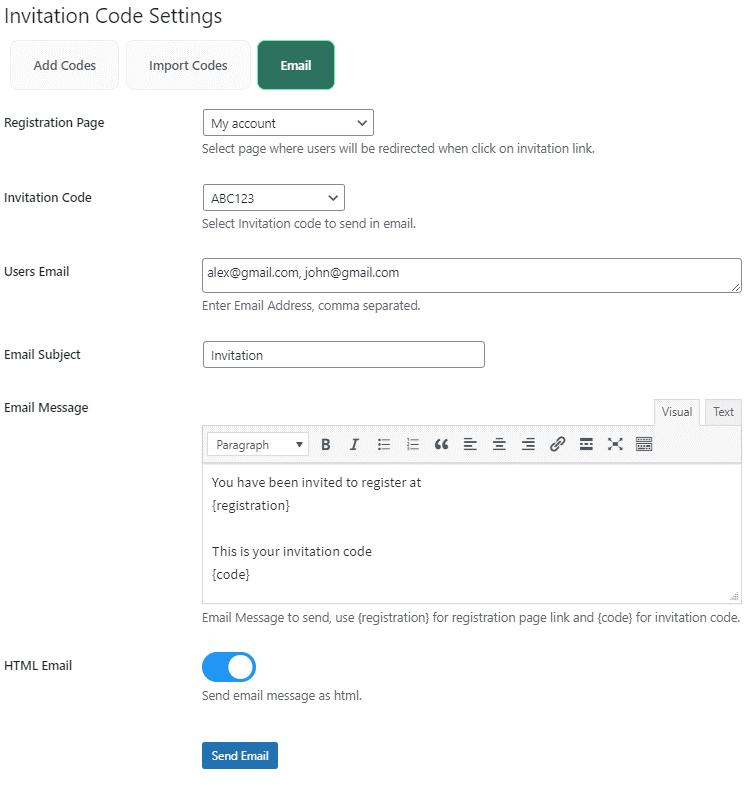
Here you can control just about everything. You can choose the landing page, subject, invitation code, and email content. Once your invitation email is ready, you can add the user’s email and press the ‘Send Email’ to send them the invitation code.
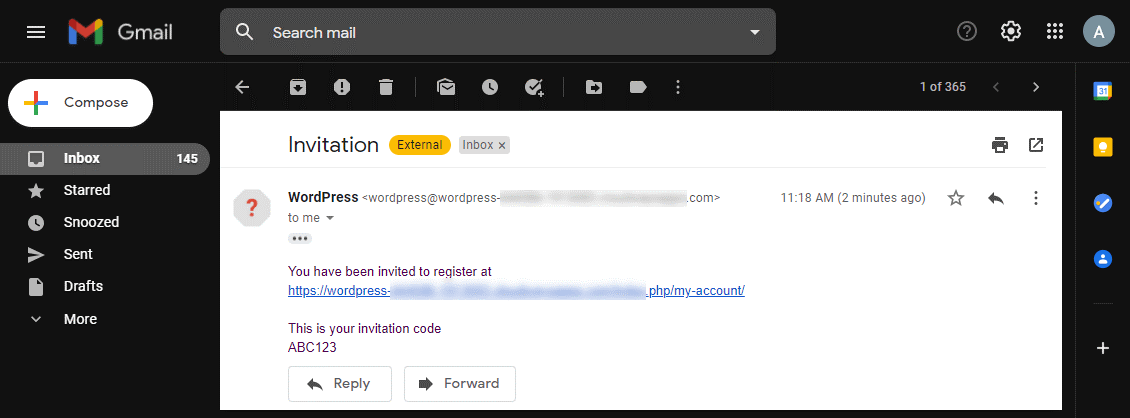
After receiving the email, users can use the link to open the registration page.
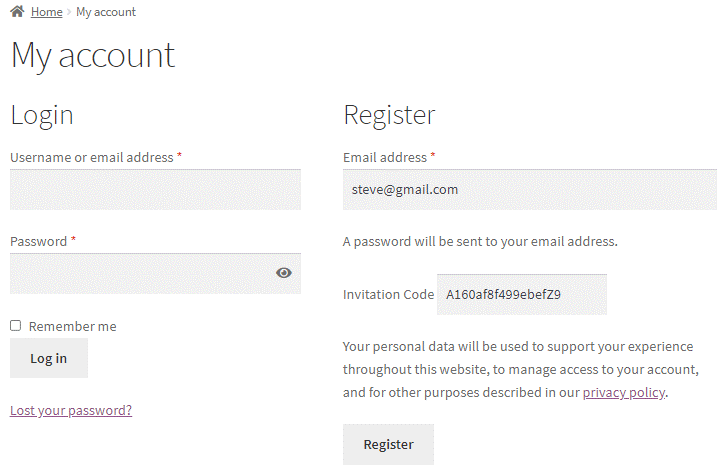
Users can register their accounts on your website with the required credentials and the invitation code mentioned in the email.
4. How to View All Invitation Codes?
This plugin also lets you view all invitation codes that you’ve created.
Navigate to ‘New User Approve’ and click on ‘All Codes.’
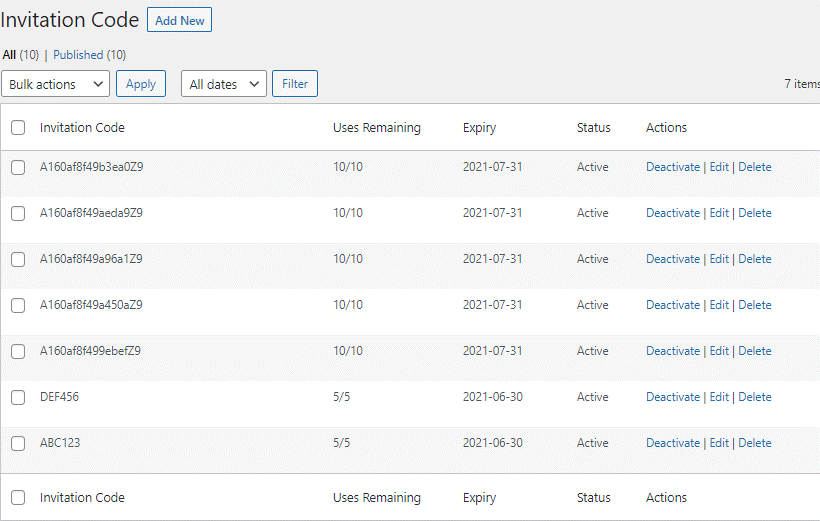
All codes that are manually generated, automatically generated, imported via CSV file, or sent through email will be displayed here.
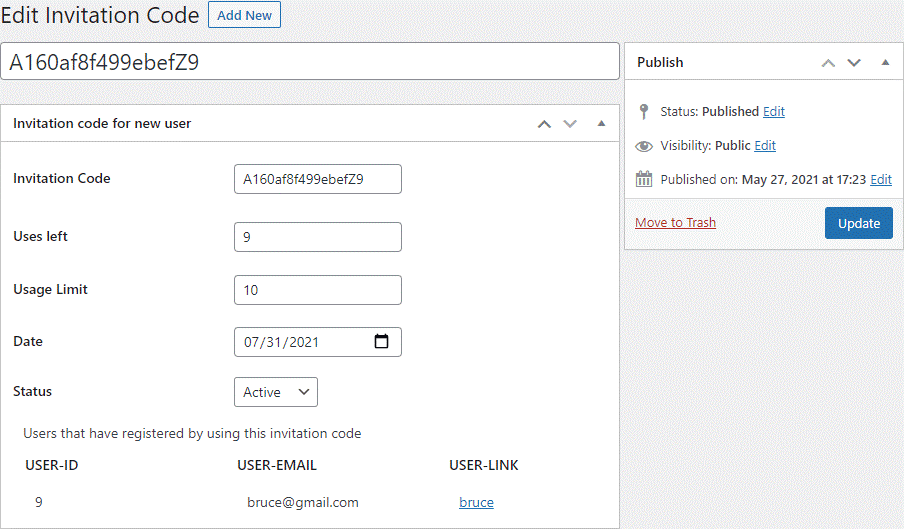
You can also edit any code to alter the status, change the expiry or even delete it whenever you like.
Final Words
The short guide on using invitation codes to register users on WordPress will surely help you make your site’s registration process perfect. Start offering exclusive memberships on your website today with this amazing plugin. Also, don’t let spammers and people you don’t want to use your site sign up whenever they want.